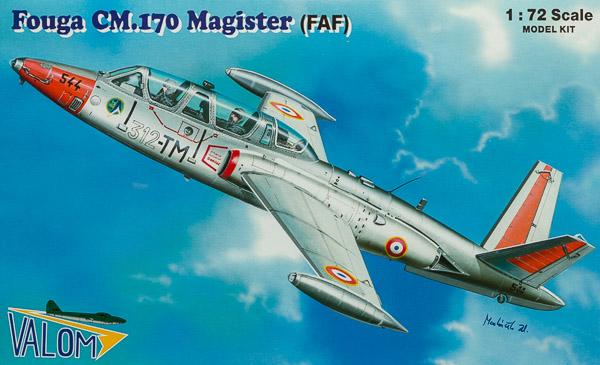
Valom 1/72 Fouga CM.170 Magister/CM.170R Magister
By Chris Banyai-Riepl
Overview
 The Fouga Magister was one of the world's first jet trainer aircraft, with the origins of the type dating back to 1948. Following some changes to the original concept, the first Magister took to the skies in 1952. The aircraft was a big success, and over the next decade almost a thousand Magisters were built. In addition to France, the Magister saw service in Austria, Bangladesh, Belgium, Biafra, Brazil, Cambodia, Cameroon, El Salvador, Finland, Gabon, Germany, Ireland, Israel, Katanga, Khmer Republic, Lebanon, Libya, Morocco, Nicaragua, Rwanda, Senegal, Togo, and Uganda. Today, many Magisters are in the civil registry and can be seen around the world.
The Kits
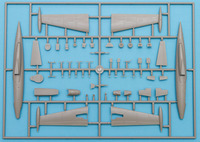
It has been many, many years since we have seen a new 1/72 Fouga Magister. For ages the old Airfix and Heller kits have been the only game in town. Now we have plenty of options and first out of the gates are these new Valom kits. The first two of what will undoubtedly be many releases cover French and German options. Aside from the decals, everything is identical in these kits, which makes it great should you decide on an aftermarket decal sheet as you won't have to wonder which box to pick up. The plastic is molded in a tan plastic and features recessed panel lines, with additional details provided in resin and photoetch.
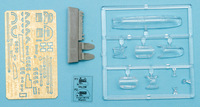
 Jumping into the construction, the interior is the first stop. The Magister has a long canoe of a canopy, so lots will be visible here. Valom has decided to tackle this challenge with a blend of plastic, resin, and photoetch. Starting with the seats, you get a pair of nice resin seats that get photoetch seatbelts. The instrument panels are likewise multimedia, with plastic backs, film instruments, and a two-piece photoetch front. The use of the plastic back end is particularly nice, as it provides the back ends of the instruments. All these bits fit into the one-piece tub, which also gets resin throttles, photoetch rudder pedals, and plastic control columns. There are quite a few other photoetch and resin bits added to the sidewalls as well, and when it's all together it should be a suitably busy office.
With the cockpit done, the next step is to button up the fuselage. Before doing that, though, you'll need to add the engine faces and exhausts. This is a nice addition and definitely adds that extra bit of detail needed here. There's also a note stating that five grams of weight is needed in the nose. Having built a Heller kit ages ago, this is a definite requirement if you want the model sitting on the nose wheel. With the fuselage together, you can add the two part intakes and attention can turn towards the other bits.
 The other bits center around the flying surfaces, and first up are the stabilizers. That classic V-tail design gives the Magister its unique look, and these are provided as one piece. This is probably the weakest part of this kit, as these only have a small nub to match up to indents on the fuselage. Getting these parts lined up properly and attached sturdily will be challenging. I would recommend getting the wings in place first, to provide a clear reference for angles, and perhaps set up a jig to keep everything aligned properly as well. The big control horns are provided in photoetch, providing a proper to-scale rendition of these parts.
The wings are simple top/bottom split, but feature separate inserts for the wheel wells. This makes for some great detail for those wells, which is good for detail hounds. However, the Magister sits very low to the ground, so it really won't be visible unless you set the model down upside down. Speaking of the landing gear, There are some nice drawings in the instructions showing all the various bits and details from the kit, and where they go, both plastic and photoetch. The completed gear will look pretty darn good when all together. The final details are some resin and plastic bits for the fuselage in the form of scoops and such, plus the big canopy, which comes in both open and closed options.
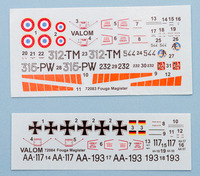 As noted earlier, the two kits differ only in the decals. Kit 72083 is the French Air Force version, and it comes with two options. The first is from G.E. 312, BA 701, Salon de Provence and the second is from G.E.315, BA 709, Salon de Provence. Both are overall natural metal with orange noses and orange panels on the stabilizers. The latter is provided in the decal sheet.
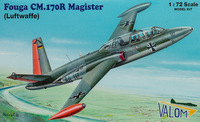
Kit 72084 is the Luftwaffe version, and it also has two versions. The earliest one is AA-193 from WaSlw Erding in 1960 and is overall natural metal. The second is AA-117 from FFS "A" in 1966 and is camouflaged in the Luftwaffe scheme of dark gray and green over light gray. This option features orange elevators and outboard tip tanks. There is one problem with this sheet in that the numbers for AA-193 are not the right shape, with the 9 and the 3 being too rounded. A search through the spares box should find some suitable replacements, though. Both sheets include stencil detailing as well, and overall the quality of printing is excellent.
Conclusion
The Valom Magister kits are a welcome sight, as we have long needed a new tool Magister in this scale. Additional releases will undoubtedly cover many of the other nations that flew the type. My thanks to Valom for the review samples.
