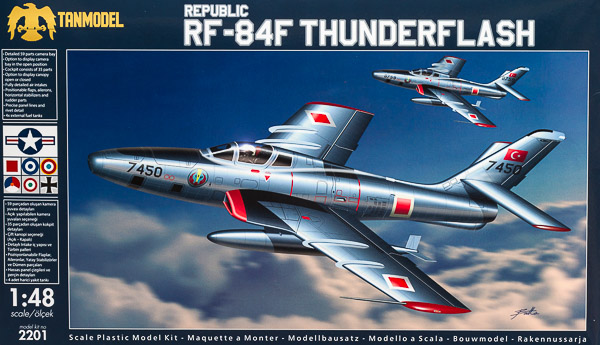
Tanmodel 1/48 RF-84F Thunderflash
By Chris Banyai-Riepl
Overview
The Republic RF-84F was a photo-reconnaissance evolution of the F-84F attack fighter, and like most reconnaissance derivatives, the RF-84F served long after its armed sibling. The RF-84F saw a significant design change over the fighter version, with the nose intake replaced by a camera nose and the intakes moved to the wing roots. Like the F-84F, the RF-84F saw widespread international usage, with examples flying in Belgium, Taiwan, Denmark, France, Germany, Greece, Italy, the Netherlands, Norway, and Turkey. While the RF-84F was retired from US service in 1971, the plane continued to fly elsewhere and the last examples were there RF-84Fs in Greece that took their last flight in 1991.
The Kit
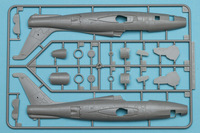
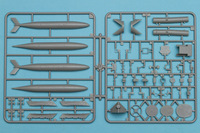
When I first saw the box, I thought that perhaps this was a rebox of the Heller kit, or maybe the Kinetic kit with some new parts. Happily, the truth is that this is a 100% new tool kit, and it's a gorgeous one at that. Molded in gray plastic, this kit features a great cockpit, highly detailed camera bay, excellent surface detailing, and a decal sheet that has nine options. An impressive start for a new company!
|
|
Jumping into the kit, we'll start with the cockpit. Here you get a seat that is built up from five base pieces, two back brace pieces, and two pieces for the headrest area. A nine-piece seat, and when done it looks pretty good for an injection-molded piece. All that's left for the modeler is to add some belts. Well, unless you want to build the Italian or German options, which used different ejection seats.
A similar treatment goes on in the cockpit itself. There's the one-piece tub, but onto that there are two separate sidewall inserts, separate individual rudder pedals, a separate throttle handle, a control stick, and an instrument panel that's made up from three pieces, one of which is a clear piece that includes the hood. When all of this is painted and put together, you're going to have one of the better looking out-of-the-box interiors available.
The instructions then have you assemble the engine bits. Here you get a long exhaust pipe, split in half, with a burner face at one end and a round can at the other. Honestly, I don't know how anyone will be able to see the burner face up that long pipe, even with a flashlight, but it's there. For the front of the engine, there's the inner intake trunking built up from three pieces and the front engine face made from two parts. With all of that painted and assembled, along with the cockpit, 2/3s of the fuselage inner bits are done.
|
|
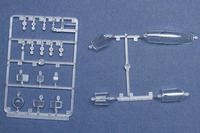
Which brings us to the camera bay. Wow, is this impressive. All the cameras are accurately represented, and there are six of them. Each one is made up of two body halves and a separate clear lens. The lens actually includes a section of the camera body, so you don't have to try and fit a small clear lens into another plastic part. This is a nice touch. The aft-most camera mounts directly to a bulkhead, and it gets some extra boxes added as well. The second-most aft camera is a long one, mounted diagonally, and it has a two-piece supporting brace. The next three cameras are ahead of the nose gear well (which is built up from four pieces) and these fit into a frame that's built up from six pieces. Finally there's the nose camera, which gets a supporting brace. For the bay itself, there's separate sidewall detailing that gets added, then the cameras can go in place.
Now, for those who want to show off all this camera detail, you don't get to right out of the box. Knowing that most modelers would likely opt for a buttoned up nose, the fuselage halves have the top access hatches molded in place. If you want to open them up, you'll have to cut them away and then use the included extra hatches provided in the kit. This is a great way to do this, as it makes building a clean plane easier, while only adding a bit of extra work for those wanting to show everything off.
|
|
Normally this is where I would say that all this nose detail makes it difficult to add weight to the kit to keep it sitting on all the wheels, but the instructions state that if all the parts are used, there is no need for extra weight. So it looks like they took all that extra plastic into account and made things even easier for us modelers!
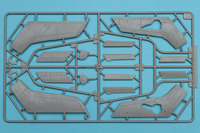
So with the fuselage together, you can add the splitter plates (which really could be shaved down a fair bit) and the outer intake sections, and then jump onto the wings. These are split into upper and lower halves, and feature a separate insert for the main wheel well. Also separate are the flaps and ailerons, and the intake fronts. The latter are very nicely molded with excellent surface detailing all around. They did some great engineering on the tooling for those parts. The completed wings then slide over the intake pieces and butt up against the fuselage, and all that's left to add is the separate rudder, elevators, wing fences, speed brakes, and cockpit heads up display and you have a Thunderflash just about ready.
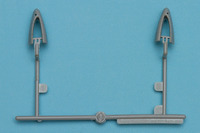
Of course there's all the small final bits, and these include the clear parts. In another excellent move, this kit comes with both a single piece canopy and a multi-piece arrangement. In both cases, the windscreen has a large portion of the fuselage included, so you'll be able to smoothly blend in this piece without worrying about marring the clear sections. For the open canopy, there are separate risers and rails and a separate rear hinge that does a great job of capturing the complexity of this canopy. The other clear parts you'll have to deal with are the camera windows. These, like the windscreen, include a large surround that will aid greatly in keeping the clear parts clear.
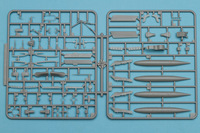
The last step is to give your Thunderflash something to sit on, and the landing gear continues the trend of excellent engineering and high detail. The nose gear has a separate tire, separate hub, a two-piece mudguard, and a three-piece strut. This should make painting this piece much easier. The main gear is simpler, but still well detailed. The strut is molded with the gear door, and like the nose wheel, these also have separate hubs and tires. Finally, there are the underwing pylons, which are all split in half and have separate sway braces, and the kit comes with drop tanks for all of them.
|
|
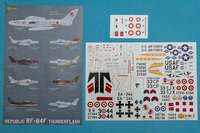
On to the decal sheet, and its nine options. With nine choices, you've got just about all your bases covered. In fact, out of all the nations that flew the type, only Denmark, Norway, Belgium, and Taiwan are not represented. What you do get is a Turkish AF example as seen on the boxtop, a USAF option from the 32nd TRS in natural metal, a Luftwaffe option from AKG 51 in natural metal with red, yellow, and blue trim, an Italian RF-84F from 132 Gruppo 3 Aerobrigata, also in natural metal, two French options, one from ER 3/33 and one from ER 4/33 (the latter from the Suez Crisis in 1956 with black and yellow bands), a camouflaged Hellenic option from No 338 Mira, a Michigan ANG camouflaged example, and a camouflaged Royal Netherlands Air Force option from No 306 Squadron. The decals look nice, with vibrant color and good alignment, but I'm always leery of decal sheets with white paper backing. . It will be tough to pick an option out of the box, and once the aftermarket people go to town on this one, you'll be even more hard pressed.
Conclusion
This is an impressive first step into 1/48 by this company, and hopefully they'll build on what they've learned with this for their future releases. A visit to their website shows some very impressive upcoming projects, including a 1/48 SR-71 and a 1/32 F-4E family. Here's hoping they're able to bring those to fruition. My thanks to Stevens International for the review sample.
