Small Stuff 1/72 Sukhoi I-14
By Matt Bittner
Introduction
Taken from the instructions:
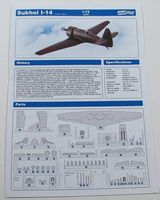
"[The] I-14 (ANT-31), a Soviet single-seat fighter was developed at Tupolev's design bureau by Pavel Sukhoi's team. It was the first all-metal monoplane fighter with retractable landing gear in the world. The first prototype powered by Bristol Mercury IVS-2 radial engine took off on May 27 in 1933. The second prototype, called ANT-31bis (I-14bis) was considerably redesigned, including a more powerful Wright Cyclone R-1820 F-2 engine, a smooth wing skinning instead of corrugated on ANT-31, different outward-retracting landing gear and an open cockpit. ANT-31bis was armed with two synchronized PV-1 machine guns and two Kurchevsky APK-11 recoilless cannons in the wing. The aircraft successfully passed the state acceptance trail in 1934, and serial production was started at the new No 125 factory in Irkutsk. Production I-14 had an increased wheel track, R-1820 F-3 engine and was armed with machine guns only. State acceptance trials of the first production aircraft held in 1936 uncovered a serious problem – difficult spin recovery. The military refused to accept I-14, and the design bureau had to introduce several modifications, including a new tailplane with an increased area, which finally allowed to solve the spin problem. However, by that time I-14's rival, a much cheaper and easier to produce Polikarpov I-16 was already in mass production. It was decided to terminate the I-14 production and scrap the unfinished aircraft at No 125 factory. Of 55 aircraft ordered only 19 were completed and entered service."The Kit
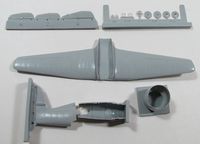
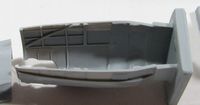
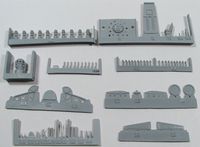
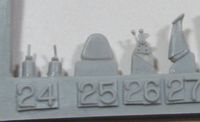
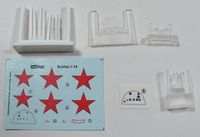
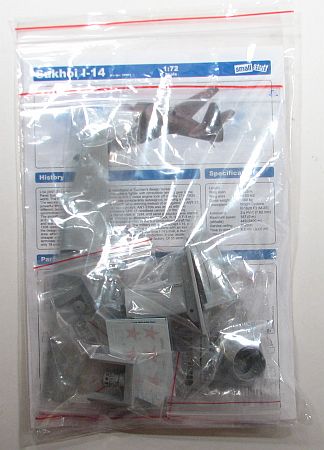
The Small Stuff 1/72 Sukhoi I-14 has to be the best kit I have ever seen. And I have seen plenty. I consider CzechMaster Resin, Choroszy and Prop & Jet the best resin kits on the planet – Small Stuff can now be added to the front of that list. The detail on this model is just astounding and I haven't found any flaws at all. Including flash. No flash, no pinholes, no surface flaws at all. Everything that should be separate is. For example, the wheel that raises and lowers the landing gear inside of the cockpit is separate. Other companies would mold this into the inside of the fuselage half. Not Small Stuff. Also separate is the throttle and two-piece rudder pedals (two pieces for each pedal). There are 86 pieces of gray resin; four pieces of reinforced resin parts (which are for the landing gear); and four clear resin pieces (canopy, instrument panel and two wing-tip lights). The clear-resin windscreen is a thing of beauty. The only material thinner than this resin piece would be a vacuformed canopy. I have not seen any other material used for a clear canopy thinner. Nice! In addition, the instrument panel is clear resin, to which you carefully paint black, and add the instrument panel decal to the rear, and then paint the back of that white. Once finished this will look stunning. Decals, nicely printed, only consist of red stars and a few stencils. If I have to complain – and this is only a complaint because of laziness – it's that the engine is made up of 42 separate pieces and the prop is separated into blades and hub. Those two will take the longest to assemble and assure (in the case of the prop) everything lines up correctly.In step 1, you build the rudder pedals – two pieces for each pedal, and those assemblies are glued to a separate rudder bar. Next step is to paint and put the instrument panel together (carefully painting the clear resin and applying the decal to the back, after which the pack of that is painted white), glue it into the forward fuselage half, and glue the landing gear retraction wheel to the cockpit side. In step 3 you glue the throttle quadrant to the fuselage side and then glue the rudder bar/pedals into place. Now you start building the rest of the cockpit.
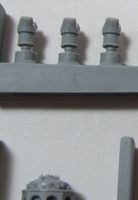
After bending some wire for the control stick and gluing it on, the control stick is then glued to the cockpit floor along with the seat. Seat belts are molded in situ so with careful painting, washed and dry-brushes, will look great when finished.Step five is assembling the engine. You'll need plenty of time for this step, because each rocker-arm cover/top is glued to the top of each cylinder – there are two cover/tops per cylinder. Once those are glued to the cylinders, then each cylinder will need to be glued to the engine boss. After all those have dried, then you'll add the exhaust manifolds to each cylinder/engine boss. The last step to engine construction is to add the carburetor intake to the engine's underside. I suspect you could probably paint each "part" separate. Once you glue the cover/tops to the cylinders, then you can paint the cylinders. Paint the engine boss prior, as well as the exhaust manifolds. Just be sure to scrape the paint away on the mating surfaces because I don't think you want to do this whole process again.
The next stage of assembly is to glue the engine cover to the front of the engine, glue the engine to the cowl, glue the prop blades to the prop boss, then glue the prop to the engine. I would leave the prop off until almost last, though. Now you start to assemble the airframe.The fuselage is split into front and rear halves, which helps the process of gluing the cockpit in. So glue those two halves together, glue the fuselage assembly to the wing, then start gluing tail parts on. One excellent aspect of the Small Stuff I-14 is the tail control surfaces are molded separate, so you can deflect those as you see fit. Nice touch (although none of the wing control surfaces are molded that way). Next step is to glue the firewall to the front of the fuselage, followed by cowl/engine assembly. The instructions also have you glue the headrest in along with the windscreen. Be sure to mask it and stuff the cockpit with masking material prior to painting. Finally the tail skid is glued on as are the gun tubes and pitot tube. Those might be better left until the end, though. Same with the separate, clear wing-tip lights – which is an awesome touch!
The last two instruction steps are the assembly of the main landing gear which are again better left as part of the last steps of construction. Each landing gear is made up of four pieces and the tires have separate hubs, which makes painting these very easy.Speaking of painting, the I-14 was finished with upper green surfaces, and either blue or light gray lower surfaces (although grey is mentioned as the more logical choice).
Conclusion
As I kept going on in the first few paragraphs, this is a stunning model, the best I have ever seen. The master and molding craftsmanship has to be the best around, and the level of detail attained must be seen to be believed. It is quite the stunning model and when the Small Stuff 1/72 Sukhoi I-14 is built, it will no doubt garner plenty of conversation.Many, many humble thanks to Small Stuff for allowing me to review their superb I-14. Contact the owner for information on ordering.

