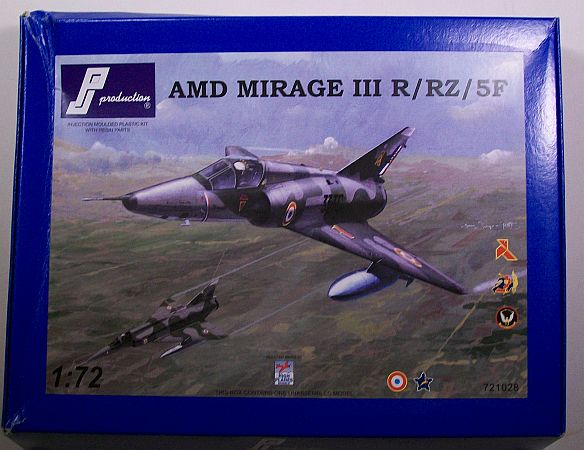
PJ Production 1/72 AMD Mirage IIIR/RZ/5F
By Matt Bittner
Introduction
Taken from Wikipedia:
"The Mirage III is a supersonic fighter aircraft designed by Dassault Aviation during the mid-1950s, and manufactured both in France and a number of other countries.
"The versatility of the design enabled production of trainer, reconnaissance and ground-attack versions as well as the Dassault Mirage 5variant.[1] It was a successful fighter aircraft, being sold to many air forces around the world and remaining in production for over a decade. Currently, the Pakistan Air Force is the largest operator of Mirage III fighters, with 75 aircraft still in service. It will be the first European combat aircraft design capable of exceeding a speed of Mach 2 in horizontal flight."
The Kit
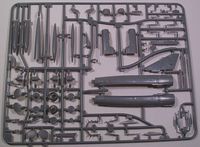 The PJ Production 1/72 Mirage IIIR/RZ/5F is a welcome addition to the new Mirage III line introduced recently by them. It has been a long time since there was a new Mirage III in 1/72, and the series from PJ Production is top-notch. The panel lines are recessed and nicely done, the molds are developed in a way that will allow multiple Mirage III versions to be made (which could be a bad thing, if the parts don't line up right, but until I can get this one built I'm giving PJ Production the benefit of the doubt) and, depending on the version, there is also photoetch and resin details also released with the kit. There are 112 pieces in gray injected plastic, 13 pieces of resin, one piece of clear resin, a clear plastic sprue with 6 parts and a photoetch fret with 8 amount of pieces. Decals are for three Mirage IIIs:
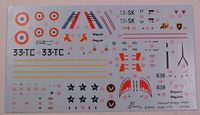
- Mirage III R (307 TC), ER 03/033 "Moselle", Strasbourg (1965); aircraft with which the famous female pilot Jacqueline Auriol won the speed record on June 14, 1963; finished in Dark Green and Steel Gray over Aluminum undersurfaces
- Mirage III5F (37 SK), EC 03/013 "Auvergne", Colmar (1976); one of the aircraft that participated in the TWM; also finished in Dark Green and Steel Gray over Aluminum undersurfaces
- Mirage IIIRZ, 2 Sqn SAAF "The Flying Cheetahs, Swartkops AFB (1978); finished in Deep Buff and Olive Drab over Light Admiralty
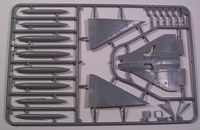 Unlike most other aircraft models, the construction of this Mirage III does not start with the cockpit. Instead, the first step of the instructions have you glue the top of the wings to the single, lower piece. Following that you glue the mid-section of the fuselage halves together along with adding some scoops to those halves. Step three is where you glue the exhaust together and glue it to the fuselage mid-section before adding the rear-most piece of the fuselage (which means you'll want to paint the exhaust before gluing it in, naturally). Now you can build-up most of the airframe by assembling the fuselage and wing together, followed by the spine, front-fin and - depending on the version you're building - the fin/rudder (if building the R/RZ you'll need to sand off a bit of the fuselage before gluing the resin rudder/fin to the fuselage).
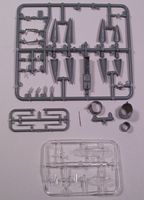 Even though the majority of the kit is together now, there is still a ways to go before you have an airframe you can paint. Now is where you start assembling the cockpit. If you decide to use the injected plastic seat, then you build that up now (although to be honest, I see no reason for it since the resin ejection seat is one-piece, and molded far finer). Once you've made the obvious choice, then you glue the cockpit tub into one forward-fuselage half, followed by gluing the halves together (trapping the tub). There is some molded-on detail to the cockpit side consoles, but you'll need to track down some photos of this area to help paint it. All the instructions tell you is to paint the cockpit matt black. You'll need to make another choice, now, and that's if you want to use the injected plastic instrument panel, or the better molded resin one. Again, it's obvious to me which one to use (but to be fair, some people don't like to work with resin, so PJ Production give you that option). Once the instrument panel is painted (again, track down photos to use as reference) then it and the control stick are glued into the cockpit tub, followed by the ejection seat. Now the assembled forward-nose is glued to the main fuselage assembly.
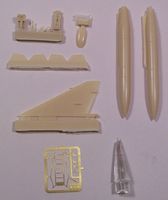 Another decision track, and hopefully you've made this one prior to actually starting construction. Depending on the version you want to model you have your choice of noses - an injected plastic nose for the 5F, or the clear resin nose for the R/RZ versions. This time you have no choice if choosing to build either the 'R' or 'RZ' - you only have the clear-resin nose you can use. One thing I would do, though, is to wait until the very end to attach the nose pitot tube, as you risk breaking this off during painting.
While you build the nose gear in the next step - and I think it's very odd that it's split in half vertically, but I suppose it's to facilitate the unusual shape of the gear - it isn't attached yet, and shouldn't be until again, after painting. However, the next step is necessary prior to painting, and that's adding the intakes, each side being built-up of two pieces. There are also antennas to add in this step as well, but those also might be best left until the end.
 The next step you'll have to pay close attention to, because there are some pieces that should be attached prior to painting, while the rest should be left off until after painting. Those items best added now are the "strakes" to the underside of the wing and - if building the 'RZ' version - the hump under the nose. Now your model is ready to paint.
The final construction steps include adding the landing gear, wheels and gear doors, along with - if you decide to add them - the external fuel tanks. You have the option of either the RP62 1300L tanks or the RP18R 500L "Supersonic" tanks. If you decide you don't want to add the external tanks nor the pylons, then you'll have to fill in the holes for the pylons.
Conclusion
Finally, a new Mirage III in 1/72, and PJ Production's kit is very nice indeed, and worth every penny. If you're looking to add this very important French aircraft to your Cold War-era modeling shelves, then buy in confidence that you'll have a great looking model after finishing the PJ Production Mirage III.
Many, many thanks to PJ Production for sending this to review.
