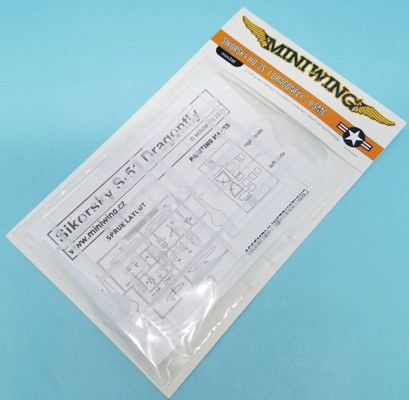
Miniwing 1/144 Sikorsky S-51 Dragonfly
By Matt Bittner
Introduction
Taken from Wikipedia:
"The Sikorsky H-5 (initially designated R-5 and also known as S-48, S-51 and by company designation VS-327) was a helicopter built by Sikorsky Aircraft Corporation.
"It was used by the United States Air Force, and its predecessor, the United States Army Air Forces, as well as the United States Navy and United States Coast Guard (with the designations HO2S and HO3S). It was also used by the United States Post Office Department. The civilian version, under the designation S-51, was the first helicopter to be operated commercially, commencing in 1946."
The Kit
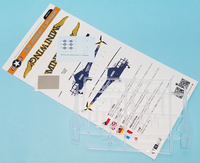
The Miniwing 1/144 Sikorsky S-51 consists of 26 pieces of clear, injected plastic; comes with vinyl masks for the windows; and this release has decals for only one "S-51": Sikorsky HO-3S-1, "Southern Comfort", serving with MAMS-33 in the Korean War. This helicopter patrolled the Sea of Japan, rescuing downed pilots. This particular aircraft was finished overall in Dark Sea Blue.
The clear parts appear a little "hazy" so you may want to fine-sand the inside of the fuselage halves and then dip them in Future to enhance their transparency. In addition, because the kit is molded in clear plastic, that plastic tends to be more brittle than others so care must be taken while do anything with the kit's parts.

|
Construction starts with the cockpit, adding the pilot's seat and control sticks to the otherwise one-piece cockpit floor and rear seats. Also added is the instrument panel but unfortunatley there are no decals to add to it. There are also no seat belt decals provided. Miniwing calls for 1 gram of weight, and I suspect the best way to add it might be under the cockpit floor or behind the rear bulkhead. If adding it to the rear bulkhead, though, care must be taken so it's not seen through the windows.
Now construction moves fast. Glue the fuselage halves toether, add the landing gear and glue the main rotor blades to the hub. Because the model is molded in clear plastic, trying to induce any droop in them could be problematic so they don't break. Maybe lots of hot water would work.
Add the undercarriage and then it's ready for painting. I would hold off on adding any of the rotor blades - main or rear - until after painting, and be aware that while the kit comes with both two- and three-bladed tail rotors, the three-bladed one is used on this specific aircraft.
Add the provided masks and paint away. After painting and decaling, add the steps and then call it a day. You might want to replace the steps with wire to make them closer "to scale" as the plastic parts are quite thick.
Conclusion
In no time at all you'll have yourself a 1/144 Sikorsky Dragonfly sitting on your shelf, thanks to Miniwing. It really is a nice kit and will look great once finished.
Huge thanks to Miniwing for the review kit.
