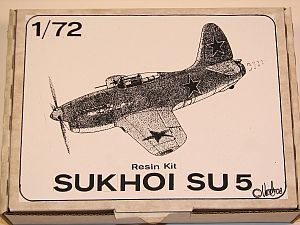
Master-X 1/72 Sukhoi Su-5
By Matt Bittner
Introduction
Taken from the instructions.
"Sukhoi Su-5 (originally the I-107) a Soviet mixed-propulsion fighter, was born in 1944 as a stop-gap fighter project to counter the latest German jet aircraft. It compete with the Mikoyan and Guryevich's MiG I-250 (Samalyot N).
"The new, but never completely developed Klimov VK 107A V-twelve, giving a lot of troubles, drove by a shaft the compressor, feeding in turn the burners of the so-called "Kholshchevnikov's accelerator" aka VRDK, with a variable area jet nozzle. This device, also known as motorjet, increased the available power by 670 kW (900 hp) and the speed by 100 km/h, respectively. Due to is "thirst" at full power it could be used for about 10 minutes and for about 3 minutes it gave the full power.
"The Su-5 took off for its maiden flight on 6th April 1945, with G. I. Komarov at the controls. Fitted with a laminar flow wing it achieved a maximum speed of 793 km/h in the horizontal flight at an altitude of 4350 m. An in-flight failure of the piston engine occurred on 15th June 1945 during the tests, but the same pilot emergency-landed the machine safely.
"The airplane was equipped with the Nudelman-Suranov NS 23 cannon with 100 r.p.g., firing through the hollow propeller shaft, and two synchronized 12.7 mm Berezin (.5 in) machine guns with 200 r.p.g., located above the piston engine. The program was cancelled on 18th October, when the piston engine flight hours were spent.
"Indeed, the maturing of the jet engine and the end of war in Europe doomed this type of hybrid power. The Su-5 ended its days as a sole prototype, while the I-250 (aka MiG-13 - a designation apparently reserved for the machine had it entered the regular service) was somewhat more successful and was reportedly produced in several dozen machines."
The Kit
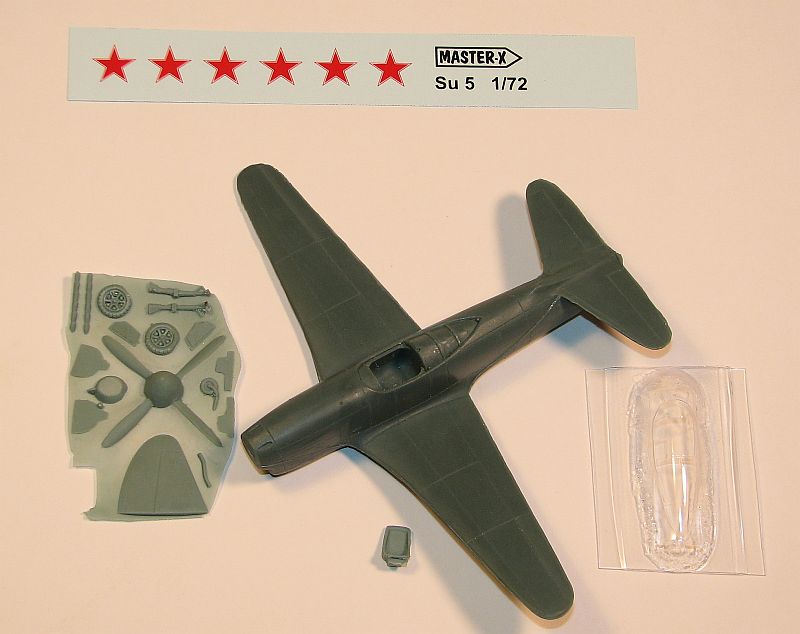
The Master-X Su-5 consists of very few parts, 19 pieces of resin and one vacuformed canopy (hopefully I won't mess it up as there is only one provided). The resin includes the single fuselage/wing/horizontal tail part, making this a relatively simple kit to construct. Since the only markings for the sole prototype was stars in the usual places, that's all Master-X provides. These decal stars are very nicely printed and in register.
Since there isn't much to construction, it shouldn't take long to get the model to a point where it's ready to paint. Since there is only a cockpit "hole" the only other parts provided include a seat and a control stick. I plan in adding photoetch seat belts, but that would be about it. Especially since I'm going to build it with the canopy closed. You might want to consider doing more to the cockpit "hole" if you plan on opening it up, though. You'll need a Dremel-type tool and a lot of patience to further hollow out the cockpit. But again, if you leave the canopy closed you won't need to do this.

|
The main piece of resin - the "fuselage/wing" combination - will need cleaning up. First you'll need to clean up where the pour "block" (or whatever it was - thankfully Master-X removed most of the material for you) was, including leading and trailing edges of the flying surfaces, along with fuselage sides and ends. Take your time and you won't have to do anything else after cleaning these up. Become impatient and you'll probably have to fill in the areas you gouged the fuselage piece when cleaning it up. You'll also need to clean up the flying surfaces in that there are resin "pips" on the surface, especially in some of the panel lines. Once those are sanded away you'll need to restore the panel lines from where the "pips" were sanded away. But other than that mentioned above, there is no other clean up needed.
Once nice feature in the kit is the metal wires embedded within the resin landing gear. No need to worry about these pieces of resin breaking, thankfully. I think more resin manufacturers should do this, especially if they produce a single piece of resin for the main assembly. Kudos to Master-X for that.
So, the seat and control column are in the painted cockpit and construction can continue. Add the masked vac canopy (if closing it up), along with the vertical tail, and rear engine exhaust and you can start painting. The scheme couldn't be simpler. Green on the top surfaces, blue on the undersides and there you have it.
Conclusion
Up until now, the only kits I know of for the Su-5 were a couple of vacs and a very old (out of production, I do believe) Czechmaster resin kit. Now with the Master-X kit you don't have to look for one of the other kits, and you'll have a Sukhoi Su-5 in your collection very quickly as there isn't much to this kit.
If you've never tackled a resin kit before, I think the Master-X 1/72 Sukhoi Su-5 would be a great introduction to building resin kits.
My thanks to UMM for the review sample.
