Mark I Models 1/144 Fiat G.50/G.50bis
By Matt Bittner
Introduction
Taken from Wikipedia:
"The Fiat G.50 Freccia ("Arrow") was a World War II Italian fighter aircraft developed and manufactured by aviation company Fiat. Upon entering service, the type became Italy's first single-seat, all-metal monoplane that had an enclosed cockpit and retractable undercarriage. On 26 February 1937, the G.50 conducted its maiden flight. During early 1938, the Freccias served in the Regia Aeronautica (the Italian Air Force) and with its expeditionary arm, the Aviazione Legionaria, in Spain, where they compared well in speed and manoeuvrabilty with their adversaries in the theatre.
"The fighter was extensively used on various fronts by Italy, including in Northern Europe, North Africa, the Balkans, and the Italian mainland. The G.50 commonly came up against the British Hawker Hurricane, which was fast enough to frequently outrun the Italian opponent, and could also outrange it. In addition, early in the Second World War it became apparent that the G.50 possessed inadequate armament, comprising a pair of Breda-SAFAT 12.7-mm machine guns. Later models of the fighter incorporated improvements, including an increase in fuel capacity that gave rise to a substantial increase in range.
"The G.50 was exported to several overseas customers, small numbers being flown by the Croatian Air Force while 35 G.50 fighters were shipped to Finland, where they served with distinction during both the Winter War of 1939–1940 and the Continuation War of 1941–1944 against the Soviet Union. In Finnish service, the type reportedly achieved an unprecedented kill/loss ratio of 33/1."
The Kit
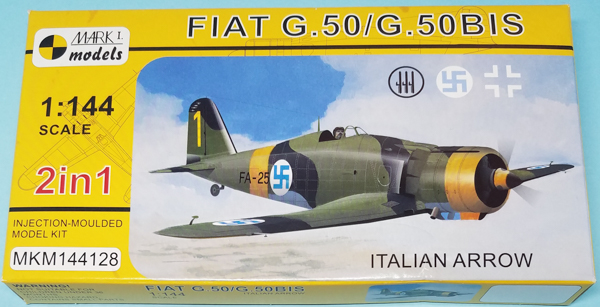
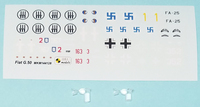
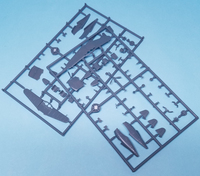
Mark I Models provides two G.50 kits in the box. Each kit consists of 43 pieces of injected plastic, some not used. Each model also has an injected, plastic windscreen. The decals are for four G.50/G.50bis:
- Fiat G.50bis Srs.V (Fiat/Aeritalia-built), Black 367-Red 2 (MM unknown), 367th Flight (Squadriglia), 151st Fighter Squadron (Gruppo Caccia Terrestre, CT), 53rd Wing (Stormo), Italian Air Force (Regian Aeronautica, RA), Turin-Caselle airfield, Italy, spring 1942 (finished with a base coat of green on top with sand "splotches", and light gray on the underside)
- Fiat G.50bis Srs.V (Fiat/Aeritalia-built), Red 163/3 (MM 5943), 163rd Flight, 161st Fighter Squadron, Independent Wing (Stormo Autonomo), Italia Air Force, Taranto-Grottaglie airfield, Italy, February 1943 (finished overall green on top and light gray on the undersides)
- Fiat G.50 Srs.I (CMASA-built), FA-25 (MM 3614), Black FA-25/Yellow 1, 3/LeLv 26 (3rd Flight, 26th Fighter Squadron), Finnish Air Force (Ilmavoimat), Kilpasilta airfield, Finland, October 1942 (olive green on top, light gray on the undersides with a yellow fuselage stripe, underside wing tips, cowl and spinner)
- Fiat G.50bis Srs.VII (CMASA-built), White 352 (MM 6532), 3./JG 108, Luftwaffe, Weiner-Neustadt airfield, Austria, summer 1944 (overall green on top and light gray on the bottom)
Decals are nicely printed, in register and include instrument panel decals for each model.

|
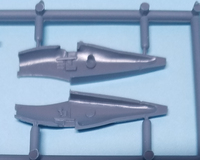
Of course, construction starts in the cockpit and once the seat and control stick are glued to the floor - and painted - then that assembly and the instrument panel are glued to one fuselage half (no seat belts decals are included). Once that is accomplished then the fuselage halves can be glued together and the upper, center section glued to the wing, then the fuselage glued to it.

|
Now it's time to paint and glue the engine pieces together (each engine is two-piece) and then glue the cowl halves around that assembly. Once that is accomplished then the cowl can be glued to the fuselage/wing assembly, ensuring not to forget the extra piece that includes the exhaust stacks. Based on which version you're building (the G.50 or G.50bis) add the rudder/fin/rear fuselage piece along with the horizontal tail pieces.

|
Prior to painting, you'll definitely want to add the four, separate "bumps" to the upper, forward fuselage. Turn it over and you'll want to add the underside intake to the cowl as well (which is different based on the version being modeled). Now it's best to paint before adding the landing gear, windscreen and antenna masts, which can be considered the final pieces of assembly. In addition, you'll need to perform a small piece of surgery in that if you chose a scheme that includes a spinner, you'll need to cut and/or sand the prop hub from the prop prior to gluing the spinner to the prop.
Conclusion
The Mark I Models 1/144 Fiat G.50/G.50bis is really a nice kit, with surface detail that is nicely done. Plus you get two models in a box! These models will definitely look great once finished.
Huge thanks to Mark I Models for supplying the review kits.
