Kovozávody Prostějov 1/72 P-51C
By Matt Bittner
Introduction
There are a few 1/72 early P-51s (namely the P-51B and P-51C) that have been on the market for some time. Those from Academy, Hasegawa, Monogram and Revell have been out for some time, and each has their problems. To say there hasn't been an accurate P-51B/C in 1/72 is quite the understatement. Usually the companies keep the P-51D wing and mate it to a P-51B/C fuselage, which is part of the problem. This article is not to go into all the faults in other kits but instead present the latest P-51B/C, that from Kovozávody Prostějov (KP).

The Kit
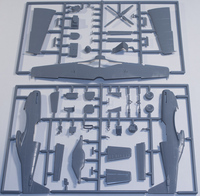
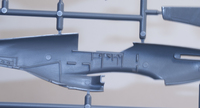
The KP 1/72 P-51C consists of 51 pieces of injected plastic and one piece of injected clear (unfortunately the canopy is not separated from the windscreen). This specific boxing has decals for the P-51C, "600" flown by Maj. E.O McComas, 118th TRS, 23rd FG, Suchwan airfield, China, November 1944; P-51 C, "11", 317th FS, flown by Maj. Merschel "Herky" Green, Lesina airfield, Italy, 1944; and P-51C, "B6 O", 363rd FS, 357th FG, 8th AF, flown by Lt. William B. Overstreet, June 1944. All three are finished overall natural metal with Lt. Overstreet's upper surfaces finished in OD and has D-Day stripes.
As with all aircraft models construction starts in the cockpit. The instructions are pretty decent about how to paint it all and there are decals for the instrument panel and the seat belts. Once the cockpit is painted and put together then it can be added to the port fuselage half, along with the underside exhaust blanking plate and tail wheel and doors.

Construction jumps around a little since the next step is to assemble the prop and spinner. Following that one attaches the separate wheel wells and glues together the landing gear.
Now it's finally time to construct an aircraft. The fuselage halves are glued together, the rear, underside exhaust channel pieces are glued to the fuselage, then the flying surfaces are attached. Interestingly the instructions have you glue the lower wing portion to the fuselage prior to adding the upper wing pieces. Hopefully this will result in a wing root that will require little-to-no seam work.

While most of the last steps in the instructions are best left until after painting (gluing on landing gear, gear doors, etc.) you will probably want to attach the separate flaps and ailerons before painting. Once painting is finished then glue all the separate pieces on and you're all set.
Conclusion
There are those out there that still say the ultimate P-51B/C in 1/72 still doesn't exist, even with these releases from KP. Even so, building a KP kit will get you closer than any other kit has before. After building a Hasegawa one, I am definitely looking forward to getting started on a KP 1/72 P-51B/C (in my case, the Mustang Mk.III).

We definitely thank Kovozávody Prostějov for sending this to review.
