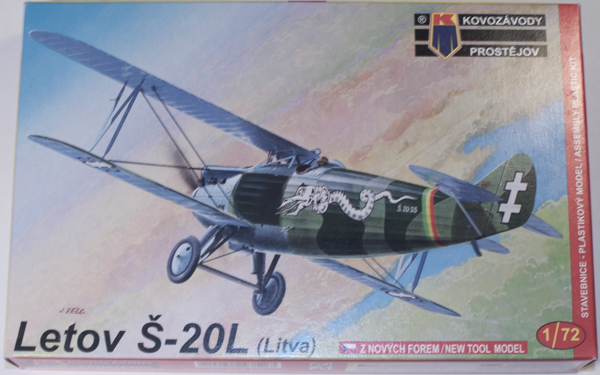
Kovozávody Prostějov 1/72 Letov Š-20L
By Matt Bittner
Introduction
The Letov Š-20 was developed right after World War I and served until the mid-thirties. There were 105 developed for the Czechoslovakian Air Force and 10 were produced for Lithuania and given the designation Š-20L. The Š-20 was a single-bay, single-seat fighter and won a few President of the Republic air races.
Unfortunately there aren't a lot of references I know of for the Š-20 and I consider this a huge shame. I personally would like to know more about the aircraft and have something akin to a Windsock Datafile that contains not only the history of the aircraft but also scale planes and photographs, especially of the interior. There are a lot of aircraft that have come and gone that really need to be researched in detail, and the Š-20 is one of them.
The Kit
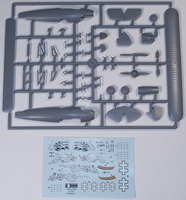
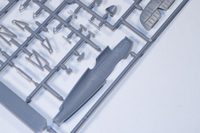
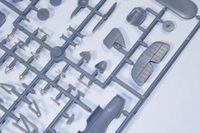
The Kovozávody Prostějov (KP) 1/72 Letov Š-20 consists of 49 pieces of grey injected plastic (some parts not used for this version) and a piece of clear foil. Decals, appearing in register and really nicely printed are for the following three aircraft:
- Letov Š-20L No.55, 4th Squadron, pilot kapitonas Leonardas Peseckas, Lithuanian Air Force, Kaunas airfield, 1928
- Letov Š-20L No.57, 4th Squadron, Lithuanian Air Force, Kaunas - Zagariskese airfield, 1928
- Letoc Š-20L No.52, 4th Squadron, Lithuanian Air Force, Kaunas - Zagariskese airfield, 1928

Construction naturally starts with the cockpit and the plastic pieces are really nice. Believe it or not, the seat includes molded-on seat belts, to which decal belts are applied over them after painting. The same is true with the instrument panel as the plastic piece has raised-detail to which a decal is applied over it. If this works then it will definitely look nice when finished. After the cockpit pieces are painted, along with the interior fuselage sides, and the decals applied then the cockpit is assembled. There is some molded-on detail to the sidewalls but of course anything could be added to enhance its appearance. Once all cockpit pieces are in place on one fuselage side, the fuselage halves can be glued closed. The rest of the fuselage is now built-up adding the forward, upper piece, headrest, tail skid and exhaust stacks (probably the poorest part of the kit as cutting these parts from the sprue could be difficult and leave them out-of-round – I'll probably replace them with sections of metal tubing and cutting them to size on the model).

|
Since the fuselage is now assembled the flying surfaces are attached. While the instructions show adding the windscreen at this time as well it's definitely best left off until the very end. The lower-wing is glued to the fuselage then there is a separate piece to the fuselage underside added over the lower wing. Hopefully the fit won't be bad.
The next steps in the instructions have you add the upper wing and struts but again, this is all best left until after painting and decaling. You will need to pay attending to a section of the underside added now as KP supplies a "stock" piece that will need to be filed and sanded so it matches the curvature of the fuselage where it's attached.
Thankfully the instructions have a full rigging diagram which a few companies cannot boast.
Conclusion
This is an excellent kit and for a biplane the construction shouldn't be difficult. The one area I have concerns with is the fuselage piece attached after the lower wing is glued in place. With careful dry fitting hopefully the fit won't be that bad. While the Czech versions of the Š-20 are mainly overall green, the Lithuanian Š-20L boasts more colors with some extremely flamboyant fuselage art. Dragons!

|
Huge, huge thanks to Kovozávody Prostějov for sending this in for review. I really want to start on it soon.
