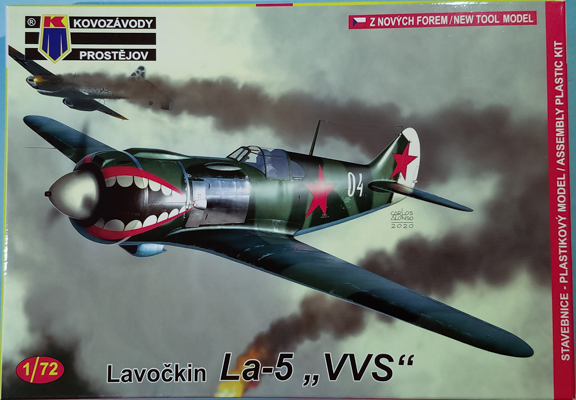
Kovozávody Prostějov 1/72 Lavochkin La-5 "VVS"
By Matt Bittner
Introduction
Taken from Wikipedia:
"The Lavochkin La-5 (Лавочкин Ла-5) was a Soviet fighter aircraft of World War II. It was a development and refinement of the LaGG-3, replacing the earlier model's inline engine with the much more powerful Shvetsov ASh-82 radial engine. During its time in service, it was one of the Soviet Air Force's most capable types of warplane, able to fight German designs on an equal footing."
The Kit
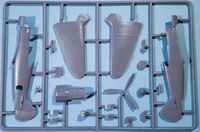
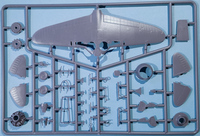
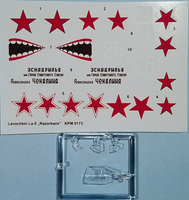
The Kovozávody Prostějov (KP) Lavochkin La-5 consists of 58 pieces of gray, injected plastic and a clear sprue with four parts. Decals are nicely printed, appear in register and are for the following aircraft:
- "White 04", 4th GIAP (Guards Fighter Regiement), flown by Y. Dmitriev, Summer 1943 (AMT-4 Green and Black uppers with AMT-7 Blue undersides)
- 960th IAP (Fighter Regiment), flown by Francesco Pellicer, Spanish pilot flying with Soviet AF, winter 1943 (appears to be two-tone as above, but with a white-distemper overall finish; AMT-7 Blue undersides)
- "White 26", 159th IAP (Fighter Regiment), Leningrad area, summer 1944 (AMT-12 Dark Gray and AMT-11 Blue Gray uppers, with AMT-7 Blue undersides)

|
The first construction steps have you paint some of the smaller details: instrument panel with decal detail; engine firewall; the two sets of vanes in front of the engine/behind the spinner; landing gear legs; and wheels/tires. This continues with the painting of the pilot's seat, following with the addition of the decal seat belts; radio set that sits behind the pilot; fire extinquisher and oxygen bottle; cockpit bulkheads; rudder pedals; and control stick. The next step has you paint the spinner and propellor followed by the assembly of said items. Next, you glue the wheels to the landing gear and paint the cockpit floor, tail wheel and tail wheel doors. Now you can get into the meat of construction.

|
Since you have all the cockpit pieces already painted you now assemble those both together and put the pieces into one fuselage half. After all the cockpit pieces are added to the fuselage, then you add the seat and oxygen bottle, and decide if you want the door on the port, rear fuselage-half opened or closed. Now you assemble the fuselage halves and add the upper, forward fuselage panel, along with the exhaust panels. Once that is all together, then you glue the engine and forward fuselage pieces together, add that assembly to the assembled fuselage along with the tail wheel and its doors, plus the pilot's head rest and gun sight.
The next step has you add the canopy and rear, clear pieces along with the prop assembly and horizontal tail surfaces. Personally, I will leave off the prop until after painting and decaling.

|
Now is the time to glue the wing pieces together. First add the radiator parts together and add it to the lower wing along with two underside blisters. Now glue the upper wing pieces to the lower wing, and then glue it to the fuselage assembly. The next steps - adding the landing gear and landing gear doors - are best left until after painting and decaling. Don't forget to add the starboard pitot as well.
Conclusion
This is a really nice rendition of the La-5 in 1/72. It looks nice, although some of the detail is soft but the interior detail is nicely done, maybe better enhanced with a Yahu or equivalent instrument panel and photoetch seat belts instead of the supplied decal ones.
Important Note: I have read a couple of online builds of this kit and you want to add the rear, clear pieces to the fuselage halves prior to gluing the fuselage halves together. Waiting until the end runs the risk of having them fall into the fuselage as you're trying to place them.
I definitely thank Kovozávody Prostějov for sending the review kit.
