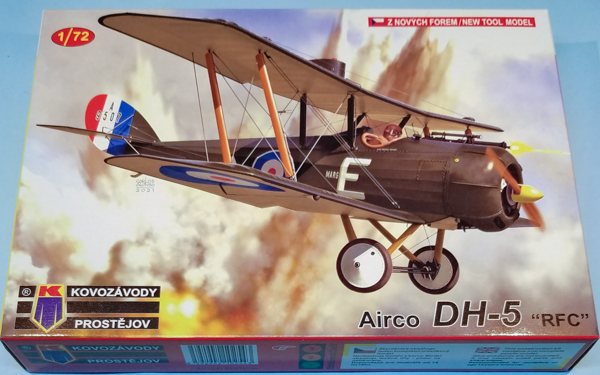
Kovozávody Prostějov 1/72 Airco DH.5 "RFC"
By Matt Bittner
Introduction
Taken from Wikipedia:
"The Airco DH.5 was a British First World War single-seat biplane fighter aircraft. It was designed and manufactured at British aviation company Airco. Development was led by aircraft designer Geoffrey de Havilland as a replacement for the obsolete Airco DH.2.
"The DH.5 was one of the first British fighters designed with the improved Constantinesco gun synchronizer, which allowed a forward-firing machine gun to fire through the propeller faster and more reliably than the older mechanical systems. It was also one of the earliest biplanes with a marked "back-stagger" of its wings. By the time the DH.5 was fielded, it was already inferior to other fighters in service and thus both unpopular and unsatisfactory with the pilots of the Royal Flying Corps (RFC). The type was quickly withdrawn from service once supplies of the Royal Aircraft Factory S.E.5 permitted."
The Kit
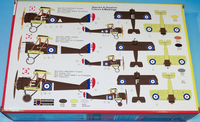
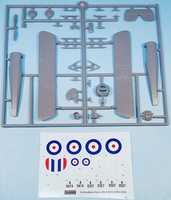
The Kovozávody Prostějov (KP) 1/72 Airco DH.5 consists of 33 pieces of gray, injected plastic. Decals are for three Royal FLying Corp (RFC) DH.5s:
- A9507, White E, 64 Squadron RFC, France 1917
- A9357, No. 32 Squadron RFC, France 1917
- A9474, White F, No. 41 Squadron RFC, France 1917

|
All aircraft are finished with PC10 uppers and Clear Doped Linen (CDL) undersides. Decals appear to be in register.
As with most aircraft model construction, the cockpit is where you start. The wing has floor molded-in details so once that's painted then to it you add the seat, rudder pedals, control stick and fuel tank behind the seat. This is where you also paint the instrument panel but be aware there are no decals for that, nor are there decal seat belts.
After the instrument panel is added to the starboard fuselage half then the fuselage halves are joined together and the wing glued to that assembly. While the next two steps show where the gun-sight-tube and gun are placed, as well as glued down, I would wait on those steps until after painting.

|
Step 5 of the instructions have you add the engine, cowl, tail pieces and tail skid to the fuselage assembly. Since one of the markings included show a white cowl, I would leave the engine and cowl off until the end so the cowl can be painted separately. Same with the tail skid as that might be broken off during the rest of assembly. Note that I think the kit's engine is perfect for the small cowl opening the engine will be seen through.
The next step has you add the top-wing fuel tank to the upper wing, and the wing to the rest of the model again, a step best left until after painting. Note that KP does NOT include the pipe that leads from the wing fuselage tank to inside the cockpit, that will need to be fashioned by the modeler. Finally, the last construction step has you add the landing gear and propeller. Be aware there is a small spinner molded with the prop but two of the marking schemes don't have this spinner, so that will need to be removed for those schemes.

|
While the instructions do include rigging diagrams, they're small and the drawings for the wires are pretty indistinct. Also note that KP only includes too-small (and not very accurate) control horns for the ailerons and NO control horns for the tail surfaces. Those will also need to be provided by the modeler.
Conclusion
Even though there is some modeling that needs to be done by the person building the kit, the Kovozávody Prostějov 1/72 Airco DH.5 is nicely molded kit and shouldn't take too long to build. Source control surface control horns and a better Vickers gun (the kit one is pretty indistinct and not very accurate), and you'll have a first-rate model on your hands.
My thanks to Kovozávody Prostějov for sending the DH.5 to review.
