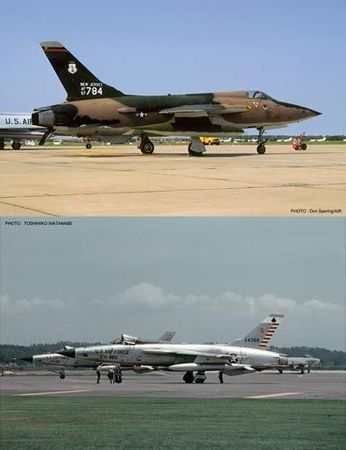
Hasegawa 1/72 F-105B/D Thunderchief Combo – Limited Edition
By Scott Kruize
Once more I'm the fortunate recipient of a so-called “free kit”, which means— if you know our publisher — it only costs this review for Internet Modeler
Hasegawa’s “Formula For Success” these many years includes not just tooling up fine new models, but also re-releasing older moldings in new boxes, often with newer accessories or alternate parts, and always with well-researched finishing schemes and the fine decal sets needed to make them. Enclosed in inspiring box art!
This particular plastic molding was originally released in 1974. This most recent boxing has two of these kits inside, a ‘B’ model in Vietnam War-era camouflage, and a ‘D’ in natural metal. The ‘B’s scheme is number 784 with the New Jersey Air National Guard. The F105D is number 386 from the 23rd Tactical Fighter Wing, 563rd Tactical Fighter Squadron.
The decals are beautiful to look at, being sharp and in perfect register, down to the Air National Guard shield in four colors. Once I worked for a sign shop and screen printer, and am frankly amazed at modern decals, so incredibly sharp, clear, and well registered. Of course much is due to the application of computer technology to the process, starting with design, and finishing with the actual print process.
When I was modeling way back Then, I built a fairly wide variety of military models, mostly modern American jets. I thought they were so cool: polished metal finishes, bright red-white-and-blue insignia and all the rest of their bold and conspicuous markings. This was one of two periods in American aviation history when our color schemes and livery were great, the other one being the ‘Golden Age’, when our national insignia had the red dot in the middle of the white star on the blue background, applied to airplanes with bright yellow wings. Army fuselages were olive green, the Navy’s in blue. All abandoned as we entered World War II. Since my youth, the glittery Cold War schemes gave way first to three-tone tactical camouflage, then to modern low-visibility shades of gray. BORING!
The closest, Then, to any build of Republic fighter jets was the ancient Revell F-84 in ‘box scale’. By the time this Hasegawa F-105 was released, I was at the University, beginning my Dark Ages—abandoning plastic modeling. The last project I started, but didn’t finish, was another Vietnam War jet, Monogram’s A-7 Corsair II.
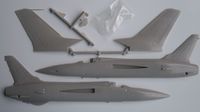
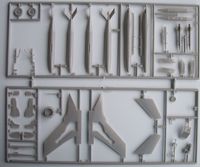
Back to the present. This kit’s quality is high for its release time, if less impressive now. See the pictures of the main components, and the single sprue of smaller ones. No high parts count in this box, even with two complete kits!
Two things serious modern builders need to know, right away: the level of detail is low by current standards, and all panel lines are raised.
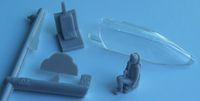
Level of detail: there’s no engine-bay structure at all, no wheel-well fittings, no internal cockpit detailing on the inner fuselage surfaces. The cockpit couldn’t be more basic; see the picture of the seat, instrument panel, pilot, and canopy.
That’s all there is.
Raised panel lines: I suppose now is as good a time as any to take a stand. You all know that cover essay Fine Scale Modeler magazine did on that huge Lockheed C-130 military transport, finished in a light scheme with the most prominent panel lines imaginable. Ever since, our hobby seems OBSESSED with panel lines.
I don’t share the obsession. Having been to lots of air shows, I observe that on real aircraft, about the least conspicuous things are the panel lines. They’re visible, of course, from a few feet—or sometimes a few inches—but they’re not accentuated in any way. Around engines, a bit of oily dirt sometimes accumulates, and around access panels, wear will be visible. But nothing like what I’ve seen at recent model displays and contests.
On kit builds, panel lines must be recessed if you want to accentuate them with a whole bunch of under-shading, counter-shading, layered colors, washes, and overdone weathering. My question: WHY?! --You couldn’t possibly do anything to your build that would make it look LESS like a replica of a real airplane.
If you must have recessed panel lines, you won’t be interested in this kit. Trumpeter’s release of the F-105 in 1/72nd has both recessed panel lines and a lot more detailed parts.
For those of you not determined to win every contest with panel line mania and hyper-detailing, let’s continue with this Hasegawa kit. I want to go a bit beyond an in-the-box review of just admiring the parts, and try to answer the question: how does it build?
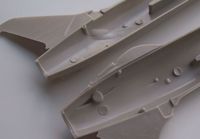
First, the condition of the parts on the sprues. As you might expect, the molds show their age some by allowing a bit of flash around many parts. This is by no means extreme. See the picture of the inside fuselage halves at the rear.
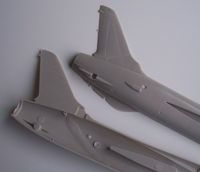 There’s some flash around the emergency arrestor hook assembly, and the opening for the jet engine nozzle. The picture below shows what a few minutes work with the #1 knife and fine sanding stick…
Cinch!
With a bit of similar cleanup, I found the parts fit to be everywhere quite good. The wing panels were a neat match to each other, requiring only a little bit of care around the forward-swept air intake points. The fuselage sides lined up very well, and I glued them together after weighting the nose with some lead shot, anchored with epoxy.
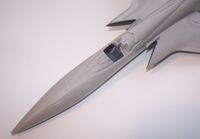
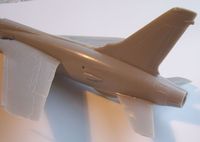
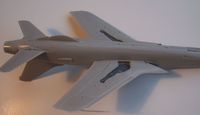
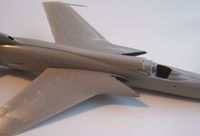
This is an article about the kit’s qualities, not about my own modeling skills, or my propensity—or not—to start putting in aftermarket details. I put the basic kit together straight from the box. The remaining photos should show how well the fit is. There's not a bit of putty anywhere.
Not that a little wouldn’t be useful, in places. The primary problem area I see is around the jet intakes where they meet the fuselage. The splitter plates, that stand proud of the fuselage sides, are not a close fit to the wing, and will certainly need to have some gaps filled. Of course you may want to augment the slight detail of the cockpit area, and the basic kit build would allow you to see through the fuselage from the jet intakes through the tailpipe.
Nothing said so far should take away from the idea that this is an easy to build kit, and will look perfectly fine once finished and displayed. I can't remember when I was able to put a whole basic structure together in so little time. The assembled model you see represents approximately three hours of time. If you are after a simple build, just for your own amusement, and have some interest in the subject matter, I can unreservedly recommend this kit. Thank you, Hasegawa USA, for re-releasing these classic kits.
Members of the clubs I meet with remind ourselves from time to time that “This is a hobby—we’re supposed to do this to relax!” Usually the line comes up when someone complains of the various pitfalls of assembling mismatched parts, in awkward assembly sequences, with hard-to-follow instructions, trying to fit multitudes of tiny parts into the right places, and the whole host of other problems that we know from experience from some of our builds. The kit will give you none of those aggravations. It’s a perfect candidate for an easy and relaxing build—TWO, actually—and let's not forget that since it IS just a hobby:
Build What You Want, The Way You Want To, And Above All Have Fun!

