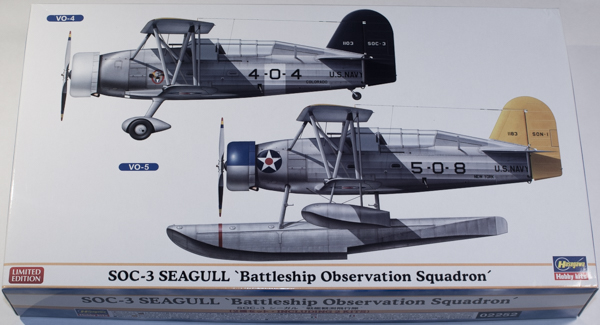
Hasegawa 1/72 SOC-3 Seagull "Battleship Observation Squadron"
By Matt Bittner
Introduction
Hasegawa first released the land-plane version of their kit in 1969 and the float-plane version released a year later, 1970. So, to say this is an older kit is an understatement. And in all that time, there hasn't been any other manufacturer release a SOC Seagull in 1/72, that I'm aware of. Because the kit is so old all details are raised but even so, the fabric effect is still nicely done. Yes, an older kit means there's usually more work to do, especially when that kit isn't as well detailed as a newer release, but that work will result in a very pleasing model.
As far as differences between the SOC-1, SOC-2 and SOC-3 it appears the only difference is in the engine, except for the SOC-2. SOC-1s and SOC-3s had interchangeable undercarriage but the SOC-2 was built as a land-plane only.
The Kit
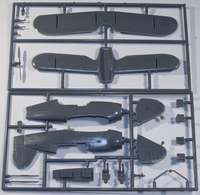
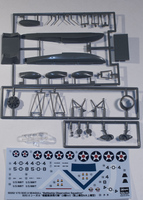
This release from Hasegawa actually contains two kits: one land-plane version and one float-plane version and unfortunately only one decal scheme for each. Each Seagull consists of 28 pieces of gray, injected plastic and one clear, injected canopy. The land-plane version also has a sprue with five parts, while the float-plane version contains an extra 16. The markings Hasegawa provides are for the following two aircraft:
- VO-4, Battleship U.S.S. Colorado (land-plane, with a black and white cowl, and white fuselage stripe)
- VO-5, Battleship U.S.S. New York (sea-plane version, with a yellow tail (NOT the same yellow as the wing; this should be "lemon yellow"), and a blue and silver cowl)
Each aircraft is finished in the typical finish for the time, aluminum lacquer overall with the upper wing finished in yellow on top. Decals appear to be typical Hasegawa so while some like them, I do not. They appear to be in register, though.
I will note up front there are some aftermarket items released for this kit. I haven't reviewed it but Falcon has a vacuum-formed canopy for it, which it really needs. Starfighter Decals has a set of decals for Seagulls in wartime colors, a photoetch set of rigging and they have also released a resin cockpit set for it, which I feel the Hasegawa kit really needs. Finally, if you want to finish your SOC in pre-war colors, then Yellow-Wings has a decal sheet of those. Unfortunately they only released Part 1 and no others. Plus if you don't mind having a Seagull mixed in with a bunch of other types of aircraft, one of the newest releases from Starfighter Decals has a SOC-3 as it flew during Operation Torch and a SOC-1 as it flew at Midway.

|
As with most aircraft models construction starts with the cockpit. Hasegawa definitely went skimpy in this area providing a floor, seats for both the front and rear cockpit, two pilot figures, and actually a decent-looking radioman's console, probably the best part of the cockpit. Also included is a decal for the pilot's instrument panel, the panel being molded as part of the fuselage halves. Once the cockpit is assembled and painted, then it's attached to one fuselage half and the halves glued together. You'll also want to add the instrument decal after the fuselage halves are assembled.
Next construction turns to adding the horizontal tail pieces, lower wing and engine/cowl/prop (the prop probably best left off until later). Don't forget to add the piece to the back, inside of the engine that will allow the prop to spin; even if you decide to glue it so it doesn't move still add this part to keep the prop "tight". Also added at this stage are the stab supports (again, probably best left off until the end) and canopy, once its masked.
The rest of the instructions are best followed after painting and decaling. This is because you glue the struts to the lower wing and fuselage prior to gluing the upper wing on. One thing to be aware of, though, is the way Hasegawa has molded the struts. They include a cross-piece between the ends which are inserted into a slot in the wings. This is not accurate at all and it's best to take the cross-piece off and glue it separately into the slots, applying any filler before painting. This will look the most accurate even though Hasegawa did this to help with building.

|
Finally you turn over the kit to add either the landing gear or the floats, for one each of the models.
Conclusion
The Hasegawa 1/72 SOC Seagull is the only kit of the subject and while the molding is quite old, it still holds up well. Sure, you'll probably have some flash to deal with due to the age of the molds but it shouldn't be difficult to remove and must be endured of you want a 1/72 model of the type. Couple it with all the aftermarket and you'll have an excellent example of the SOC Seagull in 1/72 sitting on your shelf.
I definitely thank Hasegawa USA for letting me review this release.
