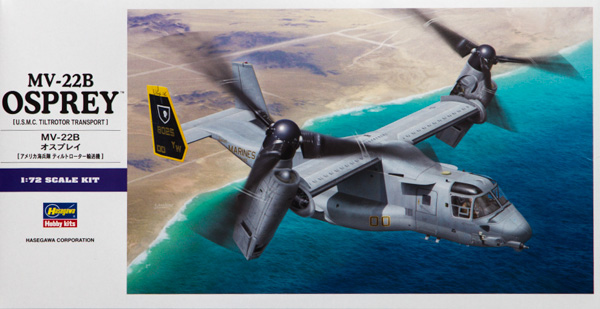
Hasegawa 1/72 MV-22B Osprey
By Chris Banyai-Riepl
Overview
 The MV-22 Osprey was first conceived in 1981 from a US Department of Defense (DOD) Joint-service Vertical Take-off/landing Experimental program. While the initial design flew in 1989, because of complexities with the design, and the fact it was the first of its kind, it was not until 2007 the first US Marine unit became operational.
The other operator of the MV-22 is the US Air Force and between the two forces, the MV-22 has seen active duty in Afghanistan, Libya and Iraq. Eventually the US Navy will also have Ospreys operational for combat search and rescue, fleet logistic support, and special warfare missions.
For a nice overview of the current fleet of US Ospreys, check out this useful pamphlet from Boeing covering the MV-22B and other variants.
The Kit
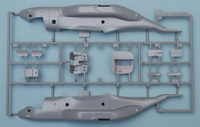
 When Hasegawa announced a new-tool 1/72 V-22 Osprey, modelers interested in this plane rejoiced. Previously, the only choice was to heavily modify the ESCI/Italeri kit, which was based on the FSD prototype aircraft. With this new Hasegawa kit, that challenge goes away. What we have is a nicely tooled accurate Osprey that looks like it will go together quickly and easily, which is not an easy feat given the unique shape.
 Jumping into the construction, the kit comes with a fairly simple interior. There's a single-piece cockpit tub and a separate rear bulkhead piece. While the cockpit tub could probably use some extra detailing, most of the interior won't be visible through the small windows. The seats are separate, and the kit comes with a pair of pilot figures to help fill out the interior. Also separate are the control columns and instrument panel, while the canopy gets a separate overhead panel. For the instrument panel, side consoles, and overhead panel, there are decals providing detail.
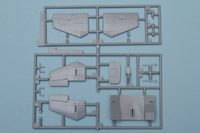 With the cockpit done, the fuselage can go together. Before the halves can be attached, though, you'll need to add the insert for the main gear wells and a rear fuselage bulkhead piece. This is a kit that won't need any weight in the nose, so enjoy not having to hunt for weights as you glue the fuselage halves together.
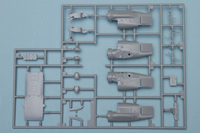
Once those are together the main wing assembly can go on, which is made up from a one-piece upper wing and two separate lower wings. The flaps are separate and can be posed up or down. The vertical stabs are split into right and left halves, while the horizontal stab is split into upper and lower halves. With that in place, and the large rear fuselage insert, the Osprey is mostly complete.
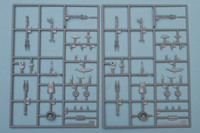
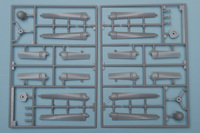 The next big step is the engine nacelles, and these really make the Osprey. Each nacelle comes in right and left halves, with inserts for the exhaust, scoops, intakes, and other small details. There is also a rubber grommet for attaching the nacelle to the wing, allowing it to pivot. For the prop rotor blades, these are made up from two pieces that fit onto a central hub. That assembly then fits into the propeller hub, which comes in two main pieces, with three small vanes for the front of the hub.
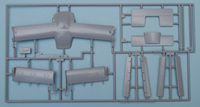 The remaining bits cover all the various antennae, strakes, and landing gear. For the antennae, there are quite a few, from the pitot tubes on the nose to the blade antennae on the rear fuselage. The nose also has the FLIR as a separate piece, as well as the refueling probe. The landing gear is fairly simple, with separate wheels and detailed single-piece struts. With the separate gear doors in place, the Osprey is finished and ready for some color.
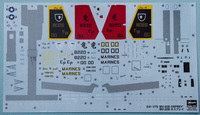 Unfortunately, this is a modern military aircraft, so color really doesn't figure in much. The two options provided in the kit are finished in the standard tactical paint scheme consisting of three shades of gray. The first option is from VMM-165 from MCAS Miramar in 2011. This is the Osprey seen in the boxtop artwork, and it brings a bit of color in the form of black and yellow tail planes. The second option, from VMM-265 from MCAS Futenma, also has a bit of color, this time in the form of red fins. The decals provide the whole fin as a decal, or the individual markings separate so you can paint the base color. The decals are nicely done and in addition to the unit markings, they also contain stenciling and walkway markings.
Conclusion
Hasegawa has done a great job with their Osprey kit, and it will undoubtedly garner the attention of aftermarket companies with photoetch, resin, and decals soon to follow. Knowing that, stock up now, as this looks to be a fun build and a great kit to put next to your Marine Corps AV-8 and CH-46. My thanks to Hasegawa USA for the review sample.
