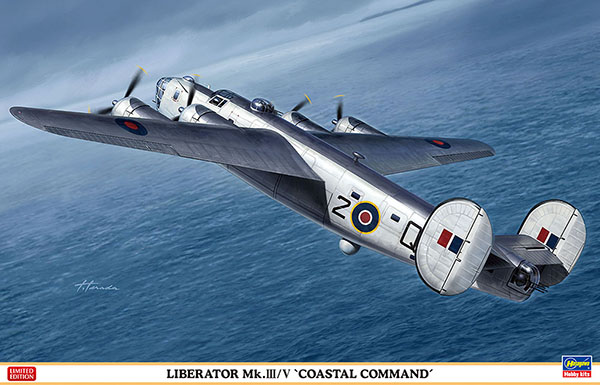
Hasegawa 1/72 Liberator Mk.III/V 'Coastal Command'
By Chris Banyai-Riepl
Overview
Alongside the Boeing B-17, the B-24 formed the mainstay of the USAAF strategic bomber force during the Second World War. Its long tapered wing and twin vertical fins made it a distinctive sight in the skies over Europe. The durability and capabilities of the B-24 made it attractive to the British as both a strategic bomber and a maritime patrol aircraft. The Liberator Mk III was a B-24D built for the RAF and Coastal Command, with the Liberator Mk V being the same but with less armor and more fuel for greater range.
The Kit
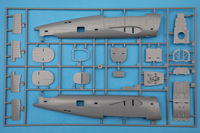
When this showed up on my doorstep, I was excited because this was the first time I managed to see the Hasegawa B-24 in person. I have had several Academy kits over the years, and of course the classic Revell and Airfix kits, but for some reason I never picked up the Hasegawa kit. Upon looking at the plastic in the box, I have discovered that perhaps that was a mistake on my part. This kit is nicely detailed and carefully engineered to reduce the risk of marring the clear areas. I did a quick search online to see what I could find, as this kit in various iterations has been out for a while now, but oddly there is not much out there on the Hasegawa B-24. So with that in mind, here's an in-depth look at the plastic in the box.
|
|
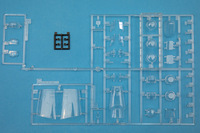
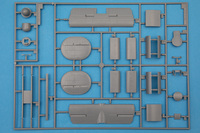
First up, there are lots of parts, and lots of clear parts. The engineering of this kit shows up right away as it involves those clear parts, with the forward fuselage molded in clear as a way to minimize fitting all the small windows in this area. This is a great touch, but I would still highly recommend picking up a pre-cut mask set for this one, as even with those molded in place, you still have a lot of masking to do. The overall mold quality is superb, with petite recessed panel lines throughout and clean, flash-free parts. As this release is for a British Liberator, the decal sheet is noticeably tiny, understandable as the British Liberators did not have much in the way of markings.
Jumping into the assembly, as you'd expect this kit begins with the interior. There are two main assemblies for the interior, the forward cockpit/nose interior, and the main fuselage interior. The main fuselage interior includes the bomb bay, rear fuselage side gun area, and forward upper turret area. This is built up from six bulkhead pieces and three floor pieces, with other details including the side guns and the ASV search radar. Once this assembly is together, it gets inserted into one fuselage half, the two-spar wing support gets added, and the main fuselage gets closed up. For the forward cockpit/nose interior assembly, this has the main cockpit getting two seats, a center console piece, a separate instrument panel, and two control wheels. On the forward bulkhead goes the nose interior floor, and that's it for the interior build. The nose is built up from clear parts, with two side pieces, that big greenhouse nose, and a separate top piece that includes the cockpit windows. There are two separate cockpit side windows as well, a flat option and a bulged option. The instructions also indicate to add 90 grams of weight (it is a B-24 after all, a notoriously tail-heavy model) before adding the nose assembly to the main fuselage.
|
|
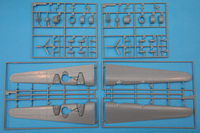
With the fuselage together, attention can turn to all the bits and pieces that get added to the outside. Big pieces first, the tailplanes are next, with the two vertical fins molded as single pieces and the horizontal stabilizer split into upper and lower halves. This fits into an opening on the rear fuselage. Moving forward, there are a slew of small windows on the fuselage sides, a total of twelve to put in place between the two sides. On the underside, you get to make the decision to go with either an open bomb bay or closed. For an open bay, there are a handful of 500lb bombs that can be added in the bay to fill it up. As a Coastal Command Liberator, though, the payload should be 250lb depth charges, so best to source those elsewhere (I know Belcher Bits has them in their catalog, and there might be other sources as well).
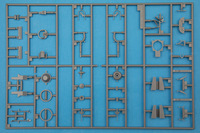
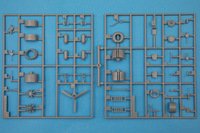
With the decision between open or closed bomb bay sorted out, the next step is adding the wings. The Liberator has a nice wing-fuselage joint that can easily be a no-filler joint. With the positive fuselage spar added, this could very likely be the case with this kit. The wings are split into upper and lower halves, with some inserts going inside for the wheel wells. The engine nacelles are fairly complex and do a good job of capturing the unique shape of the Liberator nacelles. There is a separate front cowl piece, an upper and lower mid-cowl, a two-piece engine assembly, and an upper/lower rear cowl assembly. These finished engine assemblies fit up onto the wings, which then gets separate superchargers and the main landing gear. The landing gear is sturdy looking, with a one-piece main strut and two support struts making up the main assembly. The main wheel has a separate two-part hub, which will make painting the tire much easier. On the nose gear side, the nose strut is added earlier on, and the nose wheel likewise has a separate two-part hub.
|
|
With the wings on, this Liberator is pretty much finished. The remaining parts include the upper and rear turrets. The upper turret is the standard A-3D turret and has a seat, ring, and two guns fitting into the clear turret piece. The rear turret is a Boulton Paul turret, with four 7.7mm guns. This has the ring and guns fitting together, and the turret itself gets built up from three clear parts and one solid part. With these turrets in place, attention can turn toward painting. As mentioned earlier, with a dozen separate fuselage windows, two turrets, and all the nose and cockpit windows, a masking set will significantly simplify the painting process.
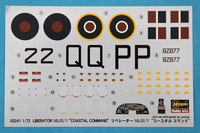 On painting, the schemes are very similar for the two options provided, with both featuring a camouflage scheme of extra dark sea gray over white. The only difference between the two are the demarcation lines. Option 1 is a Liberator Mk V from 86 Squadron in 1943. This aircraft has a high demarcation line and the ASV radar in the belly. Fuselage markings consist of a 2 and a Q. The second option is a Liberator Mk III from an unknown squadron. The demarcation line on this lower, with the fuselage demarcation curving down to the top of the wing. The plane does not have the ASV radar, and has a fuselage code letter P.
Conclusion
While there are plenty of options for Liberators in 1/72, this kit definitely falls near the top of the list. The clever engineering coupled with the fine external detailing will make for a nice looking stock model, and for those wanting more, there are plenty of aftermarket sets to spruce up the simple interior. My thanks to Hasegawa USA for the review sample.
