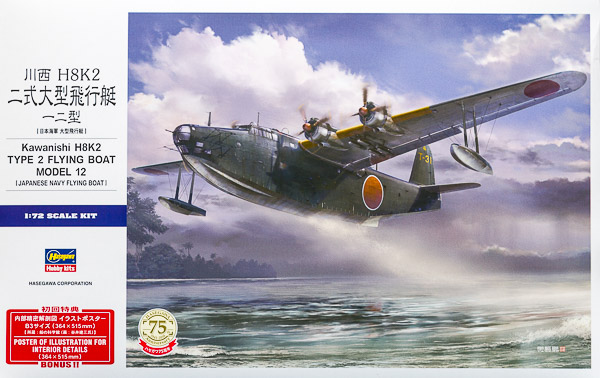
Hasegawa 1/72 Kawanishi H8K2 Type 2 Flying Boat Model 12 "Emily"
By Chris Banyai-Riepl
Overview
Designed as a larger, longer-ranged patrol flying boat to supplement and replace the Kawanishi H6K "Mavis", the H8K was a high-wing flying boat that ultimately had an impressive array of defensive weaponry. Initially, though, the handling of the type was poor, which necessitated a redesign of the hull. This delayed entry of the type until 1942, and as a result the H6K still managed to see extensive service after its replacement showed up. The H8K Emily was used extensively throughout the war, but few survived the conflict. One aircraft was taken to the United States for evaluation, where it remained until 1979 when it was returned to Japan and underwent restoration. This surviving example is currently on display at Kanoya Air Base in Kagoshima.
The Kit
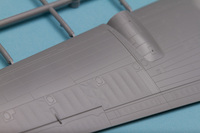
Fifty years ago, Hasegawa released their first 1/72 Kawanishi flying boat. It was typical of models of that time, covered in a fine dusting of raised rivets and featuring little in the way of detailing. Still, it remained the only game in town for anyone who wanted a scale model of the Emily, other than a couple 1/144 options. Now, in 2017, Hasegawa has revisited this large flying boat and produced a beautiful rendition of the Kawanishi H8K flying boat. No rivets are found on this kit, but instead we get recessed panel lines, subtle fabric texturing, detailed engines, a solid interior, and a full complement of figures. The large decal sheet provides markings for three aircraft. So, with that overview out of the way, let's jump into the construction.
|
|
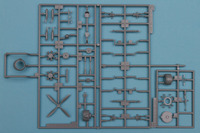
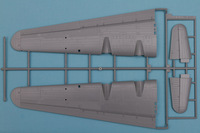
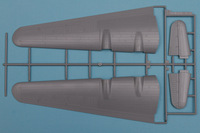
The instructions start you out with the engines and wings, which is a bit of a departure from most kits. The engines feature both banks of cylinders as separate pieces, along with a separate crankcase housing. The cowl is molded as one piece, which keeps the shapes and details nice, but leaves the depth of the top scoop a bit shallow. The wings are split into upper and lower halves, and you'll want to pay attention here as there are different holes to hollow out if you wish to show your Emily with torpedoes or bombs under the wing. There is also wing-mounted landing lights that fit in a specific manner, and the instructions are clear in pointing that out as well.
|
|
With the wings together, you get to add the back end of the engine nacelles. These are split into upper and lower halves, and the exhaust pipes fit onto this assembly. On the underside of the wing there are three clear panels at the wing root to add in, and the landing light covers. Once those are on and masked, you can add the engine nacelles and set the finished wings aside (or paint them up first, should the fit make that an option).
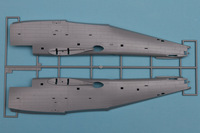
Next up is the fuselage inner bits, starting with the wing beam assembly. Thankfully, Hasegawa has decided to go with a very sturdy wing beam structure here, with two main spars extending several inches into the wings. This will be a very solid joint and you won't have to worry about seams popping open on this one. These beams are combined with a vertical fuselage bulkhead to ensure that everything stays nicely aligned as well.
|
|
Also on the inside is the general cockpit floor assembly. While there are quite a few windows on this fuselage, realistically not much can be seen inside, thanks to the size of the windows. That said, the kit does come with a fairly thorough structure, running from the forward cockpit through the mid-section to the center rear fuselage. The cockpit gets a radio stack, main instrument panel, and engineer's panel, all of which have decal details to go down on the raised detailing. There is also a control yoke assembly made up of a U-shaped piece with two wheels mounted on it. Seats are numerous, and there are numerous figures to fill them out.
A note on the figures, these are superbly done, apparently sculpted by Mr Takeichiro, the man behind the amazing Modelkasten figures. There are six different poses, two standing and four sitting, and the figures all feature separate heads and arms. The detailing throughout is exquisite, right down to their detailed gloves and life vests. Placing these figures in their locations will more than offset any lack of interior detailing, and will really bring the subject to life.
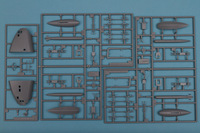
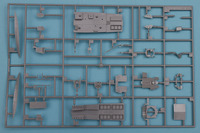
With all the innards put in place, you can button up the fuselage and build up the beaching gear. As this is a flying boat, the inclusion of the beaching gear is critical for those wanting to not build a water base for the model. The beaching gear consists of a main strut and two wheels, which both have separate hub inserts. There is also a box that is affixed to the upper outboard portion of the strut. These make up the front set, while the back wheel assembly is a smaller affair, with a strut assembly, two small wheels, a pole, and a flotation box. With those together you can set your Emily on wheels and turn to the next steps.
|
|
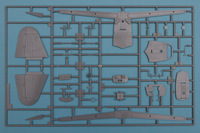
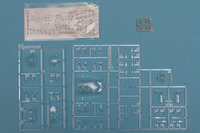
The wings are together, so the next bits are the stabilizers and vertical fin. All three of these are separate, and all are split into halves as well. Like the wings, these feature some very nicely done fabric texture that is quite subdued. At the same time of throwing these together, you get to start on the nose and tail turret assemblies as well, which have detailed guns and mounts that will get trapped in clear parts. The rear turret clear parts are split into right and left halves, while the nose one is made up of a single front piece and a top piece (along with several small side windows.
While on the subject of the nose, this is separate from the fuselage. This could mean that we will see the H8K1 Type 11 from Hasegawa, as that pretty much had all its visible differences in the nose. For this one, you get two nose halves and a three-piece floor assembly to build up the structure. A rear bulkhead provides a very solid mount for the nose to the fuselage, and should ensure a solid filler-free connection. Once the nose is on, there are two nose chine pieces to fit in place, then you can add the wings, outrigger pontoons (split into upper and lower pieces, with a one-piece strut that has a section of the top of the float for a clean installation), and propellers. Finally, there are all the radar antennae and the choice of torpedoes or bombs for the wings, both of which are nicely detailed replicas of those weapons.
|
|
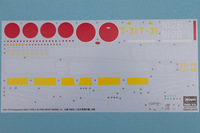
For painting, I'm afraid you don't have much choice when it comes to camouflage schemes. You get green over gray, pretty much, and the only variation will be in the tail markings. The first choice on the decal sheet is T-31 from the Takuma Naval Flying Group. The second option is N1-26 from the 802nd Naval Flying Group, and the third is 801-86 from the 801st Naval Flying Group. Regardless of which scheme you choose, the decal sheet also includes extensive stenciling and detail markings that will add quite a bit of realism to your finished model.
Conclusion
Without a doubt one of the most anticipated kits from Hasegawa in quite some time, this new tool H8K2 definitely hits all the high points. Good surface detailing, clever engineering, and some superb figures will make this one quite popular, and once the aftermarket folks go to town on it, I'm sure it won't be long before we see someone building one up as the sole surviving example during its restoration, when it was taken apart and looking well worn. My thanks to Hasegawa USA for the review copy.
