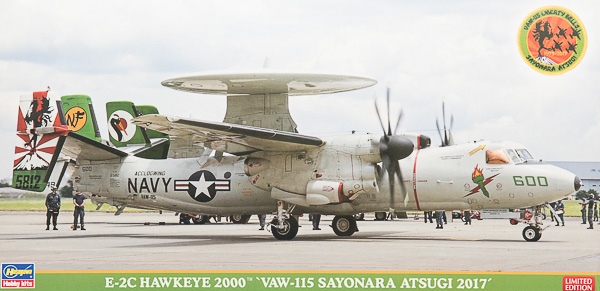
Hasegawa 1/72 Grumman E-2C Hawkeye 2000 "VAW-115 Sayonara Atsugi 2017"
By Chris Banyai-Riepl
Overview
The Grumman E-2 Hawkeye has been the eyes of US aircraft carriers for decades, and the most recent variant looks to keep the design in the skies for many years to come. For decades, several units called Atsugi home, but this year saw the last of the Hawkeye units leave that base in Japan as part of the drawdown of fixed wing aircraft at Atsugi. This release from Hasegawa helps commemorate the last VAW-115 Hawkeye to leave Atsugi.
The Kit
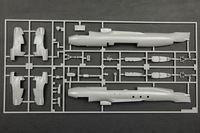
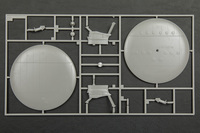
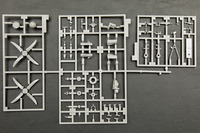
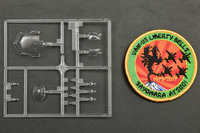
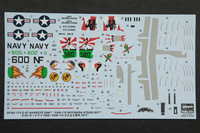
Hasegawa's Hawkeye kit has been out for a while, but it remains the best choice for an E-2C in this scale. Molded in light gray plastic, the kit has some of the best detailing in a 1/72 Hasegawa kit, with recessed panel lines, dropped flaps, and relief detail for the interior. In fact, the only thing that is really missing here is a folded wing option. For this release, you get something a little special, as this is a limited edition release highlighting the last E-2C from VAW-115 to leave Atsugi. That unique item is a patch commemorating the event, which will make for a nice display piece next to the finished model. For decal options, the decal sheet is large, but there's just a single option, that special scheme for VAW-115, which has quite a few markings across the fuselage and tails.
|
|
Jumping into the build, we begin with the cockpit. As noted earlier, this has some very nice relief detail on both the instrument panel and the side consoles. The main cockpit floor doubles as the roof for the nose wheel, so there's stuff to assemble on either side of this piece. A separate bulkhead, a couple of seats, two control columns with separate wheels, and the instrument panel make up the bulk of the cockpit interior. Missing are any representation of seat belts, so you'll want to add those via your favorite belt method. The nose wheel well has separate inserts for the top and sides. This completed assembly is then trapped between the fuselage sides. An important note in the instructions is to add 30 grams of weight in the nose. Hawkeye models are notoriously tail heavy, so do not skip this step. Once the fuselage is together, you can finish up the cockpit area by adding the roof box cluster to the canopy and adding that assembly onto the fuselage. There are separate side windows provided to ensure the correct bulbous look to those. Some details on the nose fit underneath a clear nose piece as well.
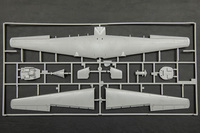
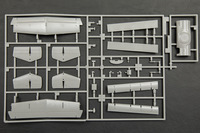
Moving on to the flying surfaces, the wings are long and thin, but warp-free. The upper wing includes part of the fuselage, while the lower wing is split into right and left halves. You will want to take extra care to make sure that the wing is properly aligned to the fuselage, as the radome will rest on top of that and any misalignment will be readily apparent. The stabilizer and fin assembly is probably the most complicated of any aircraft, with two vertical fins sitting on top of the stabilizer and two more fins capping the ends of the stabilizer. The horizontal stabilizer is split into upper and lower halves, and the outer fins are split into right and left halves. Also on those outer fins there are stabilizer caps. All in all, there are ten pieces that make up this assembly, and like the wings, you will want to take particular care in ensuring alignment of all the pieces as anything out of place will become immediately apparent.
|
|
The next big assembly is the engine pods. These incorporate the main wheel wells, so there are extra bits to fill that area. You get a separate exhaust, a main wheel well insert, and a separate front intake piece that all fits into the two-piece main nacelle assembly. The propellers are also nicely done, with two sets of blades sandwiched between a two-part hub. These completed nacelles fit onto the wing, and their fitting there looks to be solid and precise, a good thing as alignment of the main landing gear is critical to ensuring your Hawkeye has the proper stance. Speaking of landing gear, both the nose and main gear assemblies are nicely detailed, with the main strut assembly having no less than ten pieces each and the nose gear assembly built up from six parts. The gear doors are many and all have locating tabs that will make assembly much easier.
|
|
The last bits to add on are the flaps, radome, and other small bits and pieces. The flaps are left until the end for painting purposes, as the interior areas of these are painted red. There are two options for these, either flaps up or flaps down. The difference is in the connectors that you put in place on the flaps. For the radome, it is split into upper and lower halves and is designed to incorporate a rubber grommet to alleviate the need to glue it in place. The mounting pylon incorporates the main mount body and three main struts, while additional support struts are provided separately. This finished assembly then rests on top of the fuselage. With some careful dry fitting beforehand, there does not seem to be any reason as to why you couldn't leave this whole assembly off until after painting and weathering. Other final bits include windshield wiper pieces and various blade antennae that are found all over the aircraft.
|
For the marking options, there are two choices for the same aircraft, with the only difference being the line of text over NAVY on the rear fuselage. The aircraft is #600 from VAW-115 "Liberty Bells" and is a rather colorful bird. Finished in overall gloss gull gray, the aircraft has all four vertical fins painted up, along with wingtip flames and nose markings. The tail markings are a combination of decal and paint, with the fins finished in a medium green. The outboard fin has Mt Fuji and a red/white sunrise on it, while the inboard fins have circle emblems on all faces. In addition to the unit markings, the decal sheet provides quite a bit of stenciling and detail markings, which will help break up the monotony of the large empty swaths of gull gray. All told, this will be a fairly easy kit to finish, marking-wise, and with the included commemorative patch, you will have a nice display when done.
Conclusion
I am sure this won't be the last time we'll see the Hasegawa E-2 kit, so it is not a tough kit to find, but the included patch sets this release apart from the other boxings. Hasegawa's Hawkeye kit is a nice, fairly simple build that can easily be a relaxing subject to finish. My thanks to Hasegawa USA for the review sample.
