Hasegawa 1/72 F-16BM JSF Test Support
By Chris Banyai-Riepl
Overview
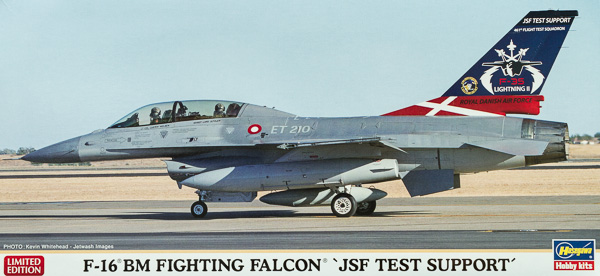
Say what you will about the F-35 (and I'm sure the language will get saltier the longer the program continues to rack up budget overruns and problems surmount), there are still dozens of nations interested in the aircraft and planning for its eventual arrival. Denmark is one of those nations, and they have allocated some of their resources to preparing for the F-35, including utilizing an F-16BM for JSF Test Support. This is the subject of the latest re-release of Hasegawa's 1/72 two-seater F-16 kit.
The Kit
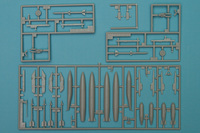
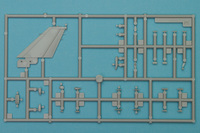
 The Hasegawa 1/72 F-16B kit has been around for quite a few years, but it still holds up well in today's modeling world. Molded in light gray plastic, the kit features finely recessed panel lines, a good mix of stores for under the wings, and a complete two-seat upper fuselage (unlike other manufacturers, who have lowered costs by creating separate forward fuselage sections for their two-seat F-16s). A nice addition to this kit are photoetch stiffening plates, and the decals offer two options of applying the markings for the JSF Test Support aircraft.
 Building this F-16 is pretty straightforward, and for anyone that has built an F-16 in the past, there will be no surprises here. The interior is typical for a 1/72 Hasegawa kit, with basic details supplemented with decal instrument panels and side consoles. The seats would definitely benefit from replacement by resin examples, should you decide to display the cockpit empty, but if you opt for the included pilot figures, they should be fine. Speaking of which, the pilot figures are rather well done, and one should not hesitate to use them if you want a bit of human in your finished model.
 With the interior done, the next step is putting the fuselage together. This is one of the areas that's really great about the F-16. Due to the manner that it's built, a horizontally split fuselage results in very minimal seam work and an easily managed cockpit setup. For this kit, you also have to add the front and rear main wheel well bulkheads, but other than that, this fuselage is together in a flash, and the only real challenge is the intake. This is split into right and left pieces, with a separate intake that gets a separate splitter vane. The nose wheel well is also separate, so it's possible to paint this up beforehand, should you wish to do so.
 The next step is, well, finishing the model. Yes, it is almost that simple. The wings and stabilizers are molded as solid pieces, so simply plug each wing in and attach the stabs and you have an almost complete F-16 shape. The vertical fin has a separate side to the base, but it too is a simple addition. The landing gear is sturdy, and again very straightforward for assembly, and with a bit of extra cleanup should look quite nice. The rest of the assembly really focuses around the small details that convert this kit into a modern F-16.
 These small details are where the fun really begins. First up, the photoetch parts. These are presented on a small sheet with no fret to trim away. I really like this method, as there is nothing to clean up. These stiffener plates fit across the upper center fuselage, and some of them will need gentle bending to conform to the fuselage contours. The other modernization detail are the four vanes found on the nose ahead of the windscreen. These are provided as four individual vanes to apply. While I would have liked to have seen this as a single piece, this kit predates those vanes and so this is really the only way Hasegawa could have done this. Finally, there are wing and fuselage fuel tanks, and Sidewinders for the wingtips, and this is ready for painting.
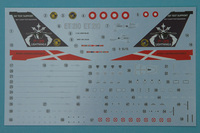
 Danish F-16s are painted up like just about every other F-16, with gunship gray FS36118 over the upper wings and rear fuselage, medium gray 36270 over the forward upper nose, and light ghost gray FS 36375 on the undersides. The standard Danish markings consist of roundels in six locations and an aircraft number (in this case, ET 210) on the upper mid-fuselage. What really sets this one apart, though, is the colorful tail markings. This plane has the lower fin painted in red with a white cross, replicating the Danish flag, while the upper fin is blue with an F-35 head on with lightning bolts in white behind it. The decals provide these markings as either a two-part decal containing the red and blue backgrounds, or as individual markings to be used over painted red and blue.
 The decals are nicely printed and in addition to the individual aircraft markings, also include plenty of stencils. For those who opt for the painting of the blue and red, be aware that sometimes the Hasegawa white can be somewhat translucent. It might not be too apparent here, though, as the white doesn't cross over any color demarcations.
Conclusion
 This is a colorful option for the Hasegawa F-16B, and the potential for creative display options abound. Personally, I am tempted to build this one up with a crew, taxiing out for a flight and passing a grounded F-35 that is surrounded by technicians in white lab coats all shrugging their shoulders (except for one, who would be swinging a mallet into an open avionics bay, of course). My thanks to Hasegawa USA for the review sample.
