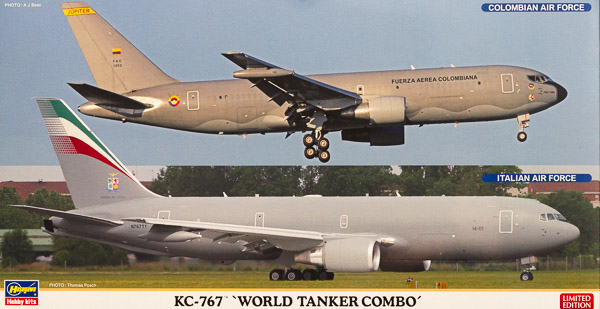
Hasegawa 1/200 KC-767 "World Tanker Combo"
By Chris Banyai-Riepl
Overview
The KC-767 evolved from a need to field a replacement for the aging fleet of KC-135Es in the US Air Force inventory. The story of the development of the KC-767 is not a simple one, filled with politics and scandals, but it appears to be on track now. In the meantime, foreign nations have adopted the type, with Japan and Italy both taking deliveries, and Colombia taking delivery of an Israeli Aerospace Industries conversion of a 767 to the 767 MMTT (Multi Mission Tanker Transport).
The Kit
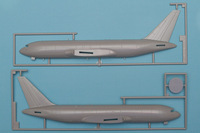 The Hasegawa 1/200 767 kit has been around for quite a few years, and is from their first generation of 1/200 airliner kits. This original version, released in 1984, was of a 767-200, the short fuselage version, and featured raised panel lines throughout and open cabin windows. Ten years later, Hasegawa modified the fuselage molds to make a 767-300, leaving it up to the modeler to cut the fuselage down if they wanted a 767-200. When the 767 tanker project moved forward, it was designed around the 767-200ER airframe, so Hasegawa had to tool up a new 767-200 fuselage, and that is what we get in this kit, complete with recessed panel lines and no cabin windows.
The rest of the kit is the same plastic that we've seen for decades, with petite raised panel lines and engraved control surfaces. The kit comes with a stand, and Hasegawa's unique way of handling nose weight: a bulkhead with two metal screws. As this is a tanker kit, we also get a new set of sprues with all those tanker parts, which includes both the flying boom for the fuselage and two styles of wing tip refueling pods. The decal sheet includes three options, so even after building both kits in the box, you'll still have one option left over.
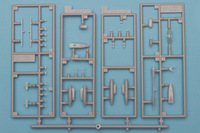 Like most Hasegawa 1/200 airliners, construction is very straightforward in this kit. The instructions start with the CF-6 engines, and these are split into right and left halves with feature separate fan disks and hot sections. This does mean that you'll have a seam on the inside of the intake that will be tough to clean up, and for those who would rather not deal with this, there are aftermarket resin replacements.
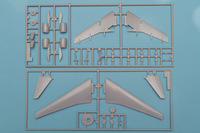 The wings are next, and again these are simple, with upper and lower halves. The lower wing is not a full lower wing, though, so you'll end up with a seam running along the underside about a quarter of the way in from the tip. There are two styles of wing tip refueling pods, highlighting the differences between the Boeing and the IAI design teams. These are molded as one piece, with separate impellers.
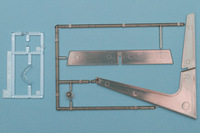 Moving on to the fuselage, this has quite a bit of extra work involved to make sure all the proper bumps and antennae are represented. You will want to follow the instructions very closely here, to make sure you open up all the appropriate holes for the specific option you're building. In fact, the instructions devote an entire page to just those pieces, in side, top, and bottom views for the Colombian, Italian, and Japanese versions. While some of the bumps and such are the same across all three, their locations can vary, and even the flying boom has differences between the Italian and Japanese aircraft.
The instructions also indicate that you'll need to fill in some panel lines on the exterior, where the larger cargo doors are. This is also where you'll add the two screws, which fit into a bulkhead. I would recommend adding just a bit of epoxy or super glue, just to prevent them from wiggling loose (unlikely, but why take chances). All that's left is to add the wings, stabilizers, engines, and landing gear, all of which is simple and straightforward, and you can paint this plane up.
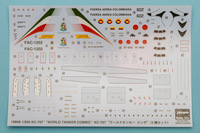 Painting is going to be incredibly simple for two of these options: they're finished in overall gray. The Colombian one has a two-tone camouflage, with a hard-edged wavy line separating the two colors. The Italian option is finished in the same dark gray as the Colombian option, FS36270, while the JASDF option is finished in overall light gull gray, FS 36440. Aside from the Italian option, which features a large green, white, and red tail swoosh, the markings for all of these are fairly sedate, consisting of national insignia and small unit emblems. The decal sheet does include a fair bit of stenciling and other markings, though, so the finished model will look suitably busy, for a generally clean airframe.
Conclusion
This is a nice re-release of the Hasegawa 1/200 767 kit, and it's good to see the -200 fuselage back in play. The added refueling bits for the KC-767 is great as well, as we will be seeing these in USAF markings before long as well. Perhaps Hasegawa could treat us to a future release of this kit with a 1/200 F-15 or F-22 to hang from the boom, since they give us the option of putting this plane on a stand. My thanks to Hasegawa USA for the review sample.
