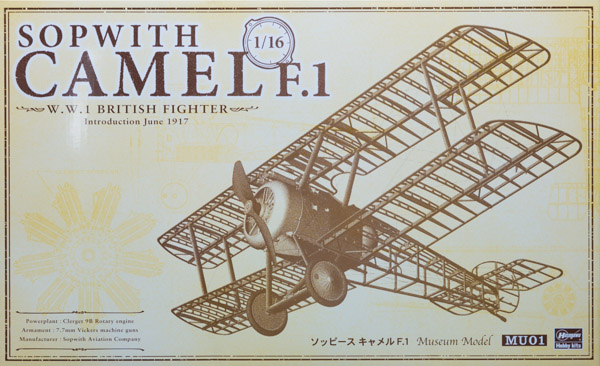
Hasegawa 1/16 Sopwith Camel F.1
By Chris Banyai-Riepl
Overview
 One of the most famous aircraft of the First World War, the Sopwith Camel has been fairly popular in the modeling realm. Standing at the pinnacle of scale Sopwith Camel models has to be the Museum Series Hasegawa 1/8 kit from back in the 1980s. This was an impressive multi-media kit that had everything the original had, as well as an impressive price tag. This new release from Hasegawa mimics that original release, but simplifies things by being 1/16 scale and almost entirely plastic.
The Kit
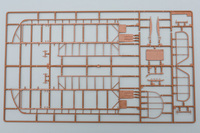
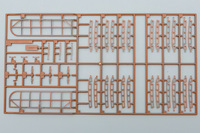
 With just a glance at the box, it is immediately apparent that this is not your typical kit. Early aviation featured some exquisite construction, but it was generally hidden under fabric covering. This kit removes that fabric, revealing everything underneath. That means that you'll have a lot more parts to clean up and assemble, but this kind of strip-down kit is very impressive when finished. The kit comes molded in several colors of plastic, and also includes string and rubber wheels for added realism.
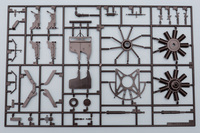 The instructions are very clear, which is a good thing given the complexity of assembly, and generally tends to follow subassemblies. The first one is the engine, which looks quite nice. The main engine body is split into front and rear halves, which might pose a problem with seams around the cylinder heads. It's large enough of an engine, though, that cleaning these up should be easy, if tedious (I have heard that using string or dental floss can work with these kind of seams; just move it quickly to build up a bit of heat & the seam is smoothed out). Each cylinder has a separate cap and two separate rocker arms, as well as a separate spark plug. The rear exhaust collector is one piece, and the instructions provide a diagram for routing the plug wires.
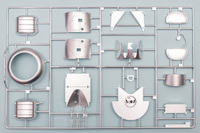 Moving to the cockpit, be ready for quite a bit of work here. The control column, for example, is made up from no less than five pieces, and that is connected to the wires leading to the control surfaces. The main fuel tank is split in halves, and although it is nicely plated, the seam will undoubtedly require repainting. There is a separate fuel cap as well. The fuselage sides are molded as right and left pieces that incorporate the cabane struts and the landing gear struts, and these are connected by the cockpit floor pieces and ten cross beams. This will undoubtedly remain a weak structure until other details such as the instrument panel (which gets separate decal instruments with individual clear lenses), gun cartridge boxes and link chutes, and oil tank assembly are added.
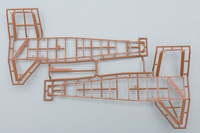
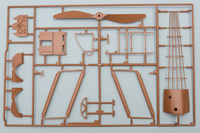 Next up are the flying surfaces, all of the control surfaces are designed to be moveable. What's more, they're designed to be moveable in conjunction with the cockpit controls, so when you turn the rudder, you'll see the rudder pedals move. This means there's several pieces that need to be kept glue-free, and the instructions are fairly clear on those parts. What they don't mention is that they will also need to be kept paint-free, so you will want to paint these subassemblies first, before putting them all together. The rudder is probably the simplest, as it just has a couple of hinges and a control horn. The stabilizer is likewise simple, although there are some extra rib details to add to that assembly. Once those are done, the instructions document how to run the cabling from the cockpit to those control surfaces. The kit comes with string for this purpose, and it should do well for that, but those wanting something a bit more realistic might look into using wire.
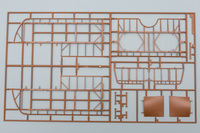 The wings are a bit more involved. While the ailerons are similar to the elevator and rudder, the wings themselves feature separate ribs. This allows for all the fine rib detail to be crisply molded, but it also means that the modeler has a fair bit of work ahead of them. The upper wing is split into three pieces, and the main wing pieces are quite durable. Once the wing is together, there are two tension cables that need to be strung across the span of the wing. The lower wing follows a similar trend of the upper, with that separated into single right and left sections. While on the subject of tension cables, the fuselage and stabilizer also gets a bit of that.
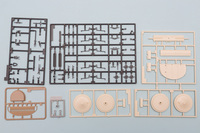 With the fuselage subassembly mostly done, and the wings mostly done, it's time to start putting it all together. The wing struts look to be well engineered, and given the durability of the rest of the kit, these should really help keep everything aligned and sturdy. With the wings on, the next step is to run the aileron control cables, followed by the wing rigging. Both of these steps are clearly described in the instructions, and the rigging material comes with the kit, so there is no need to outsource this. With the addition of the turtledeck and fuselage side panels, this is looking like a nearly complete Camel.
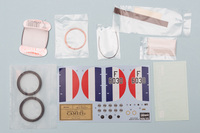 The final steps involves the landing gear, followed by adding the engine & propeller. The wheels are split into right and left halves, with separate rubber tires. The wheels have the fabric covers on them, which is a pity given how the rest of the kit is stripped down. Showing the wheel spokes would have been a very nice touch, but that is not easy to do, even in this scale, so that is understandable. Add the engine firewall, slide the engine in place, and add the cowling, and all that's left is to mount the propeller. The propeller is another feature that is designed to spin (along with the rotary engine).
 I highly recommend collecting a handful of references before tackling this kit, starting with the excellent Datafile titles on the Sopwith Camel. While the instructions are clear on what goes where, having that extra information could help on how to finish the model in terms of colors.
Conclusion
For someone wanting a great winter's project, this is something that will keep you busy for many a weekend. Once finished, it will cry out for a prominent display location, either in the display case or on the mantle. My thanks to Hasegawa USA for the review sample.
