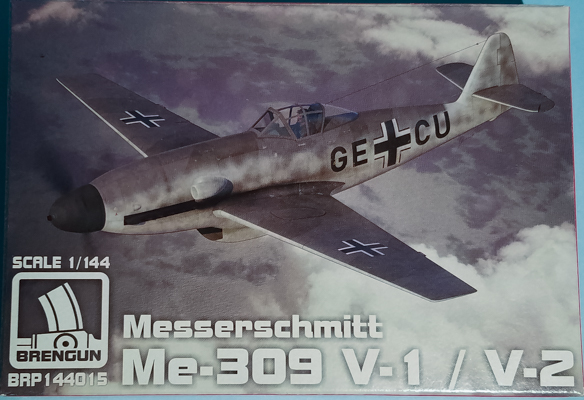
Brengun 1/144 Messerschmitt Me 309 V1/V2
By Matt Bittner
Introduction
According to Wikipedia:
"The Messerschmitt Me 309 was a prototype German fighter, designed in the early years of World War II to replace the Bf 109. Although it had many advanced features, the Me 309's performance left much to be desired and it had so many problems that the project was cancelled with only four prototypes built. The Me 309 was one of two failed Messerschmitt projects intended to replace the aging Bf 109, the other being the Me 209 of 1943."
The Kit
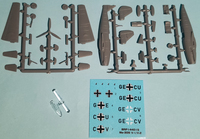
The Brengun 1/144 Messerschmitt Me 309 V1/V2 consists of 38 pieces of gray, injected plastic on two sprues (some parts not used with the V1/V2 versions) and one plastic, injected clear canopy. Decals are for two markings of the V1 and one for the V2:
- Me-309V1, early version Augsburg, July 1942, Germany
- Me-309V1, late version Rechlin, November 1943, Germany
- Me-309V2, Augsburg, November 1942, Germany
All three are finished with RLM74/RLM75 on top, with RLM76 on the undersides. Spinner and prop were black. Decals appear to be in register and are nicely printed. Be aware, though, the swastikas are in two halves.
The first thing you want to do before any construction is decide which aircraft to model. If you build the V1 "late version" then you'll need to chop off the tail of the fuselage halves to prep them for the different aft tail. The demarcations inside the fuselage halves are decent enough to use as a guide, but you'll still need to ensure the cuts are correct for each side before adding the other tail.
Another option Brengun provides is how to display the underside radiator, opened or closed. There is a separate part - part number 5 - you need to add into one fuselage half (before gluing the halves together) if you want to display the radiator as "opened".
Once you've made these two decisions then construction can start, and naturally it begins with the internals of the fuselage, mainly the cockpit. Out-of-the-box it's pretty decent, truly only missing the instrument panel details and the seat belts (there are no decals for either). No doubt in my mind Brengun is working on a photoetch set for this kit so I know I'm going to hold off working on this kit until that is released. Hopefully they release a vacuum-formed canopy for it as well. Once the cockpit is finished and glued to one half, then you also add the nose gear wheel well, the "open" radiator (part number 5, if using) and nose weight. Brengun just shows you need some, but doesn't give the actual amount needed. Once all that is in one fuselage half then the halves can be glued together and the separate radiator added to the assembled fuselage.

|
Here is where you add the different, separate tail for the "later" V1 aircraft. Hopefully you made the cuts accurate enough so there is little seam work.
There is a little bit of work to do on the underside of the wing, mainly filling in what appear to be shell ejector ports. There is also more work to be done if you're building either the "later" V1 or the V2 versions of the aircraft. The wing tips need to be cut and separate parts added.
Now you add the wings, horizontal tail surfaces and in the case of the "early" V1 and V2 versions, the separate rudder. I will definitely be canting that to one side to give it a dynamic display. Also at this step you add the intake on the port side of the nose.
The next instruction step has you turn the model over and add all the undercarriage, a step best left until after painting. Then you build the prop and spinner, flip the model over and add it and the canopy to the model. The last page of the instructions show you how the model looks from the underside, as well side views of the different aircraft versions.
Conclusion
This is definitely a very nice kit in 1/144 of the Messerschmitt Me 309 V1/V2. If you want to be complete, you need three kits to make the "early" V1, "late" V1 and V2. It also appears that another type will be on the way given the extra parts on the sprue not meant for the V1/V2. Possibly this could mean a model of the Me 609, a joined two-fuselage development of the 309. Time will tell.
I'm hopeful that Brengun will release at least a separate photoetch set for the kit, and also hopeful for a vacuum-formed replacement canopy. Again, time will tell.
I definitely send my "thanks" to Brengun for sending the review kit.
