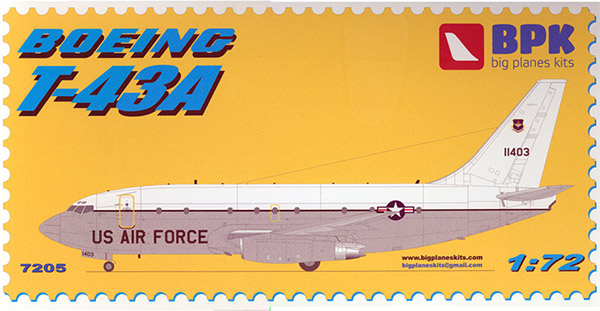
BPK 1/72 Boeing T-43A (737-253) Navigation Trainer
By Norm Filer
History
The USAF had been using the Convair T-29 as a navigator training aircraft for several years and the elderly airframe was both slow and antiquated when compared to current aircraft that used the Navigators being trained. Boeing received a contract to develop a navigator trainer based on the 737-200 airframe, to replace the T-29. Designated the T-43, the first of nineteen entered service in 1973 at Mather AFB, near Sacramento, CA. When Mather was closed in 1993 the training mission and aircraft were moved to Randolph AFB in San Antonio, Texas.
As modern navigation systems made the navigator crewmember redundant, six of the T-43s became CT-43A staff transports that provided operational support to AF Commands and Air National Guard. One became an NT-43A radar test bird. The last T-43 was officially retired in September, 2010.
The Kit
This is the second 737-200 kit released by BPK. Since the plastic is identical to the first release in Piedmont markings, Gerry's comments in his review of that kit covers most of the plastic.
 The only real difference between the two kits is the paper. Box, art, decals and painting guide, decal placement guide and instructions.
There are a few differences between a standard 737 and a T-43 and the instructions do cover those differences, but the notations are not highlighted and easily missed so here is a list of the differences;
There are only nine windows on each side, while the commercial 737 has 33. The instructions tell you which windows to fill. There is no forward cargo door on the T-43. So that needs to be filled.The left rear and right front entry doors need to be filled.
A note on the window, unlike many of the commercial aircraft where the unused windows just appear to be painted over, the T-43 windows are not there at all. So they really do need to be filled in.
 Kit construction appears to be straight forward with just a few unique items. The cabin windows are done as a long continuous strip of clear plastic with the windows scribed in. There is a corresponding rectangle partial cutout on the fuselage sides where that strip goes. The instructions tell you to remove this indented area. No mention of the fact that you should leave a ledge for the window strip to glue to. Since there is no interior included in the kit, and anything inside would be about impossible to see due to the very small (and few) windows, an alternative might be to not remove the area behind the windows but just paint it Black. Unfortunately, there is a raised ridge right down the middle of it that could be removed but would leave an uneven surface that might not look very good even if painted Black. The other potential issue is how well the edges of the window strip match the outer fuselage. But overall, I think this is a good way to do the windows. It is going to be labor intensive, but better than using decals for the windows at this scale.
 While there are no alignment pins anywhere on this kit, the parts appear to match up very well. The lack of alignment pins on the wings is not much of an issue, but the plastic is appropriately thin on the two fuselage halves and perhaps some small tabs along the matching joint will aid in keeping everything matched up during construction. I didn't have enough hands and fingers to be able to keep it all aligned during my playing with all the parts, but the match and alignment of the two fuselage halves appeared to be very good, as did all the other trial fit parts.
One unusual item is there are two small rectangles of brass sheet included in the kit. The instructions graphically tell you to roll these into round tubes for the two engine exhausts. I suspect the average modeler might find this to be a challenge. 7/16th Evergreen plastic tubing appear to be about the right size to make this quicker and easier. There might also be some brass tubing out there that would do this too.
Painting and Markings Guide
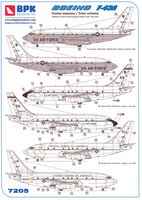
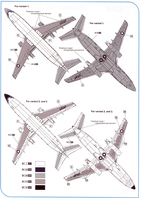
The painting and decal placement guide is very well done in full color. Decals are provided for two T-43s, one in the original navigation trainer scheme as seen during its Mather AFB days and an all white one during the later training days at Randolph. The third scheme is a rather attractive scheme used during the staff transport/support period. Color notes are limited to only Gunze Mr. Hobby water based and Mr. Color lacquer paints, but conversion to other paint brands should be easy with several web sites available to do that.
Decals
Decals appear to be of good quality but apparently are both very thin and somewhat brittle, tending to break up on application. Perhaps a layer or two of Microscale Liquid Decal Film might be appropriate prior to using them.
There are a couple inaccuracies on the decal sheets. The "US Air Force" and "USAF" as well as the stripe under the window should be FS 15044 Dark Blue. The other lettering is correctly done in Black.
Conclusions
Overall, this is a very nicely done kit of a somewhat obscure Air Force trainer. Since the parts included in this kit are identical to the commercial airliner release, and even include the gravel kit items, if you are considering using aftermarket markings for another airline, this kit would provide everything you need. I would like to thank David Cooper for providing the kit and BPK of the Ukraine for doing this kit.
