Airfix 1/48 TSR.2
By Brad Fallen
Introduction
This is an aircraft and a kit that barely need introducing. The aircraft is an aviation legend, even though – or perhaps because – it only flew a handful of times. The combination of its aesthetic appeal, superb performance, enormous potential, dastardly political assassination and then preservation as a static, crippled reminder of what might have been have gradually cloaked the TSR.2 in mythic status. Airfix’s long-announced 1/48 kit of the aircraft has seemed at times to have a similarly tortuous development, but thankfully it avoided the fate of its full-sized predecessor and is now available to those modellers who are lucky enough to find a copy. You know a kit is keenly anticipated when not one, but three comprehensive sets of aftermarket decals become available months before the kit itself.
The Box
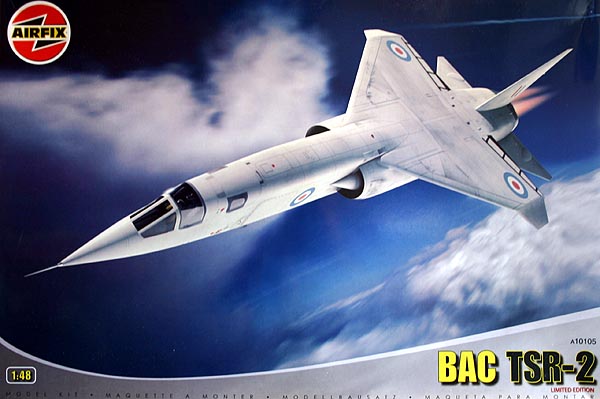
 Was it worth the wait? Let’s dive into the box and see. In fact, let’s start with the box, because it’s pretty big – 56 cm (22 in) by 38.5 cm (15 in) – but also a little flimsy, both of which could work against you if your kit is coming through the mail. It’s an attractive package, with nice CGI artwork of a TSR.2 accelerating through a cloudscape. The box art doesn’t compare with Airfix’s great Roy Cross paintings of the past, or the fabulous work that Martin Novotny does for Eduard now, but it’s clean and crisp and you know there’s a TSR.2 inside!
The Kit
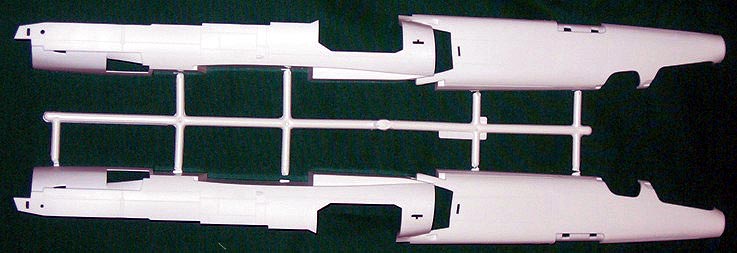
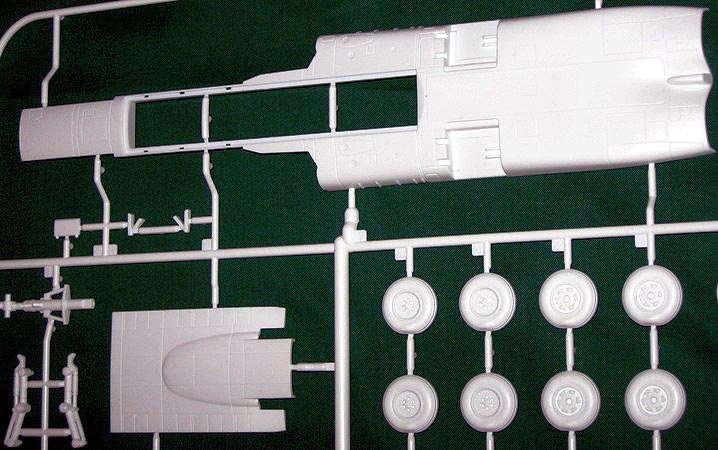
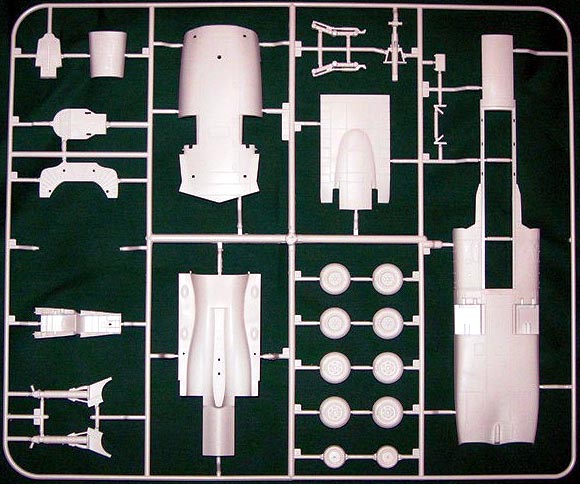
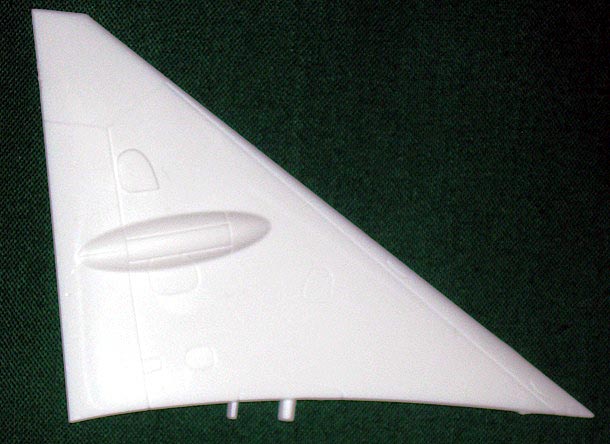
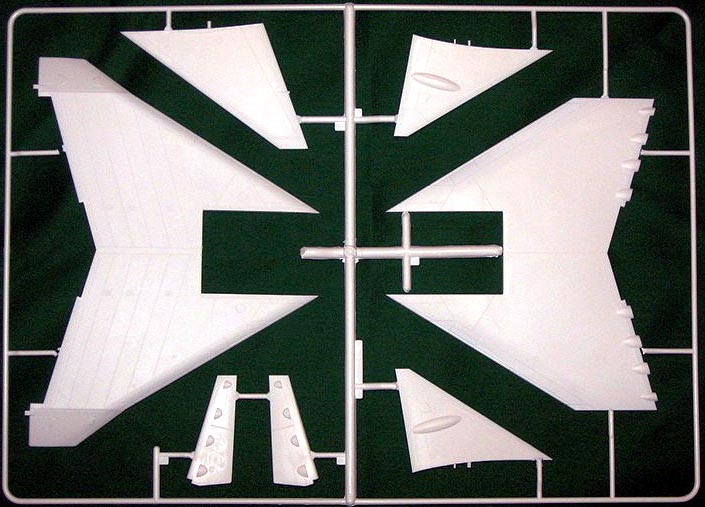 Lifting the lid, you can see why the box is so large – it needs to hold some big bits of plastic! The highlights are the fuselage halves, which measure out at 46.5 cm (18 in) in length, and the one piece upper wing (complete with down-turned tips) with a span of 24.5 cm (9 ¾ in). There are six sprues altogether – five moulded in white and one in clear plastic. The clear parts are packaged separately, inside a larger plastic bag which contains the other sprues, all intended to minimise movement during transit. I found that only one or two smaller pieces had broken off during shipping, and none were damaged.
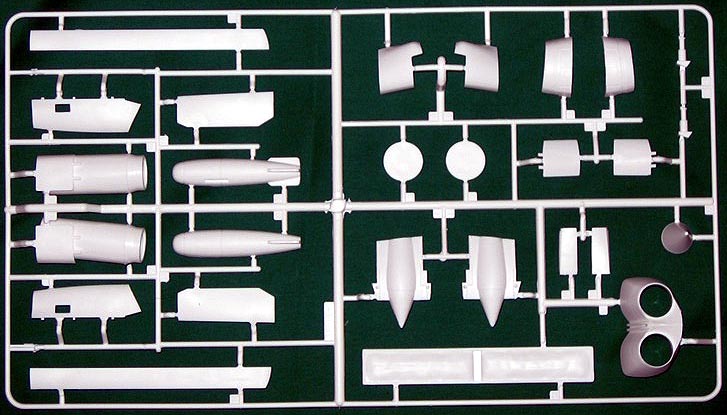
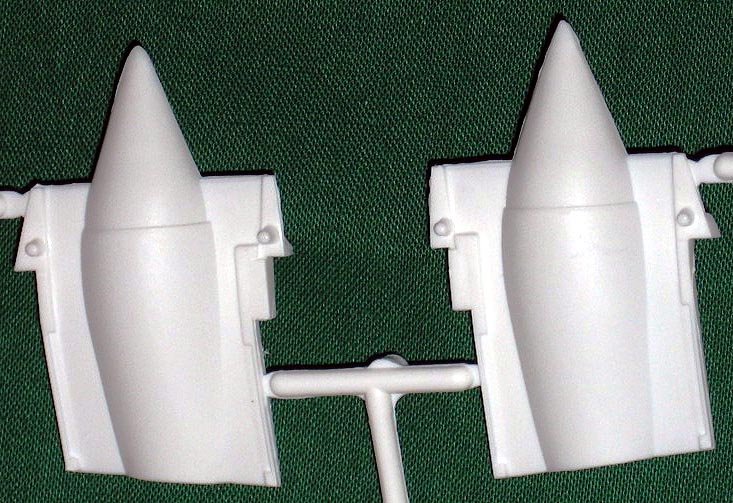
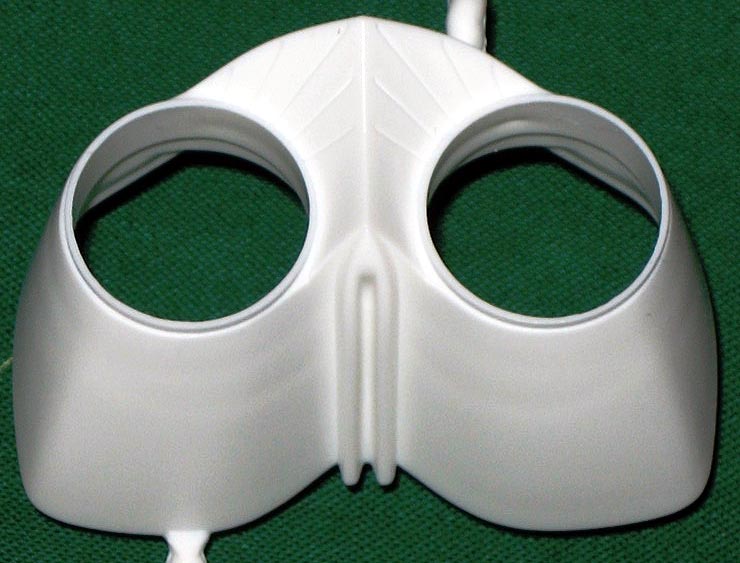 I might regret having said this once I start gluing, but the kit looks great in the box – more refined than Airfix’s recent 1/48 Spitfire Mk.I (the only other of their new mould kits that I’ve seen), and light years ahead of their early stuff. The white plastic is well moulded with consistently engraved panel lines. I was particularly impressed by the one piece, seamless burner cans, and the single piece dual-exhaust outlet, which nicely captures the subtle curves of this part of the airframe. The cockpit tub and seats look adequate, although many (including me) will be looking to replace them with aftermarket items when these become readily available. Two good-ish, three-part crew figures (the arms are added separately) are also included if you wish to feature these in your model.
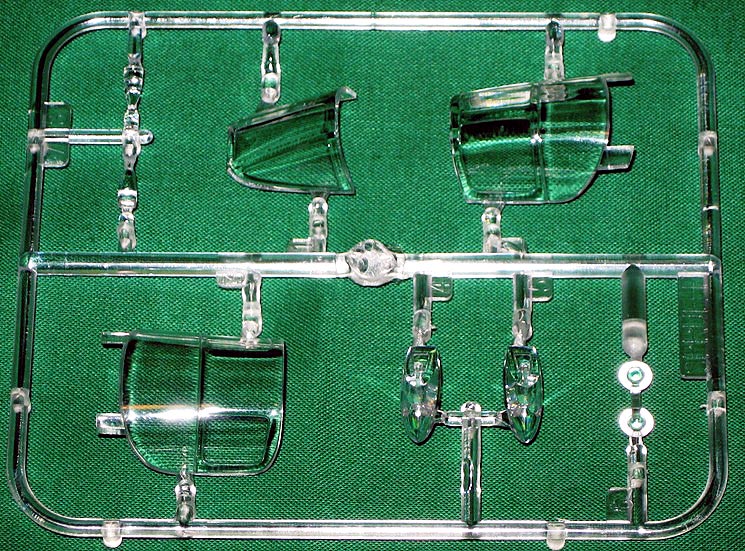
The clear parts also appear well moulded, with clearly defined framing that will facilitate masking. I hope that Eduard release one of their custom mask sets for this kit, because for me these deliver a great result that I just cannot match with masking tape and a scalpel.
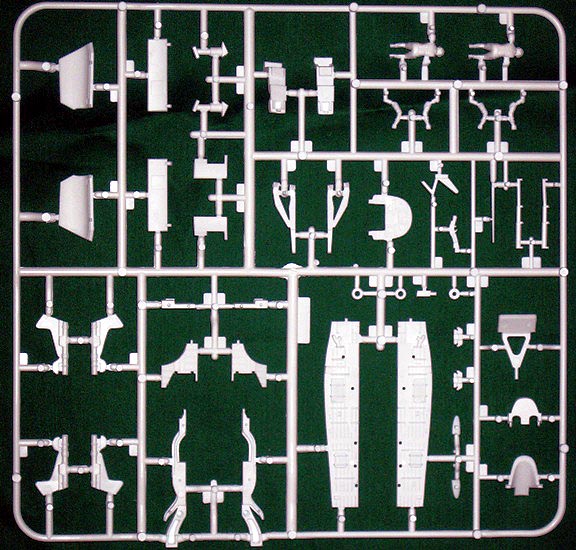
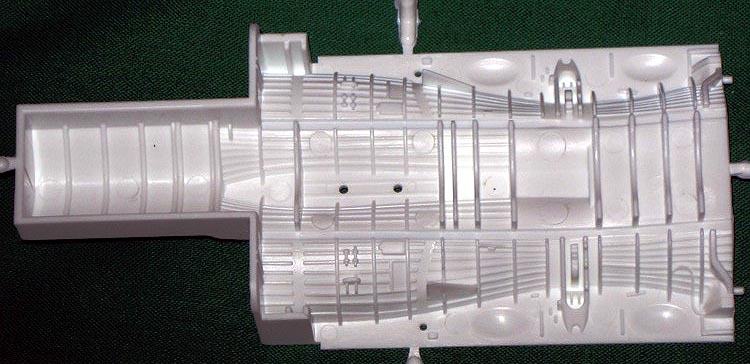
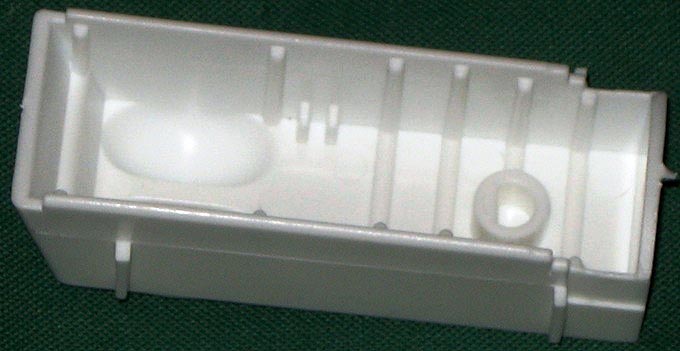
I found very few moulding flaws in the plastic – only a couple of minor sink marks above some locating pins. Ejector pin marks are also, in the main, located where they won’t be visible on the finished model. The exception here is in the otherwise well detailed one-piece gear bay, the ribbing of which is festooned with ejector pin marks which will be virtually impossible to fill without compromising the ribbing. While little of the bay will be visible in the finished model, it’s still annoying.
One feature of the plastic that I can only describe as ‘limited run’ in nature are the huge sprue attachment points for the larger pieces, which – while preventing these from breaking off the sprues in transit – will require a razor saw to remove without damage.
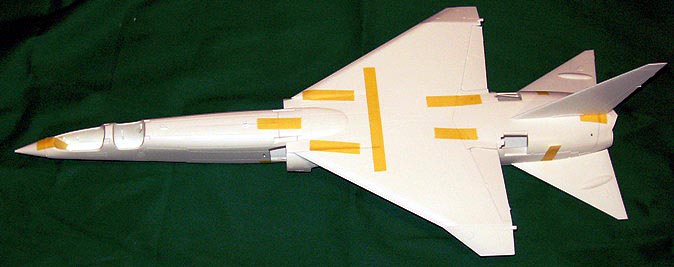
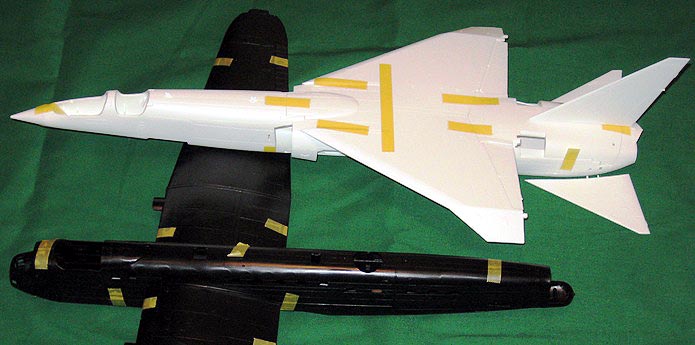 A dry assembly of the larger pieces is promising – while the fit isn’t Tamigawa, it’s pretty darn good. The locating pins that secure the fuselage and upper and lower wing halves together are enormous – the largest I’ve seen on a kit – and they do their job well. Almost too well, in the case of the wings, which having pressed together I found very difficult to separate again. The long fuselage halves also stay together without the need for taping, which bodes well for the integrity of the finished model; I don’t think I’ll need to worry about seams coming adrift when I’m painting. Famous last words, I know. To give an example of the size of the kit, I took a photo of it beside a Tamiya 1/48 Lancaster.
Instructions
The well presented black-and-white instruction booklet begins with a decent history of the TSR.2 project, repeated in several languages, before calling out assembly in 35 illustrated, easy-to-follow steps. Part numbers and paint colours are clearly marked, but – irritatingly – the latter are only provided in the form of Humbrol paint numbers. Now this isn’t a problem in terms of the overall airframe – you have a choice of white, white or white if you’re doing one of the prototypes, and if you’ve chosen a “what if” scheme then the only paint guide you need is your imagination. But the Humbrol reference numbers are annoying when it comes to detail painting and you’re one of the many modellers who (like me) don’t use Humbrol paints. Yes, there are plenty of paint cross-reference guides on the internet, but few of these list all of the Humbrol numbers provided, so research is the order of the day. Alternately, you might look for detail colour clues on one of the many excellent TSR.2 walk-arounds on the internet.
Decals
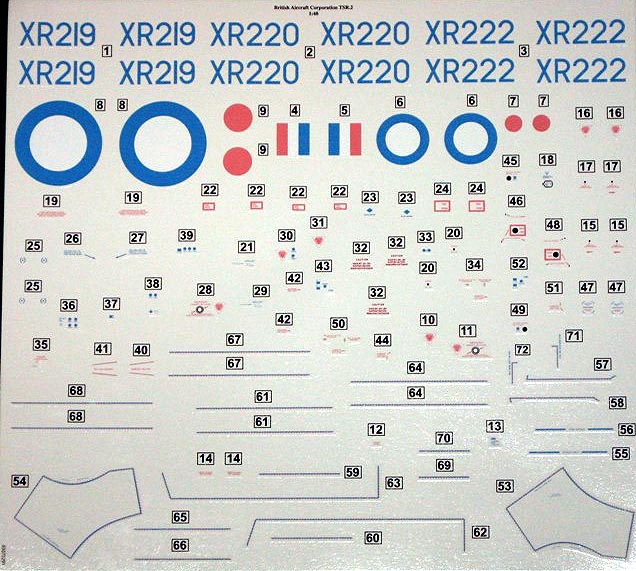 The large-ish decal sheet contains four nicely coloured blue-and-pink RAF anti-flash roundels, identification codes for three airframes (XR219, XR220 and XR222) and a full set of stencils. What’s most impressive about the sheet is how good it looks in comparison to other recent Airfix sheets – the Spit Mk.I roundels, for example, are clearly made up of dots rather than solid colours, and I understand this was also the case with some of the early Canberra releases. Definitely not so here – these look beautiful on the sheet, and will hopefully perform as impressively. Clearly marked, four-view plans of the aircraft on the final page of the instruction booklet leave you in no doubt as to where all of these decals should go.
Conclusions
This kit looks like an absolute winner in the box, and my own test fit, and some early build logs on the web, suggest that it will go together fairly easily as well. Let’s hope so, because – although I’m looking forward to the construction phase – I’m particularly keen on painting the beast. The problem will be deciding on a scheme – while the anti-flash white looks very good (and of course authentic), my ‘what-if’ meter is going off the dial with this one. I’m especially tempted by the variety of possible Royal Australian Air Force schemes, had the TSR.2 gone into production and been selected by the Australian Government instead of the General Dynamics F-111…I’m sure I’ll change my ‘final’ scheme many times in my mind before breaking out the airbrush – but that’s half the fun, isn’t it?
Review kit courtesy of SANDLE Hobbies.
This is an aircraft and a kit that barely need introducing. The aircraft is an aviation legend, even though – or perhaps because – it only flew a handful of times. The combination of its aesthetic appeal, superb performance, enormous potential, dastardly political assassination and then preservation as a static, crippled reminder of what might have been have gradually cloaked the TSR.2 in mythic status. Airfix’s long-announced 1/48 kit of the aircraft has seemed at times to have a similarly tortuous development, but thankfully it avoided the fate of its full-sized predecessor and is now available to those modellers who are lucky enough to find a copy. You know a kit is keenly anticipated when not one, but three comprehensive sets of aftermarket decals become available months before the kit itself.
The Box
Was it worth the wait? Let’s dive into the box and see. In fact, let’s start with the box, because it’s pretty big – 56 cm (22 in) by 38.5 cm (15 in) – but also a little flimsy, both of which could work against you if your kit is coming through the mail. It’s an attractive package, with nice CGI artwork of a TSR.2 accelerating through a cloudscape. The box art doesn’t compare with Airfix’s great Roy Cross paintings of the past, or the fabulous work that Martin Novotny does for Eduard now, but it’s clean and crisp and you know there’s a TSR.2 inside!The Kit
Lifting the lid, you can see why the box is so large – it needs to hold some big bits of plastic! The highlights are the fuselage halves, which measure out at 46.5 cm (18 in) in length, and the one piece upper wing (complete with down-turned tips) with a span of 24.5 cm (9 ¾ in). There are six sprues altogether – five moulded in white and one in clear plastic. The clear parts are packaged separately, inside a larger plastic bag which contains the other sprues, all intended to minimise movement during transit. I found that only one or two smaller pieces had broken off during shipping, and none were damaged.
I might regret having said this once I start gluing, but the kit looks great in the box – more refined than Airfix’s recent 1/48 Spitfire Mk.I (the only other of their new mould kits that I’ve seen), and light years ahead of their early stuff. The white plastic is well moulded with consistently engraved panel lines. I was particularly impressed by the one piece, seamless burner cans, and the single piece dual-exhaust outlet, which nicely captures the subtle curves of this part of the airframe. The cockpit tub and seats look adequate, although many (including me) will be looking to replace them with aftermarket items when these become readily available. Two good-ish, three-part crew figures (the arms are added separately) are also included if you wish to feature these in your model.The clear parts also appear well moulded, with clearly defined framing that will facilitate masking. I hope that Eduard release one of their custom mask sets for this kit, because for me these deliver a great result that I just cannot match with masking tape and a scalpel.
I found very few moulding flaws in the plastic – only a couple of minor sink marks above some locating pins. Ejector pin marks are also, in the main, located where they won’t be visible on the finished model. The exception here is in the otherwise well detailed one-piece gear bay, the ribbing of which is festooned with ejector pin marks which will be virtually impossible to fill without compromising the ribbing. While little of the bay will be visible in the finished model, it’s still annoying.
One feature of the plastic that I can only describe as ‘limited run’ in nature are the huge sprue attachment points for the larger pieces, which – while preventing these from breaking off the sprues in transit – will require a razor saw to remove without damage.
A dry assembly of the larger pieces is promising – while the fit isn’t Tamigawa, it’s pretty darn good. The locating pins that secure the fuselage and upper and lower wing halves together are enormous – the largest I’ve seen on a kit – and they do their job well. Almost too well, in the case of the wings, which having pressed together I found very difficult to separate again. The long fuselage halves also stay together without the need for taping, which bodes well for the integrity of the finished model; I don’t think I’ll need to worry about seams coming adrift when I’m painting. Famous last words, I know. To give an example of the size of the kit, I took a photo of it beside a Tamiya 1/48 Lancaster. Instructions
The well presented black-and-white instruction booklet begins with a decent history of the TSR.2 project, repeated in several languages, before calling out assembly in 35 illustrated, easy-to-follow steps. Part numbers and paint colours are clearly marked, but – irritatingly – the latter are only provided in the form of Humbrol paint numbers. Now this isn’t a problem in terms of the overall airframe – you have a choice of white, white or white if you’re doing one of the prototypes, and if you’ve chosen a “what if” scheme then the only paint guide you need is your imagination. But the Humbrol reference numbers are annoying when it comes to detail painting and you’re one of the many modellers who (like me) don’t use Humbrol paints. Yes, there are plenty of paint cross-reference guides on the internet, but few of these list all of the Humbrol numbers provided, so research is the order of the day. Alternately, you might look for detail colour clues on one of the many excellent TSR.2 walk-arounds on the internet.
Decals
The large-ish decal sheet contains four nicely coloured blue-and-pink RAF anti-flash roundels, identification codes for three airframes (XR219, XR220 and XR222) and a full set of stencils. What’s most impressive about the sheet is how good it looks in comparison to other recent Airfix sheets – the Spit Mk.I roundels, for example, are clearly made up of dots rather than solid colours, and I understand this was also the case with some of the early Canberra releases. Definitely not so here – these look beautiful on the sheet, and will hopefully perform as impressively. Clearly marked, four-view plans of the aircraft on the final page of the instruction booklet leave you in no doubt as to where all of these decals should go.Conclusions
This kit looks like an absolute winner in the box, and my own test fit, and some early build logs on the web, suggest that it will go together fairly easily as well. Let’s hope so, because – although I’m looking forward to the construction phase – I’m particularly keen on painting the beast. The problem will be deciding on a scheme – while the anti-flash white looks very good (and of course authentic), my ‘what-if’ meter is going off the dial with this one. I’m especially tempted by the variety of possible Royal Australian Air Force schemes, had the TSR.2 gone into production and been selected by the Australian Government instead of the General Dynamics F-111…I’m sure I’ll change my ‘final’ scheme many times in my mind before breaking out the airbrush – but that’s half the fun, isn’t it?
Review kit courtesy of SANDLE Hobbies.