AZ Model 1/72 Vought Kingfisher
By Matt Bittner
Introduction
Taken from Wikipedia:
"The Vought OS2U Kingfisher is an American catapult-launched observation floatplane. It was a compact mid-wing monoplane, with a large central float and small stabilizing floats. Performance was modest because of its light engine. The OS2U could also operate on fixed, wheeled, taildragger landing gear.
"The OS2U was the main shipboard observation seaplane used by the United States Navy during World War II, and 1,519 of the aircraft were built. It served on battleships and cruisers of the US Navy, with the United States Marine Corps in Marine Scouting Squadron Three (VMS-3), with the United States Coast Guard at coastal air stations, at sea with the Fleet Air Arm of the Royal Navy, and with the Soviet Navy. The Royal Australian Air Force also operated a few Kingfishers from shore bases.
"The Naval Aircraft Factory OS2N was the designation of the OS2U-3 aircraft built by the Naval Aircraft Factory in Philadelphia, Pennsylvania. The OS2U first flew on 1 March 1938."
The Kit
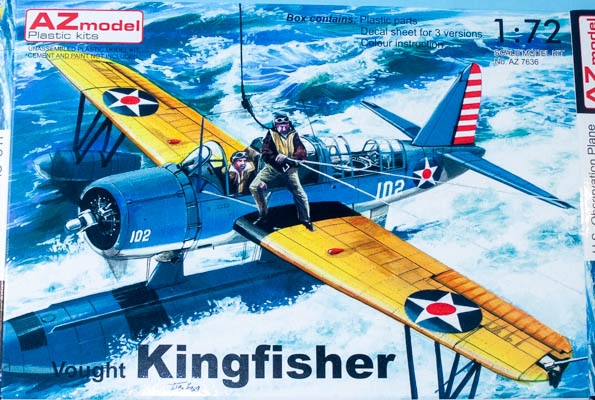
AZ Model has released three versions/boxing of the OS2U Kingfisher. Kingfisher "Wheeled Version"; Kingfisher "FAA & RAAF"; and this release, "Vought Kingfisher", the US Navy float version.
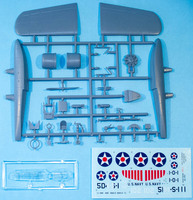
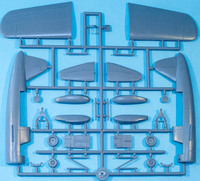
This boxing consists of 65 pieces of gray, injected plastic and a sprue of two pieces of injected clear for the canopy. Unfortunately the canopy is only in two pieces: the front windscreen-and-canopy and one-piece rear canopy. You'll have to cut the main canopy apart if you want to display it open. Decals in this release are for the following aircraft:
- Kingfisher 1-0-1 aboard USS Arizona, Pearl Harbor, 7 December 1941 (finished in Intermediate Blue uppersurfaces and Gull Gray underneath)
- Kingfisher 102, NAS Corpus Christi, 1942 (finished the same as 1-0-1 above but with Yellow on the top of the wings)
- Kingfisher 5D4-S-1, NAS Cape May, 1941 (finished overall in aluminum with yellow wing-tops)
Decals appear nicely done and in register.
Construction starts with building the rear-gunner's area. Attach the seat to its top part and the gun ring to that part, then you need to make a decision, as both a twin-gun and single-gun are provided. Once that decision is made then it is glued to the gun-ring assembly and it's glued to another support structure. Now you create the structure that sits in front of the rear gunner and attach it to the prior assembly later in the construction process.

|
Now you move to building the cowl with the engine enclosed, naturally after you paint the engine. Out of the box the engine looks good, especially when a wash and dry brushing is applied.
Finally, the part of construction of an aircraft model one can't wait for: working on the cockpit. Out of the box it's decent, especially if you keep the entire canopy closed. The only thing I can see one would want to add are seat belts. If you decide to cut the canopy to display it open, then you'll probably want to add a bit more detail. But out-of-the-box and with the canopy closed, it's definitely enough. So after the proper painting, washes and dry brushing, the cockpit pieces can be assembled, added to one fuselage half and the fuselage halves glued together.
Once the fuselage is glued together, the next stage of the instructions have you work on the main float and then glue the wings together. Then construction moves to adding all the rest of the pieces to the fuselage: main float, wings and horizontal tail surfaces. This construction step also has you add the wing floats after building them up. I'm not sure if this is best done now, or after painting and decaling. I can see how these floats would get in the way of masking. Before you turn the page of instructions over, the bombs are added to their pylons.

|
The next step has you add the wheels to the floats, bombs and clear pieces. This is a kit where you will want masks to help with the canopy and thankfully Peewit has you covered. Also added at this time is the fuselage antenna you need to make yourself. I would leave everything off except the canopy, especially if you're keeping the canopy closed and just have it masked.
There is an extra step in the instructions, but only if you have your own decals. This last step shows how you add the "real" wheels to the aircraft, and not just the float-wheels. But since this release only has decals for float-plane versions, you're on your own for markings. Be aware, though, that AZ has released a separate, "wheeled" version with decals specific to "wheeled" aircraft.
Conclusion
This is an excellent kit, one that is definitely worth tracking down if the type interests you. If you keep it as an out-of-the-box build, it shouldn't take too long to finish and will look great sitting on your shelf. I personally plan on building AZ's 1/72 OS2U Kingfisher wth the pre-war yellow wings but unsure how far I will take the cockpit. I also plan on picking up the Peewit masks.
Huge thanks to AZ Model for sending their 1/72 Kingfisher to review.
