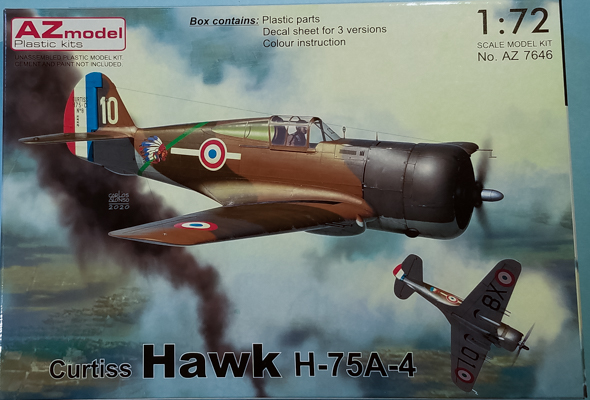
AZ Model 1/72 Curtiss Hawk H-75A-4
By Matt Bittner
Introduction
The Curtiss Hawk H-75A-4 was the last production batch for France It was basically the Hawk 75A-2 with a Wright R-1820-G205A Cyclone radial, instead of the R-1830-SC-G R-1830-SC3-G. 285 built with 81 delivered to France and the others went to Great Britain as the Mohawk IV.
The Kit
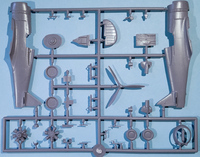
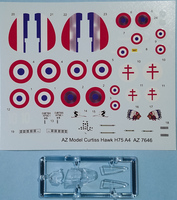
The AZ Model 1/72 Curtiss Hawk H-75A-4 consists of 62 gray, injected parts (many not used for the H-75A-4) and a clear sprue of four parts. Decals are for three H-75A-4s:
- "White 10", GC II/5 Lafayette, Casablanca, Marocco, 1940 (finished in a three tone scheme on top with French Middle Blue undersides)
- FAFL, flown by Jean Tulasne, Rayak, Syria, 1942 (finished in a three tone scheme on top with French Middle Blue undersides)
- "White 18", GC II/5 Cigogne, June 1940 (finished in a three tone scheme on top with French Middle Blue undersides), this one has muted markings
Decals appear in register and are nicely printed.
|
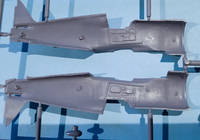
Before construction steps are noted, there are a few things to point out. AZ Model was good to include a new, separate fuselage and engine to make the H75A-4 from their already-released P-36 kit. The detail on the fuselage is nicely done and the cockpit detail especially. However, the new engine for the H-75A-4 isn't as nicely molded; in fact, I think it's a little worse than the previous P-36 engine. But, with a cowl opening not very large it could be "good enough"; me, I will hunt down a resin replacement and go from there.
|
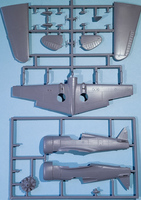
As was previously typed, you'll have plenty of parts to add to the spares box, including a set of fuselage halves and P-36 engine. Pay attention to the instructions as they point out the correct parts. One contention in my boxing is AZ Model includes instructions for the "Mohawk IV" which is the same aircraft sub-type, but provided to the British. If you're going just by instructions, I do hope there is no parts difference between the AZ Model "Mohawk IV" and H-75A-4. Now onto instruction steps.
The first steps in the instructions have you assemble and paint the instrument panel, including adding a bar and the rudder pedals to the back. What the instructions don't show is AZ Model includes a set of instrument panel decals to add to the injected instrument panel, so add those prior to gluing it into the fuselage and after painting. Next, you paint the main landing gear and tires/wheels and glue them together. Then AZ Model has you paint the pilot's seat and add the decal seat belts, which this time the instructions show. Finally, the next step has you paint the cockpit floor, rear bulkhead, headrest, control panel and seat adjustment lever (I think) before assembling those pieces together and adding the already painted-and-decaled seat to that assembly.
|
Now you proceed to fuselage assembly. After painting the interior of the fuselage halves - including near the tail wheel well - you paint-and-glue the engine to the starboard fuselage half follwed by the cockpit, instrument panel and ceiling for the tail wheel. While the instructions show you add the tailwheel as well, you can leave that off until the end.
In an unusual twist, AZ Model has you glue the main landing gear to the lower wing part - including all struts and doors - prior to gluing the upper wing pieces to the lower wing. While I will glue the main landing gear wells to the lower wing prior to assembling the wing pieces together, I will leave off the landing gear, doors and struts until after painting and decaling. Very strange. In addition, I will do a dry fit of the lower wing to the assembled fuselage prior to anything to see if it needs to be glued to the fuselage prior to gluing the upper wing pieces on. Somtimes you can get a better fit of all if you glue the lower wing part to the assembled fuselage and then glue on the upper wing parts.
|
Which leads to a change in instruction sheet order. I'll glue the fuselage halves together prior to doing anything with the wings. So I'll skip instruction Steps 7-11 and finish Steps 12-13 first before going back to accomplishing steps 7-11. Step 13 also shows you mount the tailwheel, even though it was also shown as being glued in at Step 6. Again, I will leave it off until the very end, along with the tailwheel gear doors.
Along with gluing the wings on now you also add the horizontal tail pieces and wing-guns. One aspect of the next instruction steps (again, remember I have the "Mohawk IV" instructions) is ignored, adding the "football" antenna to the top of the fuselage. The French did not use these and I think they were only used on the P-36Gs. You also add the port wing pitot (again, best left off until the end) and clear pieces. Finally you add the propellor and upper fuselage antenna.
Conclusion
I'm hoping that my example was the only kit with the "Mohawk IV" instructions but if not, pay very close attenion to the aircraft you're modeling to ensure you're putting on the correct parts. In addition, you may want to track down another engine for the poorly-molded kit-supplied Wright R-1820-G205A Cyclone. But other than those aspects, this looks to be a good kit to build an H-75A-4, a favorite aircraft of mine. No doubt this kit will be easier to build than the AML kit <shudder>. How it compares to the older Special Hobby/MPM/Azur kit is up to the reader, even though I've built the Azur kit in the past. I just can't remember - even with my older article - on how the Azur kit would compare.
I definitely thank AZ Model for the review sample.
