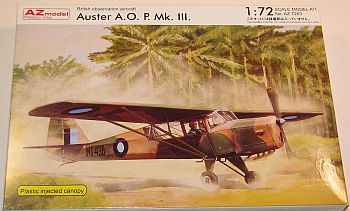
AZ Model 1/72 Auster A.O.P. Mk. III
By Matt Bittner
Introduction
From the instruction sheet:
"The Taylorcraft Auster was a British military liaison and observation aircraft produced by the Taylorcraft Aeroplanes (England) Limited during the Second World War.
"The Auster was a twice removed development of an American Taylorcraft design of civilian aircraft, the Model B. The Model B had to be redesinged in Britain to meet more stringent Civil Aviation standards and was named the Taylorcraft Plus C. After the start of the Second World War, the company developed the model furter as an Air Observation Post (AOP) aircraft for working with the British Army Royal Artillery units.
"The first Auster I was the eleventh Taylorcraft Plus C aircraft which was delivered to the Air Ministry for trials in 1939. The trials led to an order for 100 aircraft placed in 1941. The Auster II was a re-engined aircraft with an American 130 hp (97kW) Lycoming O-290 engine. Due to the shortage of American engines that version was not built but led to the Auster III, which was the same as the Auster I but had a 130 h (97 kW) de Havilland Gypsy Major engine."
The Kit
The AZ Model 1/72 Auster A.O.P. Mk. III consists of 38 injected pieces, one resin piece and an injected canopy. Decals - nicely printed and in register - are for four machines: one for teh RAF, one for the RAAF, a machine of the Czechoslavak AF, and finally an aircraft of the Israeli AF. Colors are primarily Dark Green and Dark Earth overall, with the Israeli aircraft having aluminum undersides. One note of caution. It appears the profiles were created in an "artistic" frame, meaning that the artist added shadows and the like to the paintings. There is not more colors involved with the aircraft, just an "artistic shadow". I don't particularly agree with that, especially when dealing with a model and its painting and marking information. Note also the instruction sheet contains a drawing of where the common decals are to go.

Construction again starts in the cockpit. Assemble the seat to the floor, and the control columns adn rudder pedasl also to the floor. The next part is assembling the instrument panel. This step, step #2, also has you create "something" out of plastic rod. I don't mind that as much, but the instructions don't really show you where that creation is to be placed. I'm guessing it's to be added to what appears to be a small hole in the instrument panel when looking at the instructions, but it would have been nice to have been given a clearer understand of where that part is to go. (If readers remember, I also questioned how AZ provided cockpit build information in their SPAD 51 kit, so since this is only the second kit I've seen from AZ, I'm guessing either them, or myself, has an issue with their instructions.) I also feel like the cockpit, out of the box, is too sparse under all that "clear space" of the canopy. There could be much more provided in the cockpit out of the box than what already exists. Granted, for those who enjoy adding their own touches with scratchbuilding, there is tons of room. But I'm not exactly sure of what is available for references.
Okay, cockpit is finished now it's time to add it, the instrument panel and some of the front structure to the fuselage halves and close them up. Then add the horizontal tail pieces and now the fun begins.
The area over the cockpit is a "mess" of tubular structure. All parts will need to be carefully cut away from the sprue and cleaned up. Then the whole structure will need to be carefully glued together along with being glued to the fuselage. Now you put the nose together and add it, the canopy and the wings to the fuselage. Since the wings glue to the canopy, you'll probably want to mask the canopy prior to adding the wings. Getting in there after the wings are on to mask the canopy could be difficult. While this step of the instructions have you add the main struts between the fuselage and wings, I would wait until painting is finished.
The last part of assembly is adding the landing gear (and wing struts if you waited this long) along with the smaller pieces and prop. And now you have an Auster A.O.P. Mk. III.
Conclusion
One of the better parts of my "job" here at IM is reviewing something I never knew existed. This is the case with the Auster. A pretty neat looking aircraft and one that would definitely have been best as an observation machine with all that greenhouse glass. This could either be a difficult build - or one not as difficult as I'm thinking, if you take your time and plan it all out prior to committing cement to the build. In any event, at the end you'll have a unique piece of history in your built model collection.
My thanks to UMM-USA for providing the review kit.
