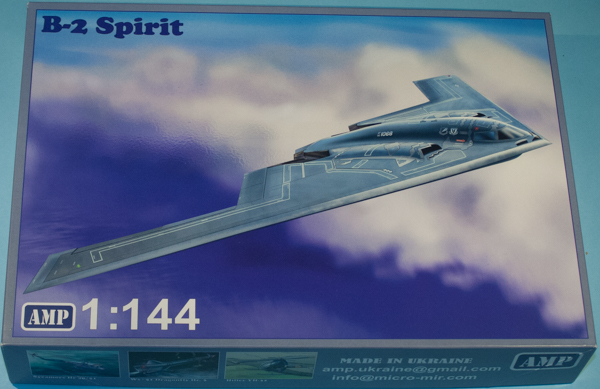
AMP 1/144 B-2 Spirit
By Matt Bittner
Introduction
I really don't think the Northrop Grumman B-2 Spirit needs any introduction. It has been seen flying around the world and most know about its design.
In terms of modeling, 1/72 had its first B-2 ages ago from Testors and recently a really nice new-tool from Modelcollect. In 1/144 Revell released its B-2 first as a snap-tite, and then as a "full featured" model. I have one of their "full featured" models and its copyright date is 1993 so it's been around a few years.
The Kit
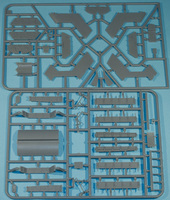
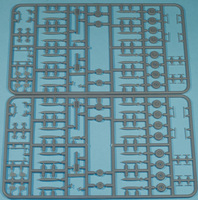
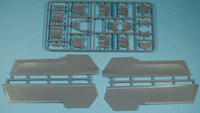
The AMP 1/144 B-2 consists of 177 pieces of injected plastic, 1 injected plastic canopy, 1 set of masks for the canopy and wheels, and a decal sheet for the following schemes:
- Spirit of New York
- Spirit of Indiana
- Spirit of Arizona
- Spirit of California
The decals are matte and appear to be in register. Not only do you receive the markings necessary to create one B-2 but all walkways and some other stenciling are also included. Also on the decal sheet are an instrument panel and side consoles for the cockpit.

|
As with most aircraft models, construction starts in the cockpit. After painting the main two pieces the decals are applied for the instrument panel and side consoles. Now it's time to build the two ejection seats: each seat consists of three parts, with the main seat portion split down the middle. Here's hoping there isn't much of a seam to deal with. Once the seats are assembled and painted they are glued to the cockpit floor and two other parts glued on as well.
Now construction turns to building the nose gear well and ordnance. There are enough parts to build 16 bombs and they appear to be JDAMs. In addition, the rotary launcher for the JDAMs also need to be built up from halves. Once all bombs and launchers are assembled, then everything needs to be painted before mating the bombs to the launchers.

|
Instruction step ten has you build the bomb-bay, and it's richly detailed. The main part consists of six pieces prior to adding the launchers/bombs, and end and side bulkheads. It would appear this entire assembly - with ornance in place - needs to be assembled prior to adding it to the main model. So treat these steps as a "separate model": give the amount of time and detail to the entire assembly prior to adding it to the model. Once in the main fuselage it's definitely best to mask this area off.
The next steps build up the main landing gear wheel wells along with the exhaust units. Once the landing gear wells are created and painted, then they are added to the bottom fusfelage half, along with the nose gear well, cockpit and other pieces. Now the intakes are assembled again, painting the pieces along with way. Once those are created they and other items are added to the upper fuselage half.

|
There is one step in the next set of instructions that you should accomplish, and that's adding the exhaust units to the lower fuselage half. The next steps I'm wondering about. AMP has you glue the lower wing half onto the lower fuselage prior to gluing the main assemblies together. It also has you do the same with the upper wing halves and upper fuselage. I'm wondering if this is actually the best way of assembly or if you should glue the fuselage halves together first, then glue the wing halves together prior to adding the assembled wings to the assembled fuselage. I may follow the instructions when I build the model and report back.

|
As mentioned, now the fuselage/wing halves are brought together. The last steps of construction have you add the wheels to the landing gear, landing gear to the gear wells, gear doors and bomb-bay doors and other items. While I would assemble the wheels and landing gear together (as with the bombs and ejection seats, all main wheels are split in half) after painting, I will still wait to add all of this until after final painting and decaling.
Note that you can also assemble this model gear up and bomb bay doors closed, and the very last instruction step shows what needs to be accomplished for that.

|
Conclusion
The AMP 1/144 B-2 is a really nicely detailed model of this modern bomber. Light years better than the old Revell kit. My only gripe with this kit is that most of the smaller items - bombs, rotary launchers, main wheels and ejection seats - are split in half. I really hope an aftermarket company will step up and produce these items as single pieces. Especially the wheels, because not only will it benefit this model, but also the Revell kit if you still want to build that one. Those kit's wheels/tires are much too small.
When I first learned about the release of this model I decided to start my Revell kit anyway. While life events hampered me making it a quick build, I am far enough into it to use it to show side-by-side when I build the AMP kit so you have an understanding of just how much better the AMP kit is.
I'm also hoping that using the kit's decals, along with Begemot's decal sheet, I can cobble everything together to make "Spirit of Ohio" and "Spirit of Nebraska", the two USA States I have lived in for most of my life.
My thanks to MikroMir/AMP for the review kit.
