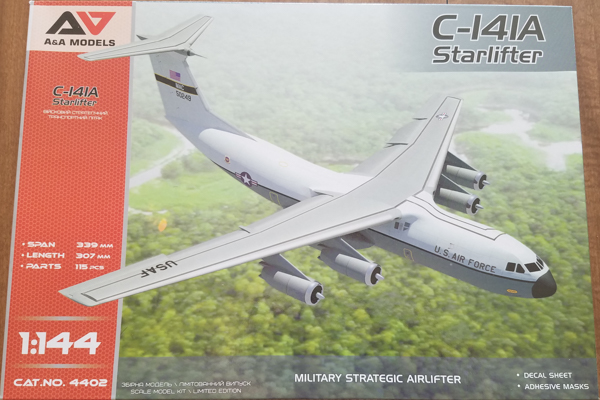
A&A Models 1/144 C-141A Starlifter
By Matt Bittner
Introduction
Taken from Wikipedia:
"The Lockheed C-141 Starlifter is a retired military strategic airlifter that served with the Military Air Transport Service (MATS), its successor organization the Military Airlift Command (MAC), and finally the Air Mobility Command (AMC) of the United States Air Force (USAF). The aircraft also served with airlift and air mobility wings of the Air Force Reserve (AFRES), later renamed Air Force Reserve Command (AFRC), the Air National Guard (ANG) and, later, one air mobility wing of the Air Education and Training Command (AETC) dedicated to C-141, C-5, C-17 and KC-135 training.
"Introduced to replace slower propeller driven cargo planes such as the Douglas C-124 Globemaster II and Douglas C-133 Cargomaster, the C-141 was designed to requirements set in 1960 and first flew in 1963. Production deliveries of an eventual 285 planes began in 1965: 284 for the USAF, and a company demonstrator later delivered to National Aeronautics and Space Administration (NASA) for use as an airborne observatory. The aircraft remained in service for over 40 years until the USAF withdrew the last C-141s from service in 2006, after replacing the airlifter with the C-17 Globemaster III."
A few years ago, Roden released a kit of the C-141B in 1/144. Its biggest dissapointment was the lack of cockpit. And that it couldn't be easily built as a C-141A.
The Kit
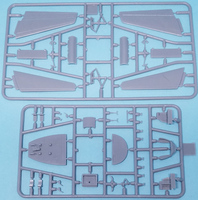
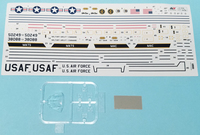
The A&A Models 1/144 C-141A consists of 110 pieces of gray, injected plastic, a clear sprue with seven parts and a set of masks for the canopy and wheels. Decals exist for two C-141As:
- 65-0249, 60th Military Airlift Wing, Christchurch, New Zealand, 29 October 1979 (finished in the white and gray scheme)
- 63-8088, 44th Air Transport Squadron, Travis Air Force Base, 23 April 1965 (finished overall in natural metal)
Decals are nicely printed, appear to be in register and include all walkways and door/window outlines.
|
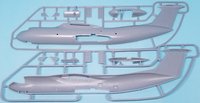
Thankfully, unlike the Roden C-141B, A&A Models include a full cockpit and of course construction starts in this area. First the four seats are assembled from three different parts (which means you can display the arm rests either up or down) and then those are added to the cockpit floor. The rear and rear-side bulkheads are added to the floor, followed by the nose section and control sticks. Overall the detail is nice although there are no instrument panel decals nor seat belts provided in the kit.
From here the assembly takes a turn in having you assemble the landing gear. All main wheels are in halves, unfortunately, but with care should build up fine. Definitely paint everything first before gluing it all together. Once the nose wheels are added to the nose gear, it is then glued to the nose-gear floor.
|
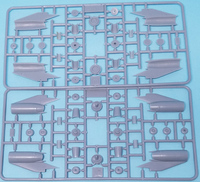
Next the instructions have you glue the retraction arms to the main gear doors followed by assembling the engines together. The last step on this page is gluing the horizontal tail pieces together.
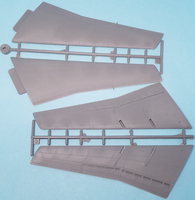
Now the forward and rear bulkheads are glued to the main gear sponsons and those are glued to each fuselage half. Each wing half is then glued together followed by adding the engines. I plan on seeing if the engines can be glued on at the end or if the gaps are too wide and need attending to. It definitely would be easier to paint the wings - and engines - separately. The plastic color for the wings is different than the rest of the kit, so I wonder if these are from the Roden kit. My Roden kit is buried so I'm unable to check.
|
From there the instructions have you glue the main landing gear wall into each fuselage half followed by adding the cockpit to the port fuselage half.
The next step has you glue the fuselage halves together but also show you needing 16 grams of weight to keep it on its nose landing gear. The instructions also show adding the nose gear at this point but I will check to see if that can be added after painting is finished. While the next step has you add the main gear, main gear doors and nose gear door again, those would be best left off until after painting is finished.
|
The final instruction step has you glue the wings, horizontal tails, canopy and a multitude of antennas to the airframe. With masking needed it would be best to leave the antennas off until painting is finished as well. Thankfully the canopy includes part of the fuselage on it so if seam work is needed, you won't harm the clear parts.
|
Conclusion
When the Roden 1/144 C-141B was released, a few were hoping to make a C-141A out of it. There would have been a lot of modifications needed to the Roden kit but thankfully A&A Models makes this point moot. Their C-141A is really a nice kit and is even better than the Roden kit since it includes a full cockpit. Nicely done, A&A Models!
Huge thanks to A&A Models for sending this for review.


