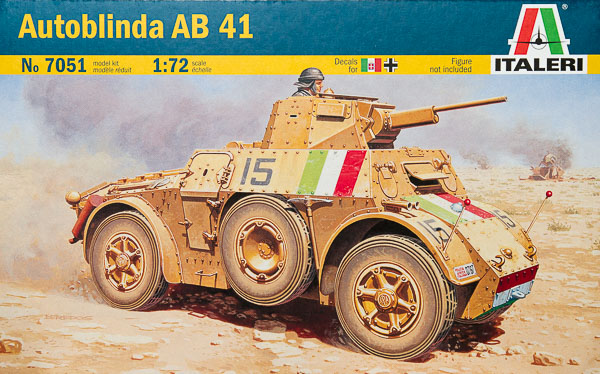
Italeri 1/72 Autoblinda AB 41
By Chris Banyai-Riepl
Overview
In 1938, the Regio Esercito, or Italian Royal Army, put out an order for a new armored car design to replace the older Lancia-Ansaldo armored cars. The result was the Autoblinda AB 40, which featured a four-wheel transmission drive, a rear engine, an all-riveted hull, and a turret with twin machine guns. In 1941, the Autoblinda AB 41 entered production, which saw the replacement of the machine gun armament of the AB 40 with a single 20mm antitank gun and a stronger engine to handle the increased weight. The AB 41 soon proved itself in North Africa, where it performed well, and the AB 41 soldiered on later in the war within the German Wehrmacht.
The Kit
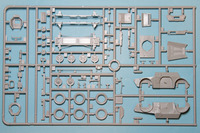
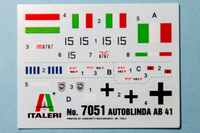
Italeri's kit of the Autoblinda AB 41 is a fairly new one, first arriving in 2007. Since then, it has undergone slight changes, with one release updating it to AB 43 standard and another taking it back to the original AB 40 design. This latest release is actually a stock re-release of the original 2007 kit, with the same box and markings. Inside the box, you get a single sprue of gray plastic, a small decal sheet with options for four vehicles, and instructions. There really is not much to this, and on quick glance, this has the makings of a fast, fun weekender project.
Jumping into the construction, the instructions start you out with the lower chassis. This is split into two parts, an upper structure and a lower, more visible piece. The instructions then take you on to the assembly of the body, and this assembly doesn't show up until much later. However, if you don't read through all the instructions and understand the construction, a slight misalignment here will come back to bite you hard later on. Essentially, what this assembly will provide is the only attachment points for the main wheels, and it's done with two square pegs, vertically aligned, for each wheel. If that alignment is off, either in the vertical or from side to side, your wheels will not fit properly and you'll be left trying to find a solution after everything else is together.

|
Moving on to the body, this is made up of twelve main panels. Now I understand that this is pretty much required due to the complex shape of the car, but the manner that Italeri did this makes assembly a snap for someone with four arms and six hands. The contact points between all of these parts is nothing more than the edge upon which they connect. There is no supporting shelves, locating pegs, or any of the usual items you might expect. In fact, the only pegs provided are the two spacers that are used to keep the sides properly distanced from one another, and these are fiddly at best.
So, running through this assembly, you first add an internal step piece between the wheel wells on each side piece. Then add the two interior spacer pegs and add on the rear engine deck, the lower back plate, the rear upper deck place, and the top turret plate. After that comes the front glacis, followed by the front top plate. Finally you get to add in the lower front plate and the chassis from step one. Another point on this chassis, make sure you stick the wheels on it before fitting it to the body, as if you don't have those wheels positioned right, they will rub up against the fenders. Overall, this assembly could have been much simpler had Italeri made a single interior support assembly instead of the two spacer pegs, an assembly that could have had locating slots and/or pegs that would ensure precise alignment and keep the assembly maintaining shape.
With all of that challenge done, the rest is just details. There are bits and pieces all over the hull, all of which are provided as separate pieces. Cleanup of some of these will be a bit challenging due to the small size. The turret has separate hatches, so it can be displayed with everything open or just a single hatch open. With everything open, you'll be able to see a fair bit inside, but the only interior bits provided are the back end of the main gun, which has a couple of additional bits for the side 8mm MG and sighting scope. One thing worth the effort is replacing the main gun barrel. It took me all of about five minutes to cut off the plastic barrel, drill out a hole, and add a section of 1mm x 0.25mm aluminum tubing. It's a small change, but makes a huge difference visually.

|
The painting options range from simple to complex. The first two are finished in overall giallo mimetico, while the other two are in camouflages consisting of marrone mimetico, verde mimetico, and giallo mimetico. The first option is from Tunisia in 1943 and has red/white/green markings on the hull sides and a black 15 on the sides and fenders. The second option is from Libya in 1942 and has simpler markings, consisting of four blue vertical bars on the hull sides and that's about it. The third option is from the 15° rgt. Cavalleggeri di Lodi (R. E. CO.) in Pinerolo, Italy in 1942. This example has a small black 3 on a red rectangle on the turret. Finally, the last option is from the 162nd Infantry Division in the German Wehrmacht in Italy in 1944. This option has German crosses on the sides and front of the hull.
Conclusion
Despite the construction challenges, I did manage to get this kit mostly together in about an hour, so I think it still would be a good weekender project. It just won't be a stress-free project, at least in the building portion. Painting and finishing, though, will be fun, especially a desert one, and I'm looking forward to getting some color on this one and start weathering away at it. My thanks to Italeri USA for the review copy.
