Introduction
A product of the talented designer Rheinhold Platz, the Fokker D VII is considered to be the best-performing German fighter of World War One. The airplane entered service in April 1918, and at least 1000 are estimated to have been manufactured by the end of hostilities in November 1918. Anthony Fokker continued to produce D VIIs in Holland after the war. Many European air arms plus the U.S. Army Air Service operated the D VII in the 1920s.
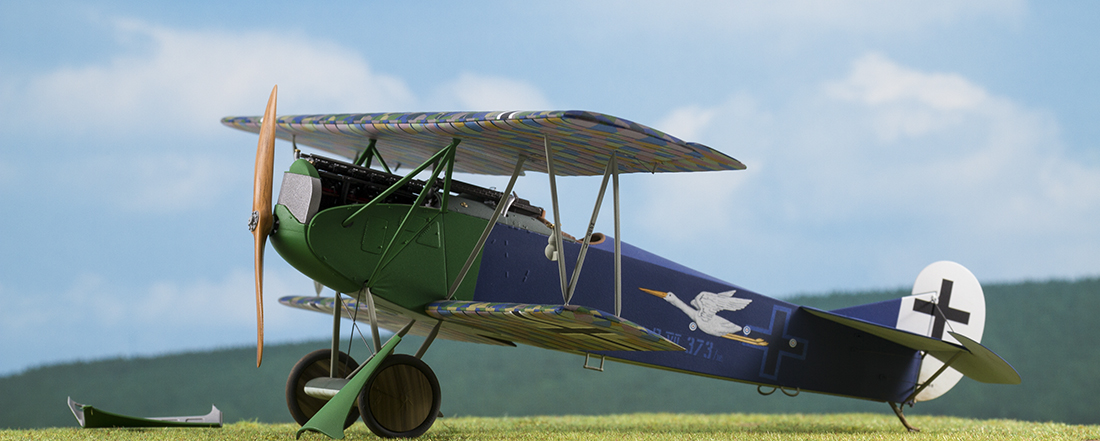
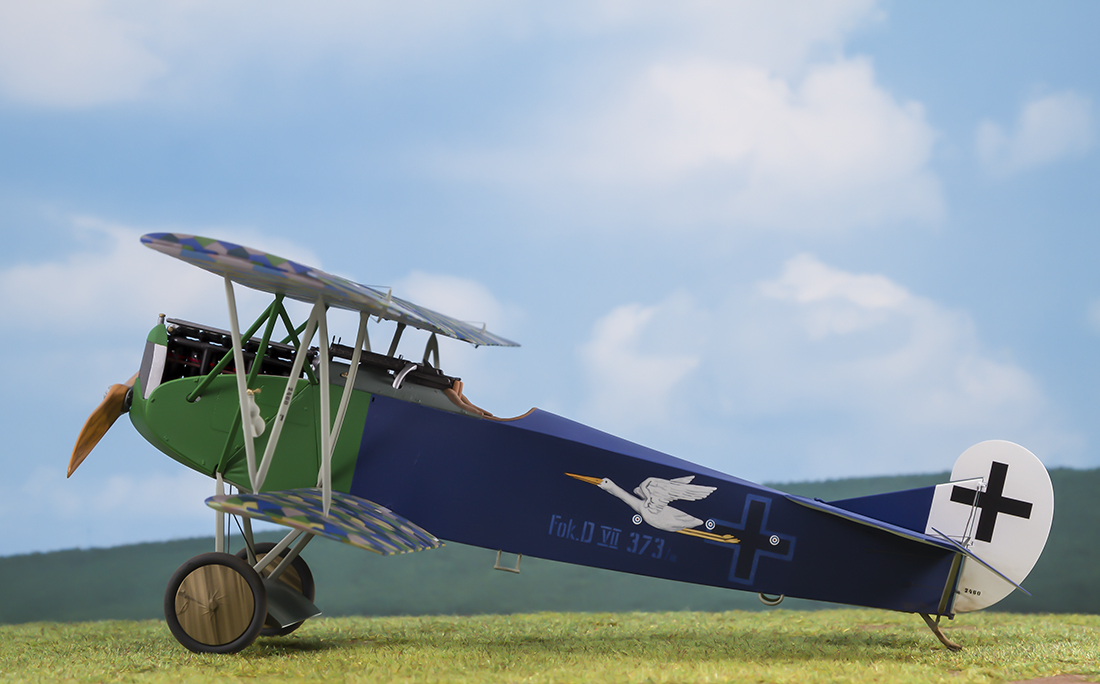
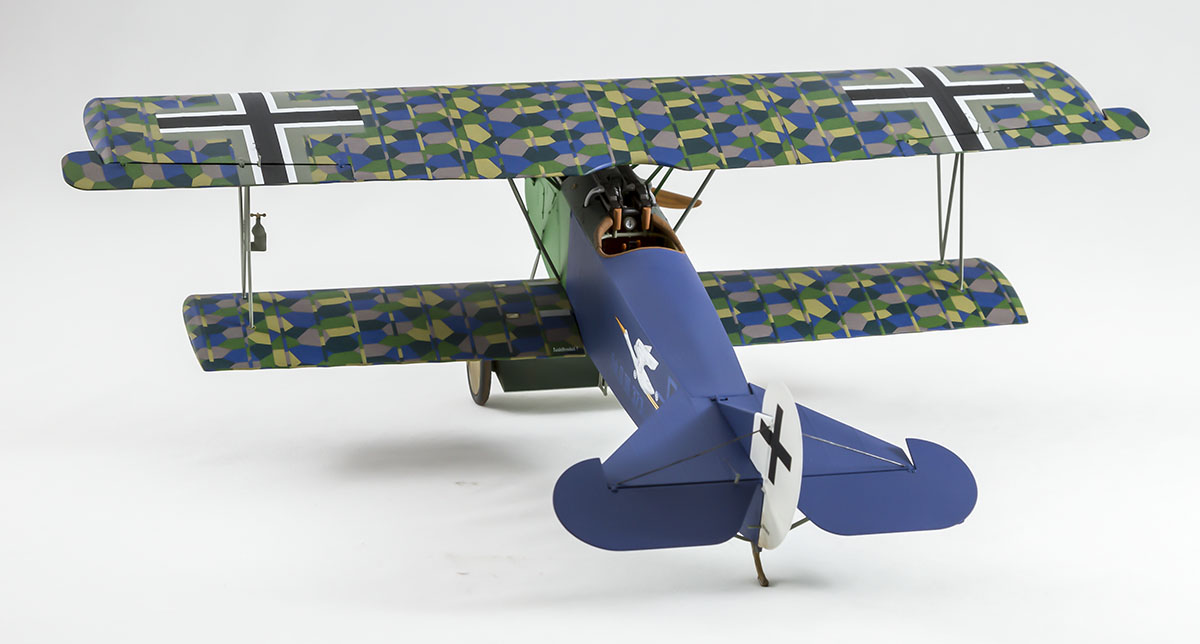
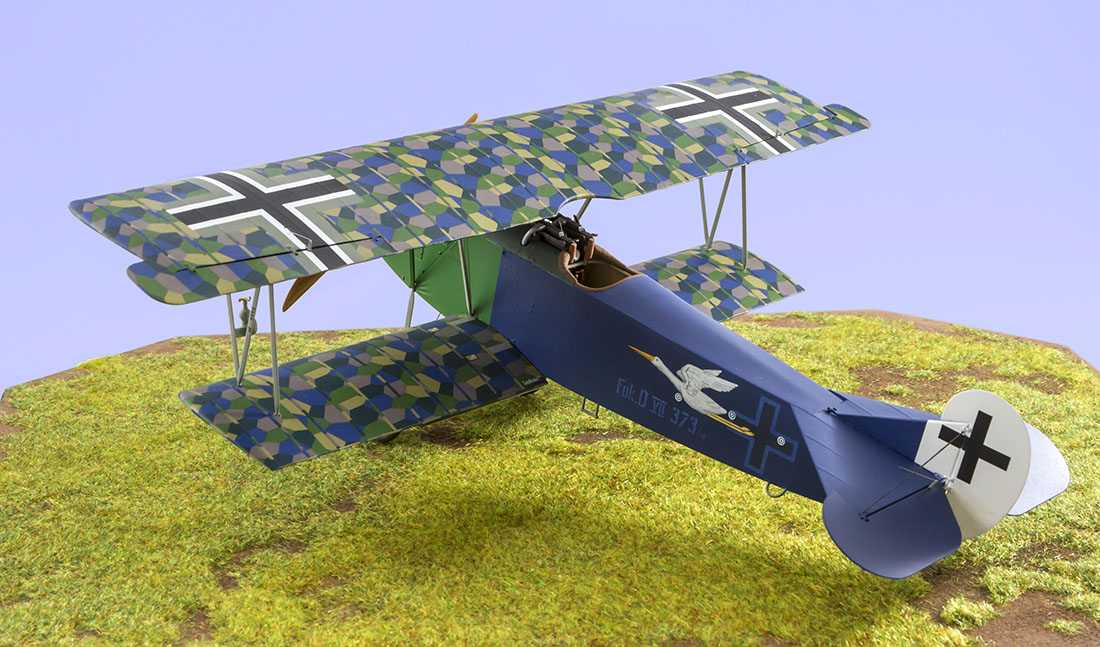
During the war, the D VII was built at three different factories--two of them owned by the Albatros company. My model is the Fokker factory version (kit no. 32011) . It has the markings of pilot Heinrich Piel of Jasta 13b.
There are now four WingNut kits of the D VII, each with minor variations and different decals. Also available from WingNut are several extra decal sheets that offer more markings choices than are in the kits.
Kit Description
 The plastic parts in my kit are well-molded, although I found some minor sink marks on some parts (fuselage, wing axle top, and left lower wing top). Raised molding lines have to be removed from some parts, especially the tubular internal fuselage frames. In other words, normal parts clean-up and preparation has to be done, the same as with any other kit.
The only clear part is the windscreen, which is perfectly produced.
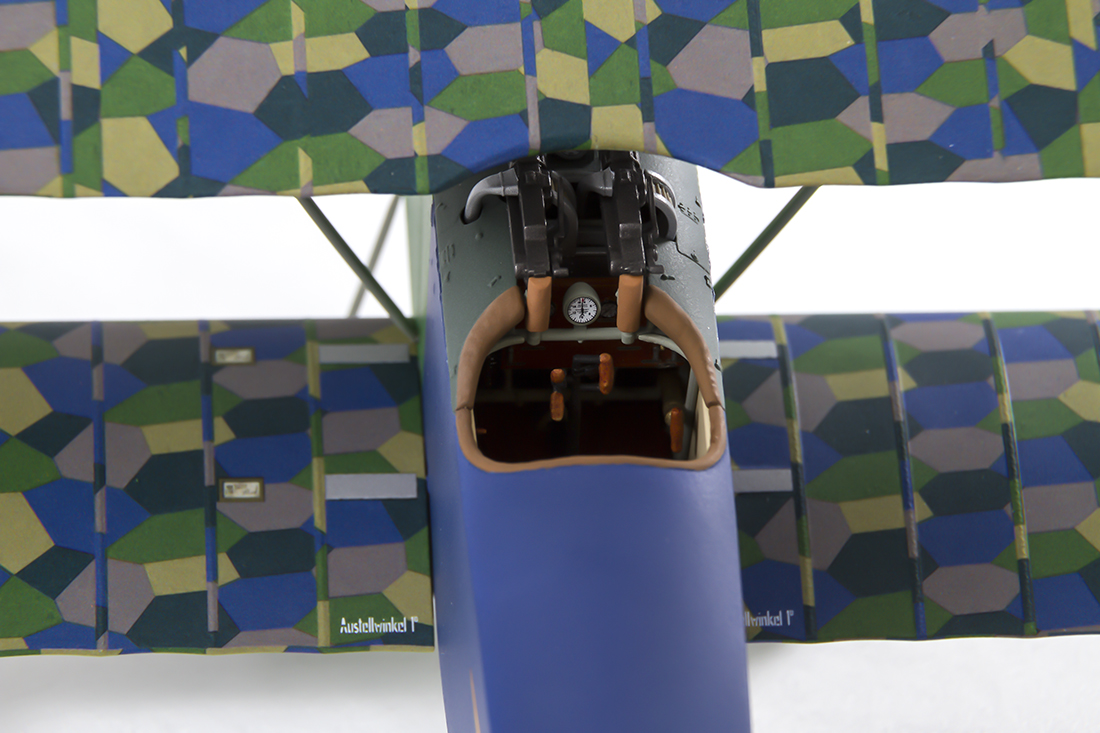
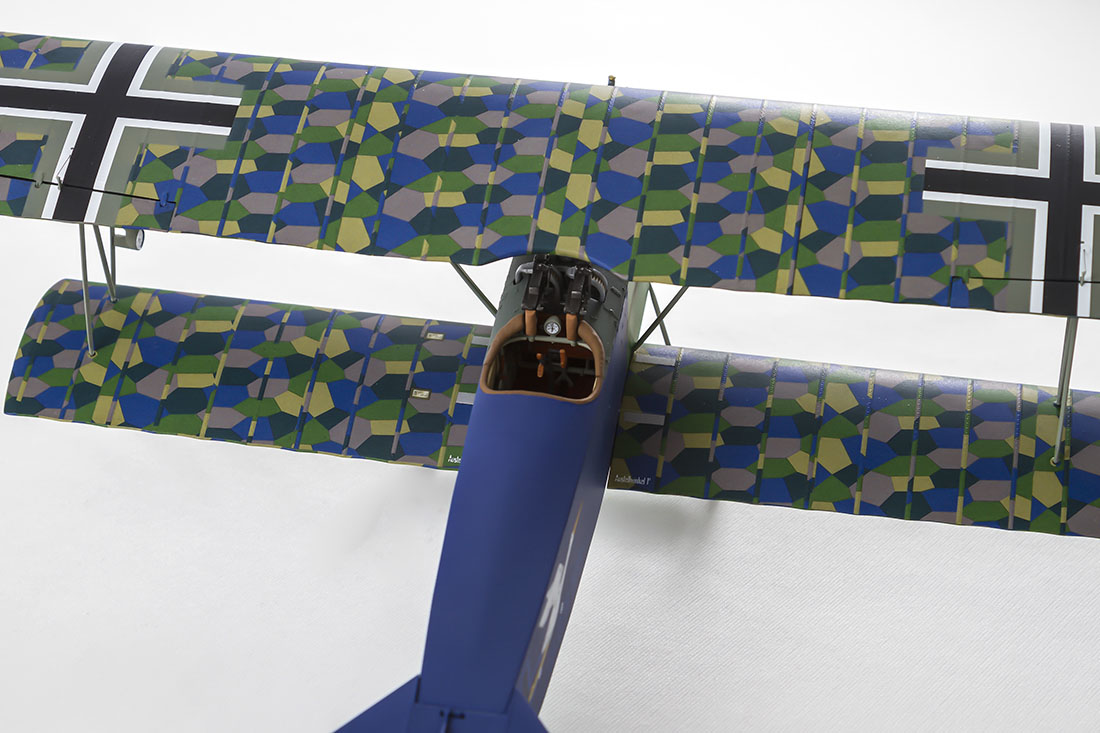
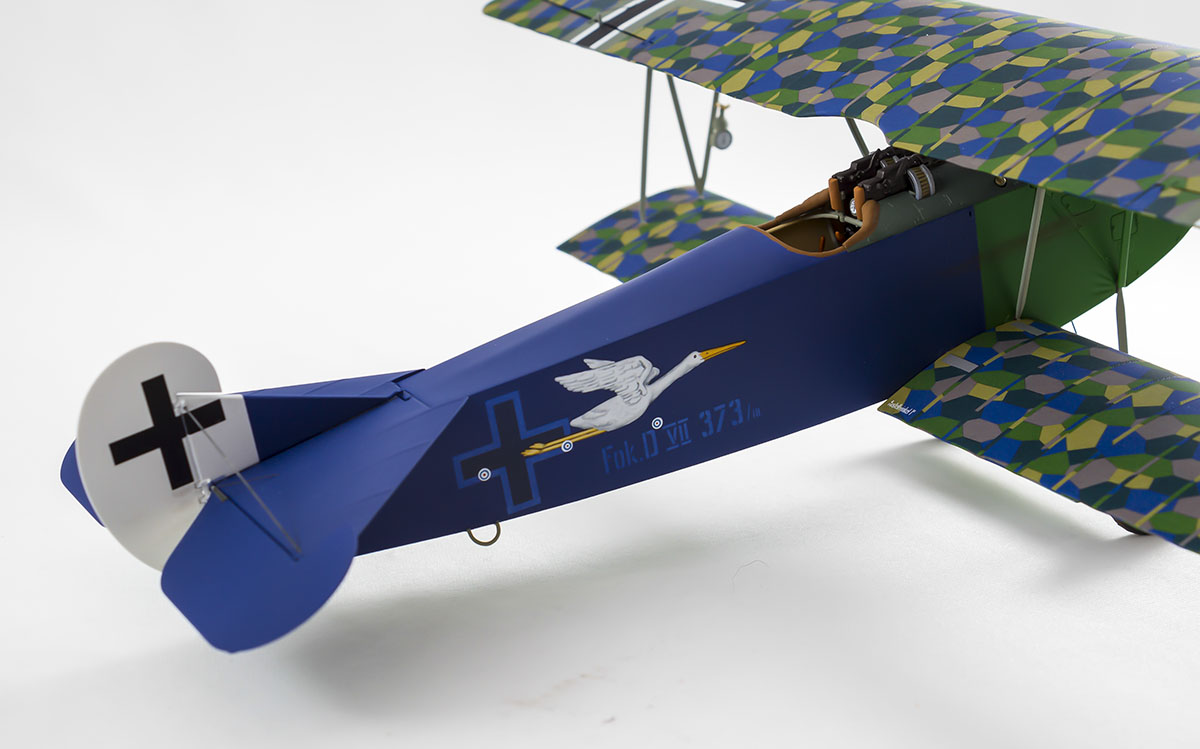 Photo etch parts include the seat belts, shoulder harness, flash guards, gun cooling jackets, and gunsight reticles. I had no problem heating, bending, painting, and attaching these parts with the exception of the jackets. I was unable to properly contour the forward part of the jacket into the proper shape, so I discarded these parts and used the optional all-plastic machine guns.
The amazingly detailed engine is a kit in itself. A lot of time and effort here is worthwhile, especially if you choose, as I did, to display the engine by removing the top cowl panels. (I added scratch-built spark plugs and wires to the engine.)
 The superb instruction manual includes the painting & marking guide and numerous reference photos of the aircraft and its engine. However, there are two errors in parts identification: the axle wing top is I6, not I9, and the upper left cowl panel is I8, not I12. Color call-outs are provided for Tamiya, Humbrol, and Misterkit paints.
Construction Notes
 The main fit issue is that the completed cockpit /engine assembly is too wide where it joins the fuselage halves immediately behind the cockpit coaming. The solution here is to sand down the outside surfaces of the tubular structure at the rear bulkhead to make it narrower. I also thinned a bit of the tubular structure adjacent to the fuel tank.
The top panel containing the coaming (part H1) was a difficult fit and had to be forced down. There was still a partial gap at the bottom which I filled with white glue.
 I had to do a lot of tinkering to get the engine to align straight on the engine mounts (parts B14 & B15). And I clipped off the forward tips of these mounts for a better fit of the chin cowl piece.
One other bugaboo is the prominent gap between the chin cowl (I 9) and the lower panel (A25). I dealt with this by adding a shim to the forward edge of the panel part to make it longer.
 It is very important to test and adjust the fit of all cabane, interplane, and landing gear struts in their location holes before final assembly. Paint must be removed from the attachment points of the struts for a proper fit. Some holes may have to be enlarged or deepened.
A word about the landing gear sub-assembly: it is weak and flimsy because the four struts that attach it to the fuselage are plastic. It would have been a better choice for WingNut to employ metal struts here for strength and rigidity. This would probably also improve alignment.
For the bracing wires in the landing gear and the tail, I used .012 inch and .010 inch brass wire, respectively. Even smaller wire was used for the various control surface cables.
Propeller Tips
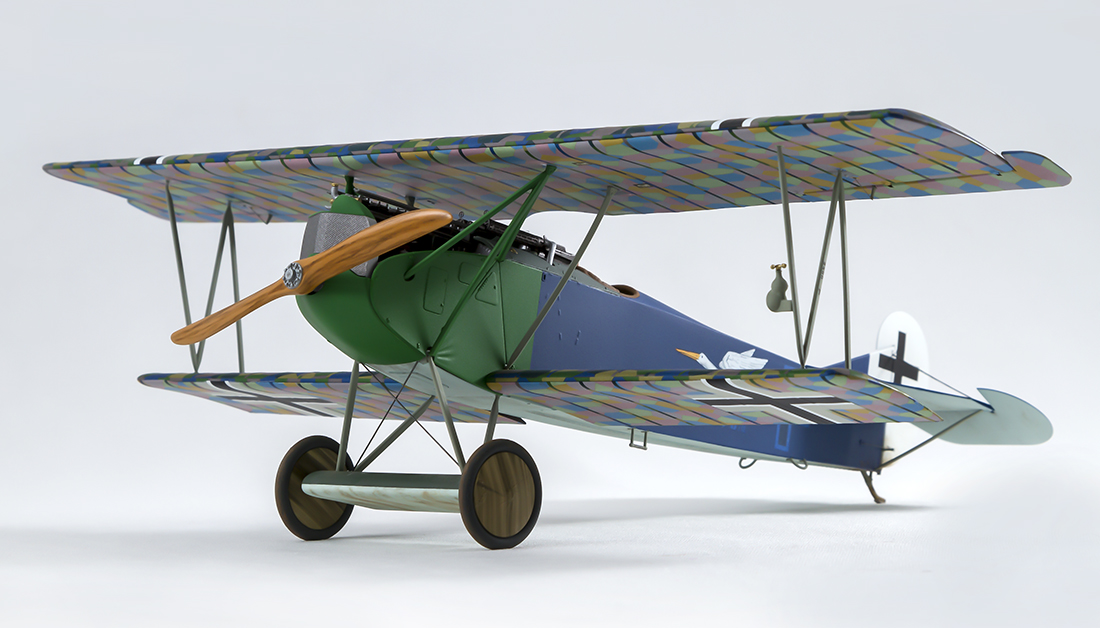 The propeller has a pleasing wood-grain effect that was accomplished in four steps:
1--Base coat of Testors Model Master Wood enamel (lightened slightly with white).
2--Coat of clear semi-gloss Polly Scale
3--Drawing the grain pattern with brown pencil
4--Final coat of Tamiya clear orange
I experimented with various brown pencils from my local art supply store. I chose Albrect Durer No. 8200-179 because it gave the best results. (Yes, a German pencil.)
Paint & Decals
I used mostly Humbrol enamels on this model, as per the instructions. Some Testors Model Master enamels like Aluminum were also used. The wings received a gloss black undercoat prior to the lozenge decal application.
 I was very pleased with the quality and ease of application of all the decals. They responded well to my usual Solvaset and blotting method, plus a bit of low heat from my hair dryer. The different sections of lozenge decals were first aligned and fixed to the wing leading edges, which often left a bit of excess to be trimmed off the trailing edges. The kit contains ample supplies of extra lozenge for touching up any areas that need it.
Mud was applied to the tires with a Tamiya weathering stick. Appropriate dirt, exhaust, and oil stains (mostly on the undersides) were done with weathering powders.
Conclusion
World War One aviation is not my area of expertise, but I enjoyed dipping my toes into new waters with this fine kit from WingNut Wings. The kit has a lot of fiddly parts and is not an easy or fast build-- it is definitely not for beginners. I recommend it without hesitation to experienced modelers.
References
- Fokker D VII In Action by Squadron Signal
- The Fokker D VII by Profile Publications
- Wings Magazine June 2001