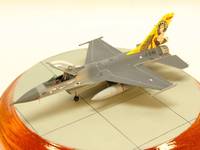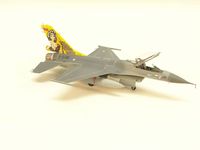
Revell 1/144 F-16C Fighting Falcon
By Bruce Simard
Introduction
Revell's little "Viper" came out several years ago. (Bureaucrats are the only one's I've heard call them Falcons! ) and I have to say, they did a tremendous job with this kit. The interesting thing is, I've read several complaints about this kit. I agree NO kit is absolutely perfect. But some of the complaints I really do not understand. The paint scheme is a major complaint because you have to paint the tanks to match. (We are modelers, right? ) I've also heard the nose contour is not exactly right. Well, I'll tell you here and now, I'm an average modeler. I do NOT count rivets, nor do I measure with a micrometer. Plus I really do not care if a panel line is 1/64th of an inch too far forward. Does it actually look like an F-16? In my opinion, this is a sweet kit. Now granted, I am NOT an F-16 expert. But to me an F-16A, AMU, and C model can all be built from this kit. And the biggest plus is the air intake. The previous models such as LS and DML failed totally at this item. So to me, it really is a nice kit. Plus a decent set of stores are provided.Construction
Now that we've set the tone for this article, let's get into the build. Like most, I start with the cockpit. I used an aftermarket ejection seat from Lilliput Air Force, which I purchased over the net. These seats are very nice examples including the "Side Horns" on the top. From my observations, I think they are made from a 3D printer but I may be wrong. At any rate, after painting it up and adding a harness made from aluminum foil, the seat assembly was set aside to complete the cockpit itself. I normally just use pieces of various instrument panel decals cut up to detail out the 1/144th interiors and instrument panels. A HUD was made fromclear plastic, tinted light green, and sealed with future. The canopy was my next project. Since I am an old time mechanic, I'm used to seeing these birds sitting on the ramp with the canopies opened up. This is the way I like to display them. In this case Revell chose to provide a single piece closed canopy. I used a razor saw to cut down the rear frame line all the way through the attach ears as well. These were then reattached with the aft sloping piece separated. The job really is not that tough to accomplish.
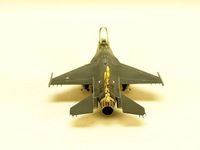 With the "Office" fairly well built, the major assemblies were now started. I did add the splitter vane to the intake from scrap plastic, after painting the insides white. The gear wells actually have some decent detail incorporated in them, which only needs a decent wash after basic painting to "Pop" these details out. I prefer to use artists gouache from any art store to accomplish this. If you want a stark representation, use lamp black. I prefer to use Davy's Grey, which is a dark grey. Just don't overdo it. These birds are generally kept quite clean. I also detail the gear struts and linkage the same way. When building up the airframe you will decide which pylons and weapons you wish to use. I chose just to display my bird with the external tanks.
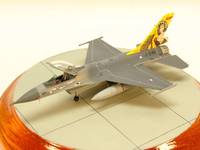 With this kit, you will also have to decide which tail to attach. Whether you're building an A, AMU, or C version is up to you. I heartily suggest referring to photos here. Mainly due to the fact some (Like Norway) have a parachute housing, some are using the compartment for ECM, and some are just equipped with a smaller clipped tail. So study your photos, or consult your local F-16 expert. About this time you really need to start thinking about a color scheme. The grand majority of the Vipers are grey on grey, but again you really need to study photos and decide for yourself. One tremendous thing lately is the great explosion in aftermarket decals for this scale, compared to years ago anyway. Granted you will need to research these via your computer. Companies such as MYK, DXM, even DACO are bringing out new items constantly. Balkan Models just came out with a nice 1/144th scale sheet for the Viper featuring about 5 countries worth. 1/144th scale is very slowly being accepted, which considering the cost savings on the models themselves, plus the space savings for display, it is extremely understandable.
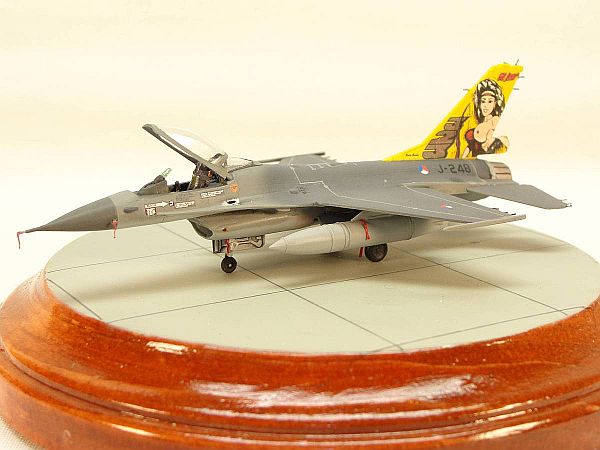
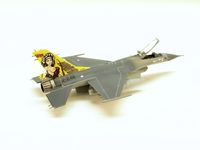
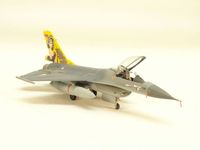 Once you get the basics out of the way, now comes the fun! I love to see how much of the smaller details I can try to replicate. If you reference some of the attached photos, you'll see what I mean. The Viper has two very prominent Angle of Attack probes sticking out on each side of the nose. These are the items that always look like "Cat whiskers". I drilled a #79 hole in each side, and glued in a tiny piece of .005 surgical steel wire to represent the probe itself. To this was attached the "Remove before flight streamer". This was made from regular household kitchen foil, then painted red. (No...before someone asks - I don't have the printing on them! Even I'm not that anal!) These streamers were also attached to the landing gear struts, external fuel tank racks, and the nose probe itself. It just gives that little extra appearance. Previously I had made the ECM antenna covers for each side of the nose from epoxy resin and painted them a darker grey.
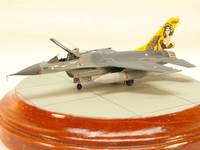 The decals I chose for this build I had seen many times over the last 10 years or so. This is Dutch 323 Squadron, whose "Mascot" is Diana the Huntress. These decals were originally made by DACO in 1/72, and if I remember correctly they may have made them in 1/48 also. I had suddenly noticed Hannants had them in 1/144th! Obviously I had to have a set of those decals, and then Revell came out with this gorgous C model. These decals are really tremendous to work with and are really quite nice. Granted, if you really get on top of them with magnifiers, you can notice the pixels. But considering most people can't even see my models, I wasn't too concerned. Besides, this made for one of the best looking Vipers I've ever seen!
Conclusion
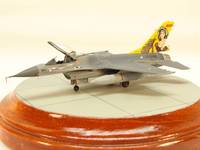 In summary, I have to say I really enjoyed this kit, and will be building more. You'll probably have to suffer through more of them because there really are some terrific decals coming out. Balkan Models just released a sheet with 5 different versions if I remember correctly, Plus DXM released 2 Tiger schemes from several years ago. Again, with this scale,you can build up quite a nice little colorful collection without nuking your wallet. Now we just need a two seater to go with this one, Revell? And you conversion folks need to add the Conformal Fuel Tanks (CFT's) for us, then we can really go to town.
 That's about it for this build. Hopefully you enjoyed the article. But whether you did enjoy it, or hated it, let the IM staff know what you think. They can't fix it if they don't know how you feel. Till next time......Take care (;^)

