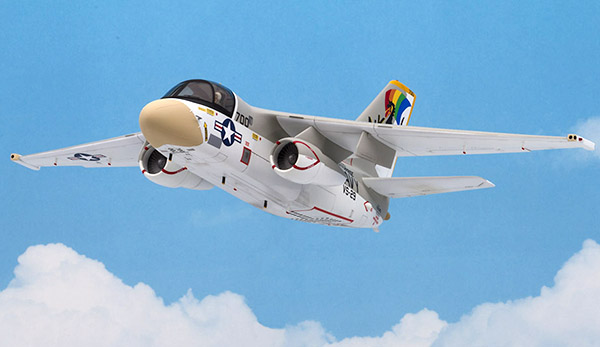
Hasegawa 1/72 S-3A Viking
By Gary Meinert
History
Lockheed's jet-powered S-3 Viking was the successor to the piston-engined Grumman S-2 Tracker. Entering service in 1975, the S-3A offered greater airframe performance coupled with more capable computer and sensor systems for the detection of enemy submarines. From 1988, the improved S-3B version equipped the fleet anti-submarine warfare (ASW) squadrons. The ES-3A variant was developed for electronic reconnaissance and flew with two squadrons during the 1990s.
After the Cold War ended, the Navy decided to remove the ASW gear from the Vikings and use these versatile aircraft for other purposes, including aerial refueling, surveillance, and anti-surface warfare. The last Viking squadron was retired in 2009, which marked the end of an era. The Navy no longer has a carrier-based aircraft for the ASW mission other than multi-role helicopters.
The Kit
 Hasegawa's S-3A is definitely an oldie - I've had it in my stash for about 35 years. I finally tired of waiting for a better Viking kit, so I decided to tackle this one. My particular kit is no. 1142 and has the dual Minicraft/Hasegawa label on the box. (Back in the day, Minicraft manufactured Hasegawa kits under license in the USA).
The Hasegawa S-3A is accurate in shape and dimensions, but has raised panel lines. It has the correct dark-tinted canopy and a number of other features, including separate flaps, refueling probe, FLIR scanner, crew entry hatch, and MAD boom. The external stores pylons offer the option of either drop tanks or bombs. The kit has a rudimentary cockpit with pilot and copilot figures.
Construction Notes
My first task was to remove those annoying raised panel lines. The crosshatch panel line pattern on top of the wings is erroneous anyway.
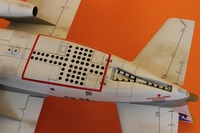 Since I wanted a flying aircraft model mounted on a post, I had to build the fuselage with all landing gear doors retracted. The same goes for the crew hatch/stairs and the infrared sensor unit. Naturally, these parts did not fit well in the up position so a lot of time and effort was spent filling and sanding in this stage of the build.
As I got deeper into the build, I encountered many other fit problems. Perhaps the worst item was the wingtip devices that house the passive electronic countermeasures antennae. They are molded in upper and lower halves as part of the wing upper and lower halves. I ended up basically rebuilding these structures. I also beefed-up the wings internally with styrene blocks to prevent flexing.
Another painful construction task was filling the seams in the engine pods --both intake and exhaust sections.
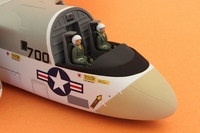 The two cockpit figures from the kit leave a lot to be desired, but I decided to use them anyway. (At least they don't look like fighter pilots).
The finished model is attached to a 3/8" diameter plastic rod by means of two metal prongs that insert into corresponding plastic tubes in the fuselage bottom. The base is a wood plaque.
Improvements
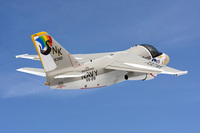 I scratch-built all of the fourteen blade antenna pieces from strip styrene. These look more accurate in size and shape than the kit parts. I also made the two fuselage side windows with Microscale Kristal Klear instead of using the kit windows.
In order to replace lost wingtip detail, I modified and installed aftermarket navigation lights. I used tiny black dot decals to represent the antenna faces.
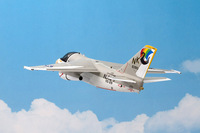 I drew some of the more important panel lines with a No. 3 pencil. I also created appropriate smudges and stains on the white areas with weathering powders.
Paint
The model was airbrushed with Testor Model Master enamels for the gull gray and white paint scheme. A coat of Alclad clear gloss was sprayed on prior to decal application. Alclad clear flat later blended in the decals and a final light coat of Metallzer clear sealer provided a semi-gloss sheen.
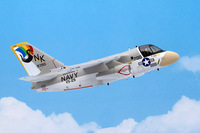 My Viking has a tan-colored radome; I had to experiment to find the right paint for this part. I discovered that Humbrol HU 094 lightened with a bit of white is the perfect color. I chose another Humbrol enamel (HU 147) to paint the walkway sections.
The sonobuoy tube openings on the fuselage bottom were accented with diluted Tempera black (water-based) paint. I also applied a light oil wash in the tail hook well.
Decals
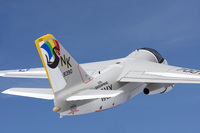
My Viking is the CAG bird for the VS-29 Dragonfires during the squadron's 1976-77 cruise aboard the USS Enterprise. Superscale Sheet 72-836 provided the decals, but there were several errors and omissions on this sheet. I had to dig into my decal dungeon to find alternatives wherever possible. I also used some of the kit decals.
Conclusion
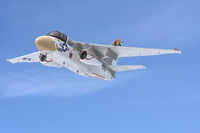 This project generated an unreasonable amount of work and aggravation, which is to be expected when I am stubborn enough--or foolish enough--to build an old kit. Although I am satisfied with the end result, I would not recommend the kit to other modelers.
As a devotee of naval aviation, I am pleased to add the Viking to my collection.
