The Eduard Fokker Dr.I Dual Combo kit #8161 was reviewed in my First Look article. The kit comes with all the modeler needs to build 2 outstanding Fokker Dr.I aircraft. My original intent was to complete both supplied kits for this article. As often happens things did not go as planned. This had nothing to do with the quality of the kit, but rather time and inspiration, with a few self made obsticals thrown in.
Construction
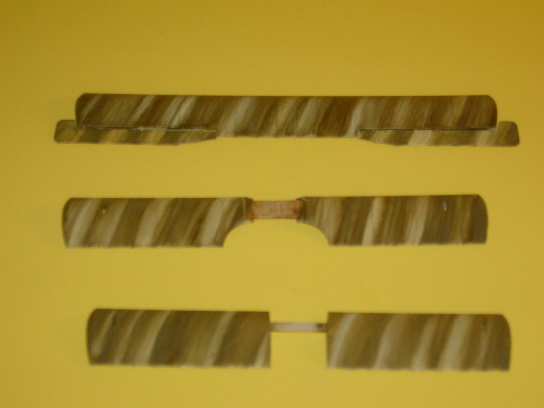
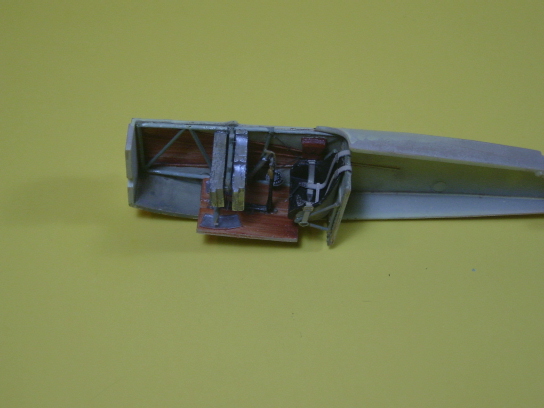 Construction began with the well detailed cockpit. Both sets of fuselage sides were painted Poly Scale CDL as a base coat. The triangular wood formers were then given a brushing of Raw Sienna artists oils. This is applied somewhat wet, thinned with Testors Model Master Airbrush thinner to speed up drying time. A 1/4" flat brush is then utilized to remove most of the paint, leaving the impression of wood grain. This process was also used on the cockpit floor, part B5. All parts representing the tubular structure were painted grey green for one of the aircraft, and CDL on the longerons for the other representing fabric wrappings. Interior
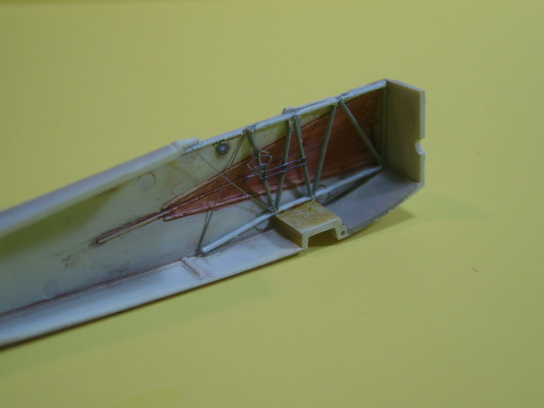
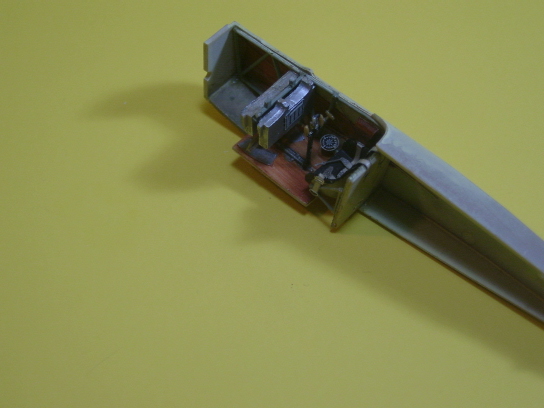
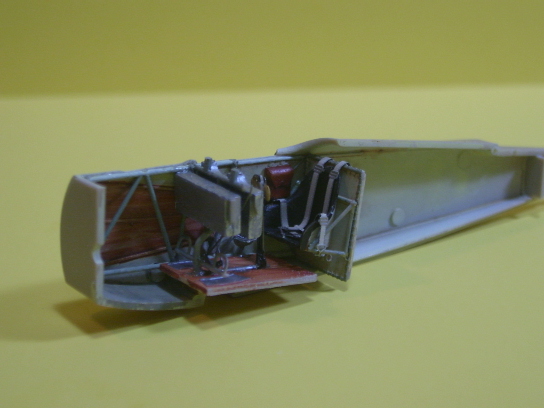 construction is relatively straight forward with PE parts supplied to enhance the Stick, compass, and even including a prepainted part representing the plate on which the variance for the compass was recorded for the pilot. Be careful handling and cleaning up the tubular parts. They will break if misshandled, TRUST ME I know! The leather map bag, part C9, was painted using burnt sienna and attached to the right fuselage half. The rear bulkhead is painted CDL with grey/green framing. The seat was
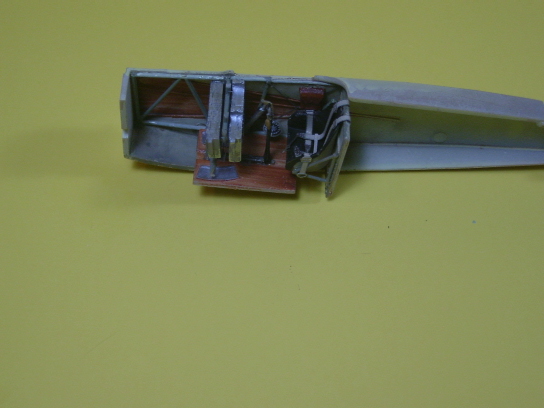
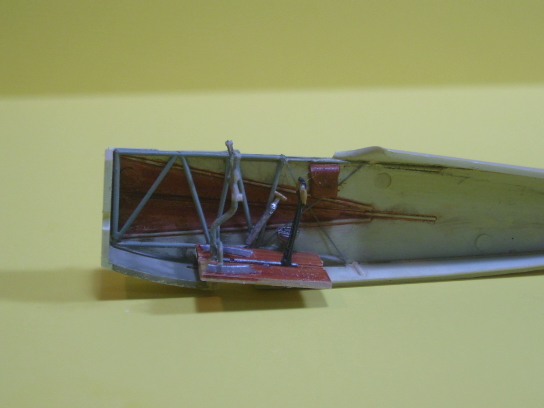
 painted to represent black leather covering the aluminum, then attached to the triangular seat framing. The prepainted PE seat belts are attached to the framework and are very convincing. PE part 3 is a magneto for Albatros type fighters and should be left out of the build. Install the ammo cans, painted aluminum, and part #C36, the support for the tail skid, and you are ready to join the fuselage halves.
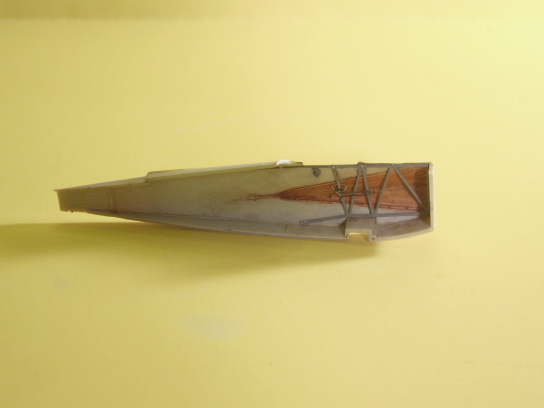
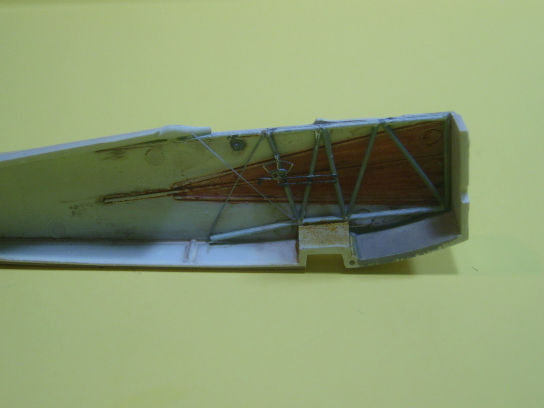 Once seems are filled, very little necessary, and sanded, it is time to consider further assembly and painting sequences.
Eduard's assembly sequence calls for attaching the fuselage decking/cockpit coaming, part A8, to the Mid wing Part A2, then attaching this assembly to the fuselage as the next step. I followed this sequence for one of my Dr.Is as my intention was to hand paint the fokker streaking using traditional methods. For the second, and ultimately the one I have finished for this article, I chose a little different approach.
Gunsight Graphics Fokker Streaked Camo
 Not long after receiving the Dr.I kit for review I also received a pre-production sample of the excellent Gunsight Graphics German Fokker Streaking Decals from Sean Brian Kirby, Mastermind of Gunsight Graphics. These decals are Lazer printed on photo quality clear decal paper. They allow the modeler to acheive an excellent streaking pattern but do require some pre-planning. I painted all wing uppersurfaces with Polyscale CDL and
 then masked and painted the undersurfaces Misterkit Fokker Turquoise. The fuselage was painted in the same manner, after installing part C22, fuselage stictching, attaching the lower wing, and PE access panel and masking the opening in the top. A Template was made for the fuselage side using scale drawings, allowing a little extra for curvature of the fuselage sides, and encompassing the blue return on the lower longeron. this allowed for the CDL to be used as a basecoat, and the blue to be painted next, leaving the return. When using these decals one must think in reverse of normal painting methods. REMEMBER there is no masking over decals once applied. So one must paint any markings before applying the streaks, and mask accordingly. I thereore attached the tailplane, and painted it white, along with the rear fuselage. I also painted the cross
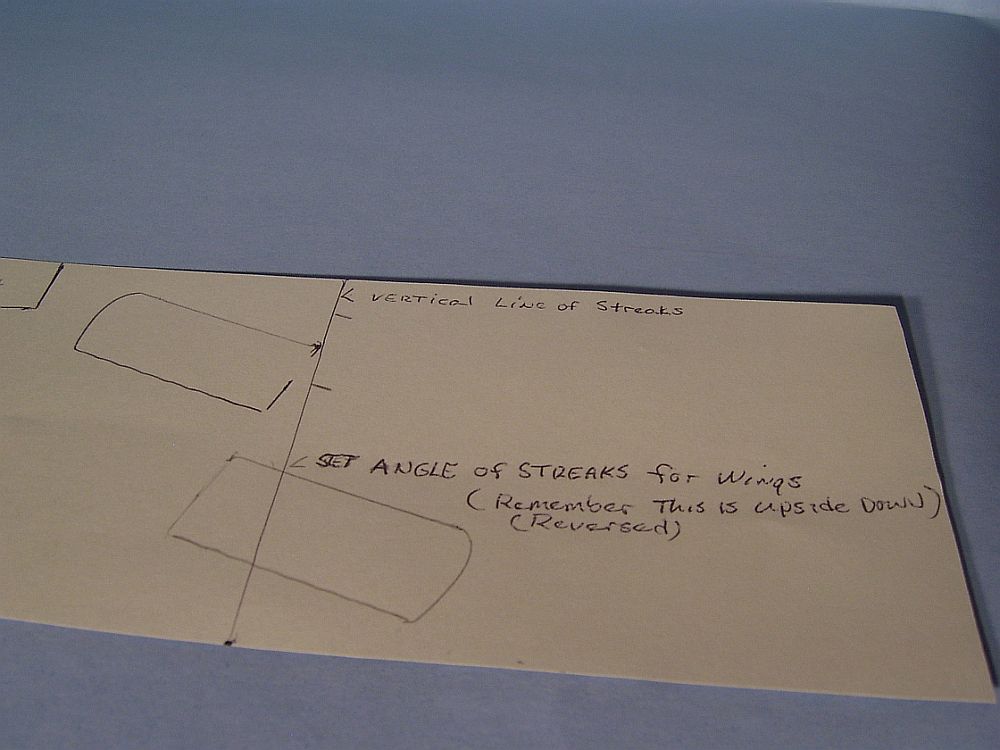
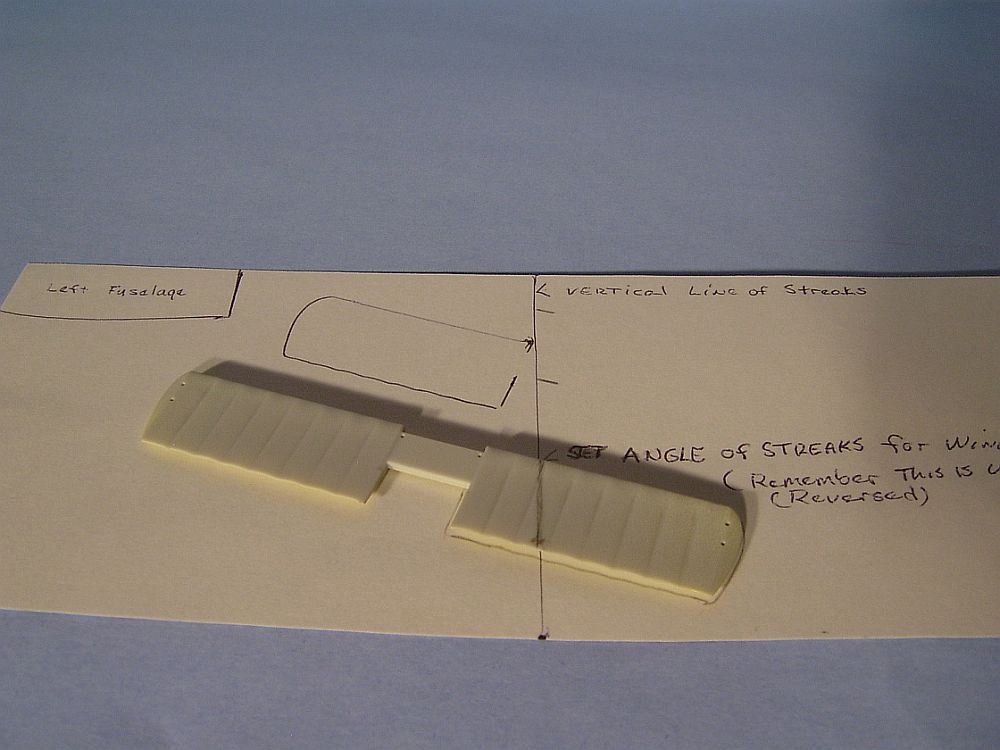
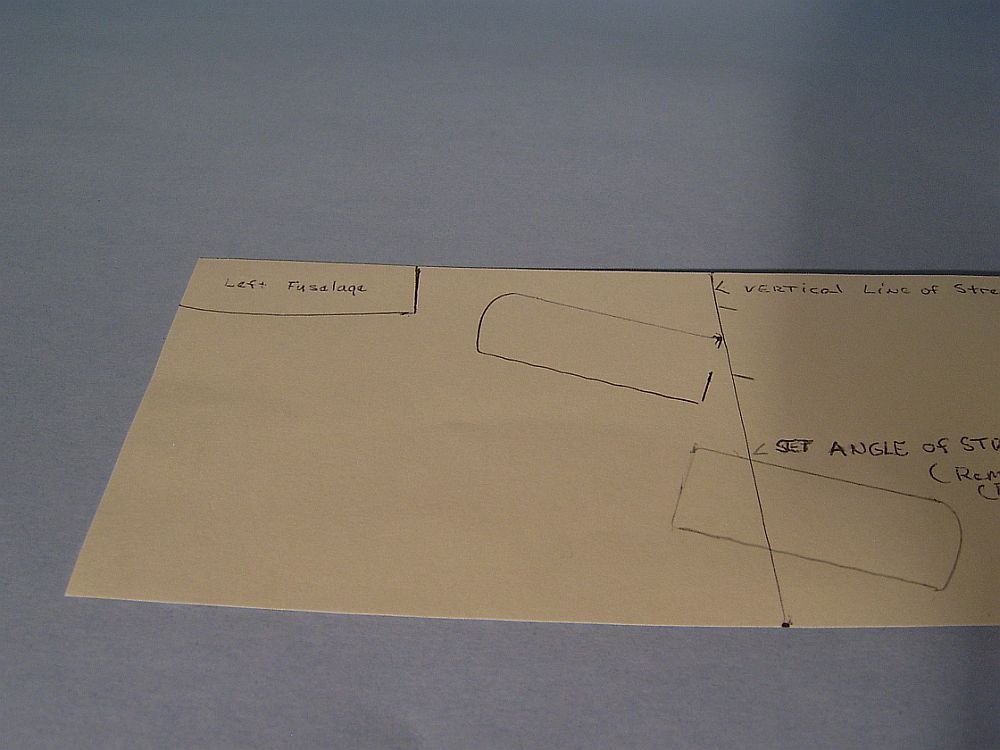 backgrounds Olive green then masked them off. Making Templates for the wings proved rather simple. I struck a line on the backside of the decal sheet representing the Verticle line of the streaks. I used the kit wings with a line drawn at the angle I wanted the streaks to run, then simply lined up the angle of my streak line on the kit part with the verticle line on the decal sheet and traced the part with a pencil (remember this is reversed as you are working on the backside of the decal sheet!). The upperwing was done in three pieces allowing for the cross back ground. From here you cut the decals out, and apply as any other decal. The turtle deck was applied first, then the fuselage sides. I did cut an x
 shape where the induction pipes protrude to assist in application and make sure the decals conformed to the fuselage side. For those of you thinking this sounds complicated just think of this as about the same process as applying lozenge decals! As an asside, I was able to line up my parts to come fairly close to the pattern of streaks as seen on the original. Test your templates frequently before cutting the decals and you should have a trouble free application!
 The other, conventional scheme was assembled per directions, then painted CDL on the fuselage sides and all upper wing surfaces. Artists oils were then applied wet using a flat brush. I use a mix of Yellow, black and a dash of red for the olive mix. A brush dampened with thinner is utilized to remove paint in a manner that represents the streaking desired. The rear fuselage and tail surfaces were then painted red.
At this point I assembled the kit using the Gunsight Graphics decals mid wing and fuselage decking per instructions. I then added the Interplane struts to both builds, and went to the next step.
The next sequences encompass building the Spandaus, and attaching the ammo feed chutes. I had, as usual some degree of difficulty rolling the barrels and attatching the PE ends/sights. I lost 2 to the carpet Gnomes!! This coupled with the jump from the case by the painted streaked bird left me to focus on finishing just ONE for my build article.
 The rest of the assembly is very straight forward. Assemble the engine, add the control surfaces to the wings and tailplane, attach the cabanes to the upper wing and glue the assembly to the fuselage and interplane struts. I had no major difficulty in the final wing assembly, just a note to be careful as in all multiwing assemblies.
 The final assembly step is the landing gear. It has been stated in previous reviews that Eduard's Dr.I "Sits TOO HIGH" without trimming the gear struts. I found that by opening the locating holes in the upper portion of the axle wing, part A6, and making sure the struts were located properly, that there is no need to shorten the struts.
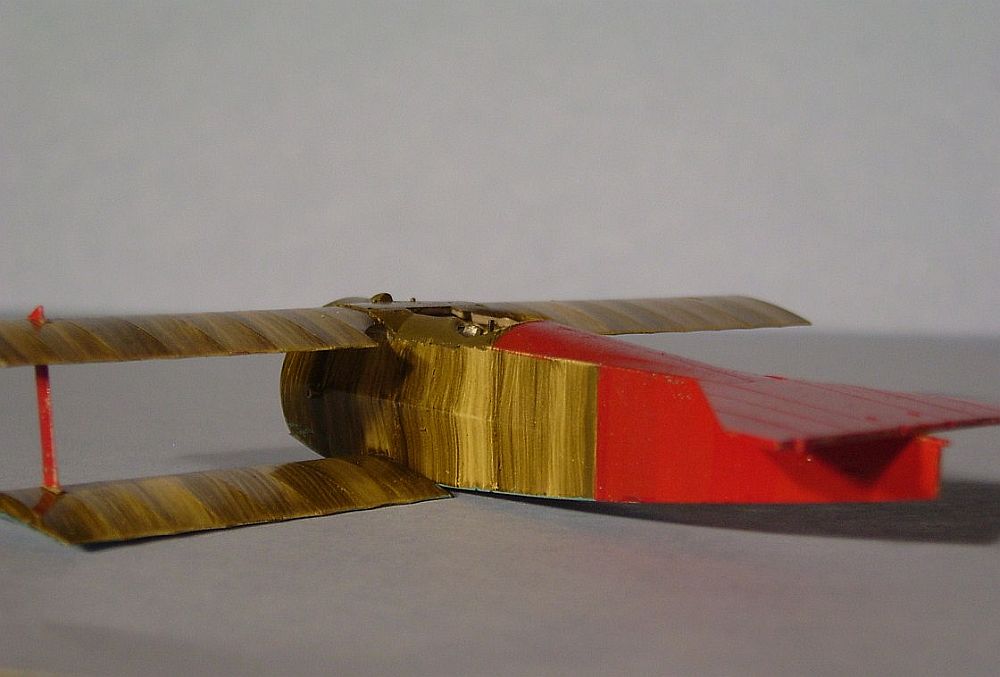
 Final painting and touch up was done with Testors US OD for the streaks, I made a few random additions just to vary the pattern. The cowling and struts were painted Pro Modeler Insignia Red, and the personal markings were from the Blue Rider Jasta 11 sheet. Tailskid and wingtip skids were painted in a base coat of CDL, with burnt sienna brushed over. All rigging was stretched sprue.
Final finish was Poly Scale Clear Satin Finish. I used artists oils to represent the carbon deposits, and staining frequently seen on Dr.Is.
Overall this kit is a pleasure to build, with carefull assembly this kit is great for first time WW1 builders or veterans alike.
Thanks to Matt Bittner, Eduard, and Gunsight Graphics for the review samples.