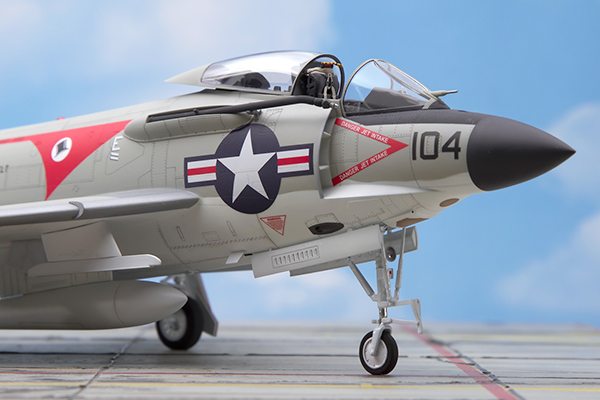
Building the Hobby Boss 1/48 F3H-2 Demon
By Gary Meinert
Introduction
See my in-the-box review of March 2012 for the kit description and history of the subject. Instead of repeating any of that, I'll go directly to the build experience.
Construction Overview
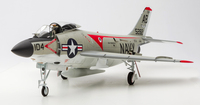 My enthusiasm for this kit began to decline soon after I plunged into the build. While generally accurate in shape and dimensions, this kit has numerous problems. The major issue is the fit of the wings to the fuselage. HB has apparently designed the wings to fit in the neutral position, but the reality is that the Demon's wings have a prominent anhedral. I had to shim the entire wing join with sheet plastic and add even more after I forced the wings down to the anhedral position. Much time and effort was expended test-fitting, filling, and sanding the wing-to-fuselage join.
More Fit Problems
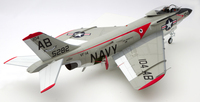 But wait, there's more. Every sub-assembly contained within the fuselage (nose wheel well, speed brake wells, tail hook well, etc.) had prominent gaps to fill. Same for some areas of the cockpit. The lower front fuselage panels (Parts J3 & J4) were a poor fit. The rudder, flaps, and ailerons required a lot of modification to achieve a proper fit. The beaver tail was also a bad fit. (Incidentally, the beaver tail has an inaccurate shape, being too sharply curved on the upper surface.)
Pylons & Rails
 The four wing pylons were another headache. They are engineered to fit too far forward, and cannot simply be moved back because the upper surface contours would not match the wing. The four missile rails are of the type for carrying the AIM-7 Sparrow missile only. They have several inaccuracies and are also too narrow in relation to the thickness of the pylons.
My solution was to discard the kit pylons/rails and kit-bash two new ones for the inboard positions. I used pylons from a 1/72 F-89 Scorpion kit and missile rails from a 1/48th Phantom kit. The rails were reduced in length. My resulting pylon/rail combination is for the AIM-9B Sidewinder.
Other Issues
 Another major concern is that the coaming (part D22) sits too high and is angled too steeply. I made precision cuts to lower the coaming, but this interfered with the fit of the instrument panel, so I also had to chop off a portion of the bottom of the instrument panel.
The canopy bottom plate (F6) and associated parts are designed to fit with the canopy closed. I had to modify this sub-assembly to fit properly with my canopy in the open position.
The jet exhaust nozzle assembly is angled down too much, but that's the way it fits. I did not try to change it.
Improvements
 A number of other corrections and improvements were made, including:
- The kit seat is for the early Demon, not the F3H-2. I replaced it with the Aires MB Mk4 resin seat for the F3H-2.
- The landing light and carrier approach lights, which are mounted on the nose gear leg, are omitted in the kit. I added a light from my spares box and scratch-built the approach lights box.
- I added the missing ventral beacon light, again from my spares box.
-
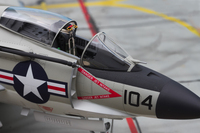 I added plates to cover the upper gun ports. These were made from five thousandths sheet styrene.
 - I made the tiny gun camera fairing for the right front lower fuselage.
- I replaced the lower UHF antenna (E10) and the strakes (F14&15) with more accurate pieces made from plastic sheet. (These strakes may be deflector plates for the adjacent shell link ejector chutes, which I represented with decals.)
-
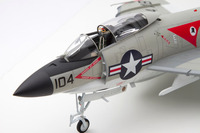 Since the pitot tube in front of the windscreen (F8) was too large and had an overly thick base, I trimmed it down to a more reasonable size.
 - The kit lacks a gun sight, so I scratch-built a simple one.
- I added an ADF dome antenna to the equipment under the canopy.
- I drilled openings in the lower gun ports for a more realistic appearance.
- I added a throttle and radar hand control to the cockpit.
Painting
 I used Testors Model Master (MM) enamels for the basic gull gray and white airframe colors. I carefully masked and airbrushed the large red fuselage chevron design with MM Guard Red. Ditto for the red trim colors on the wingtips and tail tip. For the speed brake inner surfaces, I chose MM Insignia Red, and for the speed brake wells Pactra Zinc Chromate (green).
According to my reference photo, my Demon (Bu. No.145282) did not have the usual black walkways. I therefore painted the walkways MM Neutral Gray, a much lighter color.
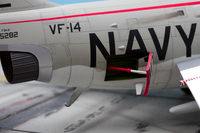
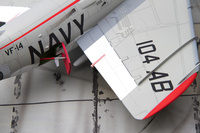 The panel lines and other recessed surface detail were highlighted with pencils. A few smudges with weathering powder were applied, mainly on the underside. The prominent stains from the oil vents were also accomplished with powders.
This time I tried new products for the clear coats: Alclad Aqua Gloss Clear for the decal base coat, and Alclad Klear Kote Matte for the upper surface flat finish. I was pleased with the results.
Decals
 My Demon has the markings of the VF-14 Tophatters, the Navy's oldest active aviation squadron. The Tophatters (originally known as the High Hats) will celebrate their centennial in 2019.
The decals are a mixed bag: some from the kit, some from Furball Aero Design, and some from my decal dungeon. My usual method of Solvaset and blotting was used to apply the decals.
Conclusion
This is my third time at the rodeo with a Trumpeter/Hobby Boss 1/48 jet kit. (Regular readers will recall my previous build articles on the F-105D and F-100D.) And this is my third unhappy experience with this company's products.
I don't expect perfection from any kit, but the HB Demon kit has too many shortcomings to deal with. I therefore recommend the kit only to advanced modelers who absolutely must have a Demon in their collection.
Meanwhile, I raise my mug in a toast to the Tophatters and the other leading men of Carrier Air Wing One. Primus Principes, indeed.
References
- F3H Demon In Action by Squadron/Signal
- McDonnell F3H Demon by Steve Ginter
- Combat Aircraft magazine, Dec. 2009
- Forgotten Jets
- Phil's Aeronautical Stuff
