Airfix 1/72 F-51D in Canadian Colors
By Jim Bates
Airfix 1/72 F-51D Mustang in Canadian Colours
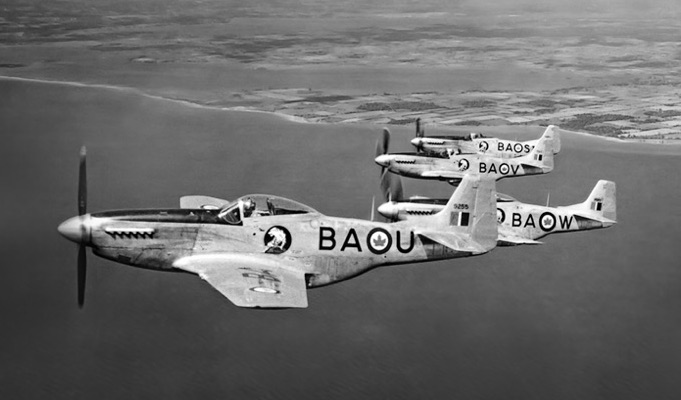
In 1982, the Canadian Warplane Heritage acquired a former RCAF (Royal Canadian Air Force) P-51D Mustang that was soon repainted in the colors of an RCAF Mustang 4 that flew with 424 Squadron, an Auxiliary Fighter Squadron that flew out of Mount Hope, Ontario, in the late 1940s. I was just 10 years old at the time and I was captivated by the large tiger badge painted on the side of the Mustang. The tiger was adapted from the CFL Hamilton Tigercats logo, and knew I just had to build the model. In 2016, I accomplished that goal!

The RCAF's Wild Horses
Although a few RCAF Squadrons flew the Mustang with the RAF during World War Two, it was just post-War that the RCAF took the Mustang on strength. The RCAF wanted to replace their P-40s and Mosquitos and they sourced over 100 P-51D Mustangs from the United States and designated them Mustang 4. Two regular strength Squadrons, 416 and 417, were equipped with the type, but most of the Mustangs were passed to the Auxiliary Squadrons. The 424 Squadron Mustangs, flown by former fighter pilots now serving as weekend warriors, helped defend the population centers of Hamilton and Toronto. Most of the Mustangs were struck off strength in the late 1950s and early 1960s, after a decade of service. Many of the aircraft survive to this day; RCAF Mustang make up a large portion of the "warbird" P-51s still flying at airshows.
The Model
Why did it take me over 30 years to build the coveted "Tiger" Squadron Mustang? For the longest time, it was sourcing the appropriate decals. Both Ventura Decals and Arrow Graphics took a crack at the Tiger markings but neither were satisfactory. When Leading Edge Models released their 72.81 Eastern Squadrons decal sheet in 2012 the model came to the forefront of my project list. Airfix released their new tool F-51D at about the same time, so there was no question it was time to get moving and build the model I had been looking forward to for years.
The Airfix F-51D
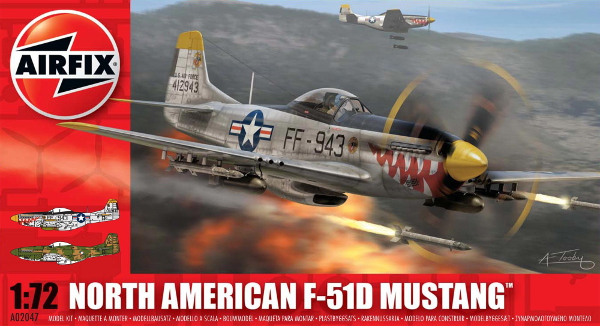
There have been at least three boxings of the Airfix "New Tool" P-51D since 2012. The best boxing to search out is the F-51D, which includes an additional sprue with bombs, rockets, and the uncuffed Hamilton Standard propeller I required for my chosen subject.
The Airfix Mustang is molded over two sprues of soft grey plastic and one clear sprue. As with all of the newer Airfix kits, the moldings look good and have nice detail. However, one is struck with the thought that, if Airfix used a slightly harder plastic the kit could look much better. The detail is excellent, although the cockpit instrument panel is represented by a decal. The panel lines are engraved, though some might find them a tad too emphasized.
The cockpit floor also includes the under fuselage scoop ducting, so do not forget to pre-paint the ducting and fuselage sides before assembly. The cockpit consists of a seat, instrument panel with decal, gunsight, seat, and a control column that I defy anyone to remove from the sprue without damage (I broke mine and had to create a new one from plastic rod). I painted the cockpit with various dark greys in order to create the "scale black" necessary for the cockpit of most RCAF's Mustangs. I assembled the fuselage halves with no issues, but I did struggle fitting the wing to the fuselage. I had to shave the wing root so that the correct dihedral was maintained. It is very possible that I didn't remove enough plastic from the rear of the wing where it slides under the lower fuselage scoop, because I could not get the wing to fit cleanly and some filler was needed under the nose. Otherwise, the filler stayed in the jar with this build. You can also lower the flaps, the first 1/72nd scale P-51 kit with this option. Most P-51Ds at rest are parked with the flaps lowered so I choose to fit them extended. The standard kit includes only drop tanks, but the additional sprue includes a set of rockets and bombs. My original plan was to separate the rocket mounting stubs from the rockets and fit only the stubs...a common RCAF fit. But I lost a few of the minute stubs, so my Mustang has only the wing pylons fitted.
While my kit's landing gear was well molded, it is not odd to find the main landing gear warped. They should be easy to bend back into alignment. Much like the control column, it would take much more skill than I posses to remove the fuselage antenna from the runner without it shattering. Finally, something appears to have gone wrong with the horizontal stabilizers and a few panel lines that delineate the elevators are missing. The fastidious modeler will scribe them in, but I was lazy and ignored it.
Sadly, Airfix has aped the Tamiya design of the clear parts and molded the solid frame and clear bubble separately. I was able to carefully join the parts with Tamiya Extra Thin Cement, but it wasn't without stress. Also, the windscreen is a butt joint to the fuselage with no lower framing with which to hide any mistakes. Sadly, I didn't get as clean a joint as I wished. I masked the canopy and gave the airframe a coat of Mr. Surfacer. To my shock, no remedial seam work was necessary! I sprayed the Mustang with Gunze Mr. Color H8 for the natural metal, Tamiya Flat Aluminum for the separate rudder, and the Gunze Chrome for the spinner.
The Leading Edge decals are interesting. They are beautifully printed, but they are quite thin and willing to fold over with the slightest provocation. Oddly, they take minutes to release from the backing paper, not the seconds we are all used to.
Once the decals were dry, I added the small parts, removed the masking, and I applied a wash to the perforated cooling vents under the nose. Finally, 34 years after I first fell in love with it, I now have a 424 Squadron Mustang on the shelf.
While the Mustang is my least favorite of the new tool Airfix kits I've built, it is still a very nice kit and great value for the money. The self destructing control column and antenna, odd canopy engineering, and missing scribing on the horizontal stabs are frustrating, but it does have the lowered flap option. The Tamiya kit has slightly better detail and panel lines and shares the same annoying canopy engineering choices, but it has the flaps molded in the retracted position and is quite a bit more expensive. I guess it's just a matter of paying your money and making your choice!
