
Airfix 1/72 Blenheim: 40 years on
By Neil Crawford
Airfix Bristol Blenheim IV 1/72 scale an exercise in futility.
(or how to make a pig out of a sows ear)
|
|
|
|
|
|
|
|
|
|
|
|
|
|
|
|
|
|
|
|
|
|
|
|
|
|
|
|
|
|
|
|
|
|
|
|
|
|
|
|
|
|
|
|
|
|
|
|
|

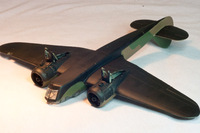
For some reason I’ve been thinking a lot about my old Airfix Bristol Blenheim. The Blenheim was an important workhorse for the RAF , and often ignored, it also fathered the Beaufort and Beaufighter, two aeroplanes that I really like.
I must have been reading too many of Mike Grants articles about building old Airfix kits, perhaps I’m just too tight to buy a modern kit, or maybe I just like a challenge, but before I knew it I’d fetched my 40 year old model down from the attic and started sanding it down. I often surprise myself, but this was ridiculous. An MPM kit would be a much more sensible choice, but it seems to be a trend amongst older modellers to build old kits, and who am I to ridicule that, well I used to quite a lot, I always used to say that anyone not using the best possible kit as a starting point is an idiot, but I’m nostalgic too, and flexible, so here I go!
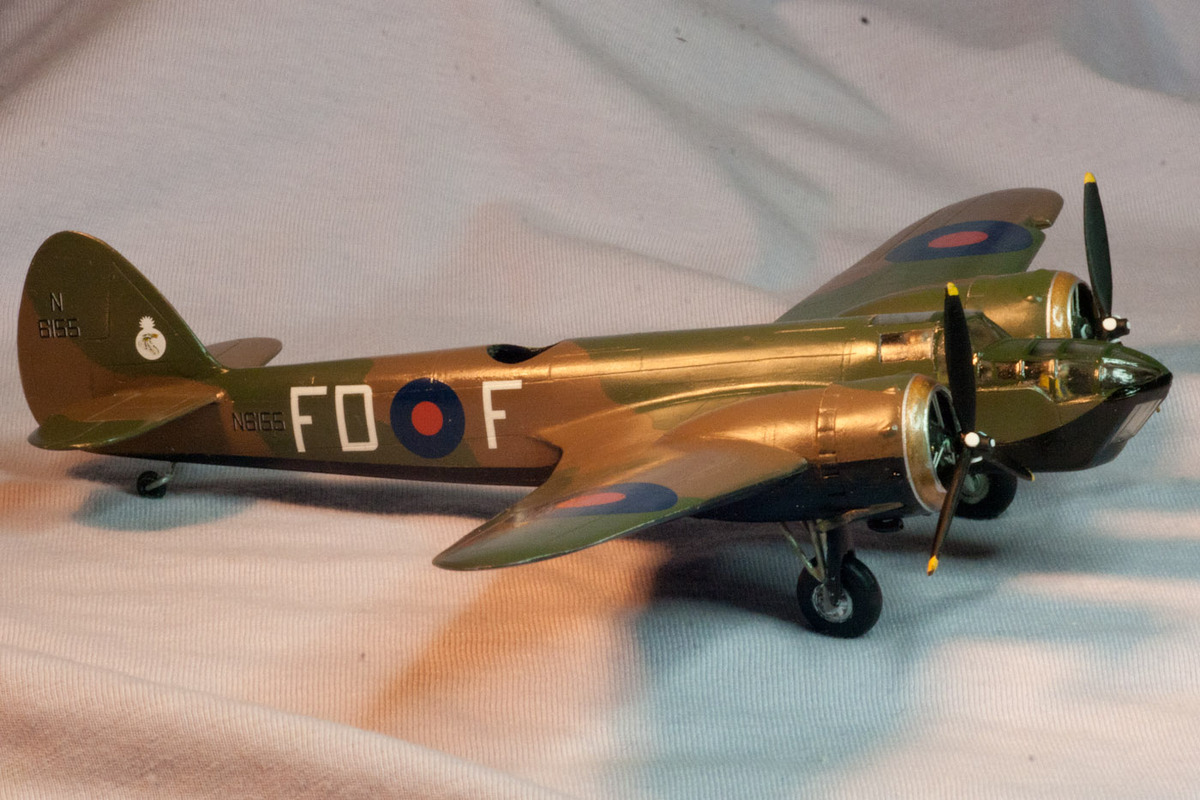
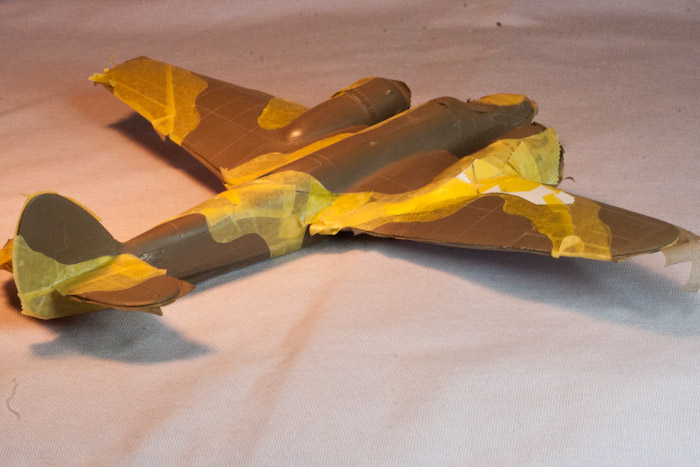
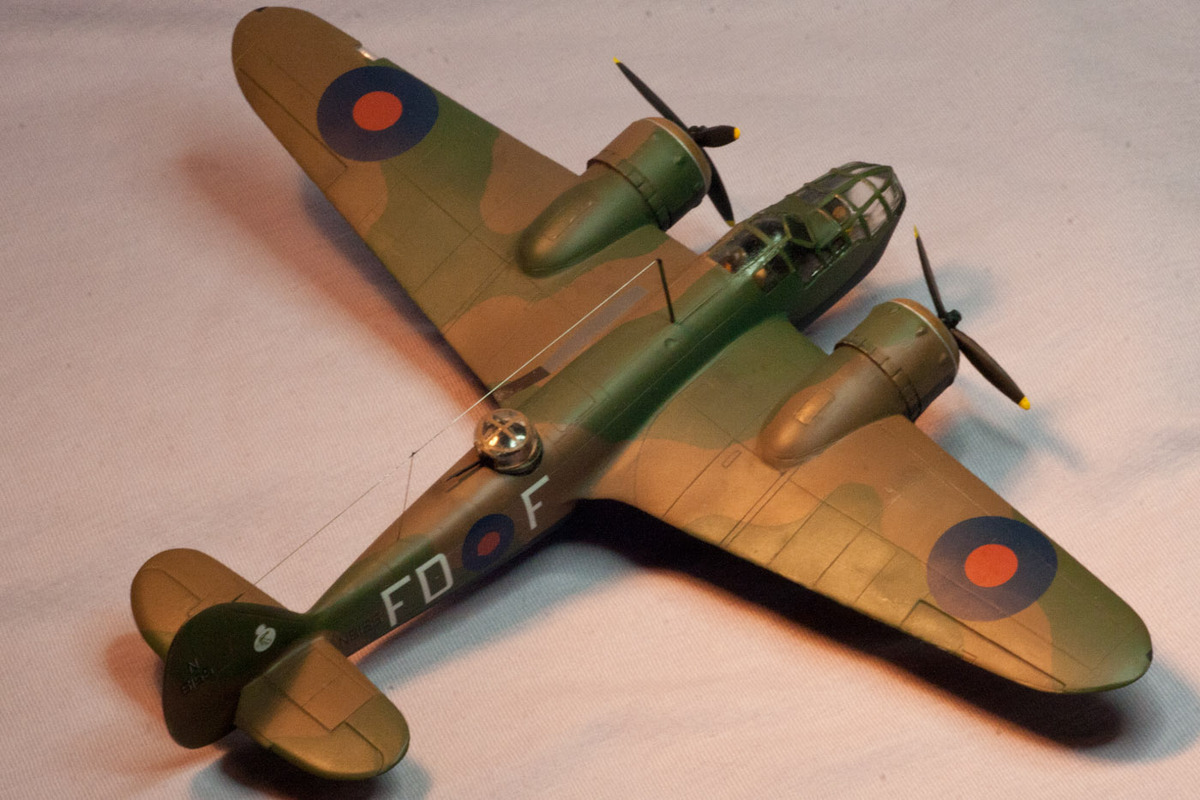
I bought some Xtradecals for an early Blenheim IV from 114sqn at Wyton in 1939, I like the black undersides and white registration numbers, very pre-war. Also I wanted it to be a bomber, I have too many fighters on my shelves already. Making an early Blenheim had consequences on the transparencies and turret though, the Airfix kit has twin Brownings and other late mods that need backdating. This Blenheim had rather a tragic history, 114sqn was in France with the BEF , their airfield was bombed by the Luftwaffe and they lost six out of eighteen bombers, the remaining twelve were damaged, most of the crews were lost during the following days, flying aircraft from other squadrons during the attempts to stop the German columns with low-level bombing.
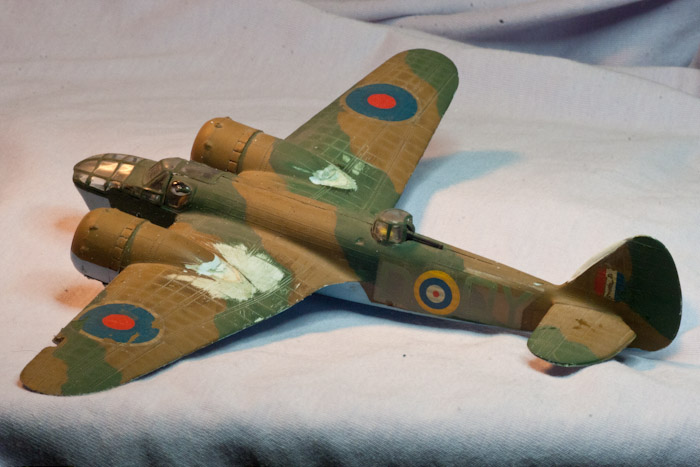
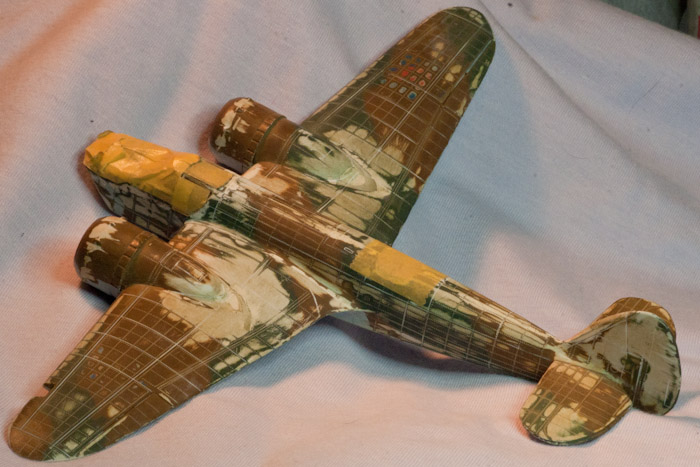
My old model that I made in my teens was quite nicely made, but it was made before I’d found about putty, and and sanding down rivets, so I started by doing that. The cockpit canopy was quite neatly glued on, with crew in place, and I decided to leave it that way. The whole point of this exercise was to have fun, and do a quick build. As soon as you start detailing cockpits it’s a lost cause. But watch this space, in 10 years time I might be back with a cockpit workover.
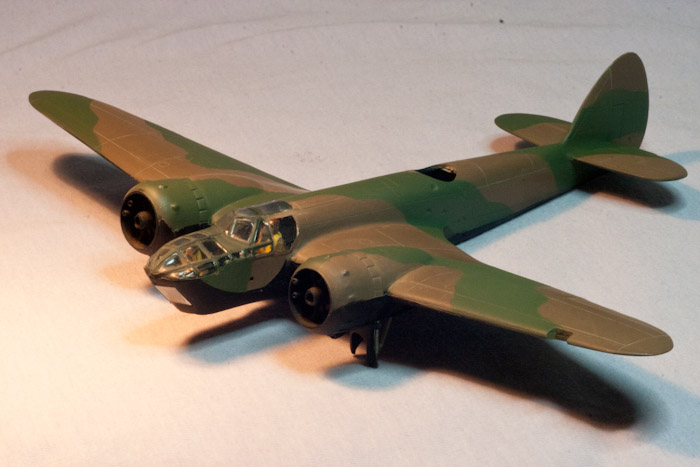
Another thing to avoid in quick builds is too many references, I nearly blew this one due to finding an old article by Ray Rimell from Scale Models about correcting the Airfix Blenheim. Ray is one of my modeling icons, so usually his word is gospel, but in this case I decided to skip some of his more extreme recommendations, and just do the most obvious fixes. The worst problem is that the upper engine nacelles are the wrong shape, they need to be rounded not pointed. It’s a fairly simple alteration, I just put the Dremel to it and grinded away all the excess plastic, and rounded it into a nice shape. Ray said it’s possible without sanding all the way through the wing surface, but I failed in this, and had to patch up the holes in the wings with plasticard, no big deal and in the long run probably better to have a patch than an area with weak plastic.
The second easy fix is the shape of fin and rudder,the leading edge is too straight, which spoils the look of the model. I just cut out a bit of curved plastic, from a Polikarpov wing leading edge, sanded down the Blenheim fin a bit to fit, and glued together, milliput and sanding sorted it all out.
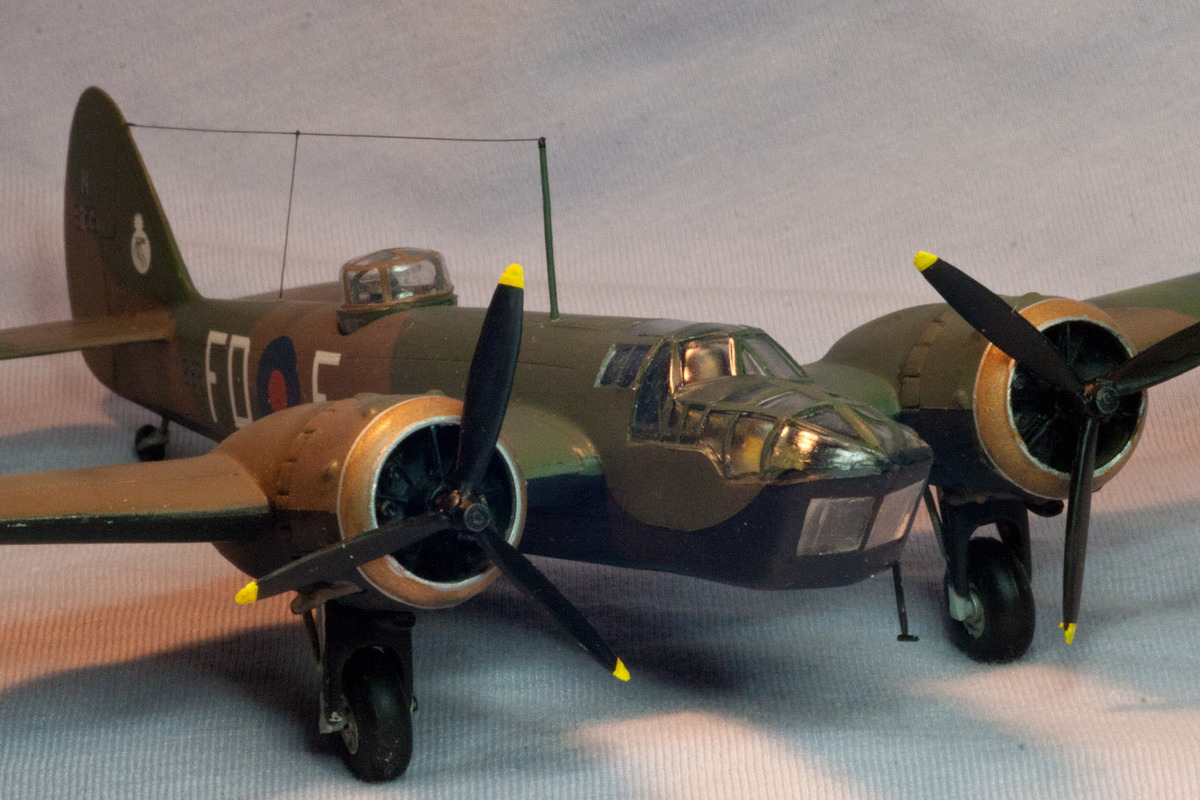
Ray suggested replacing the engine cowlings with Frog items (remember he wrote this 30 years ago), but I don’t have a Frog Blenheim, and even if I had I’m not sure I’d sacrifice it, so I merely did a very careful sanding job on the whole area, the cowling bumps are miss-shaped due to a mould line right through them all, which is a pity as theres nothing badly wrong with them. I ignored Ray’s advice about replacing all the rudders with Frog parts, even though I’m sure it would improve the model. Instead I rescribed them which although a compromise does make them better. I also re-shaped the tailplane and wing-tips, that is always worth doing as it’s so easy. The tailplane and elevators are badly shaped, but can be fixed with careful sanding, by emphasizing the trim tab, the chord can be lessened enough to make it look right.
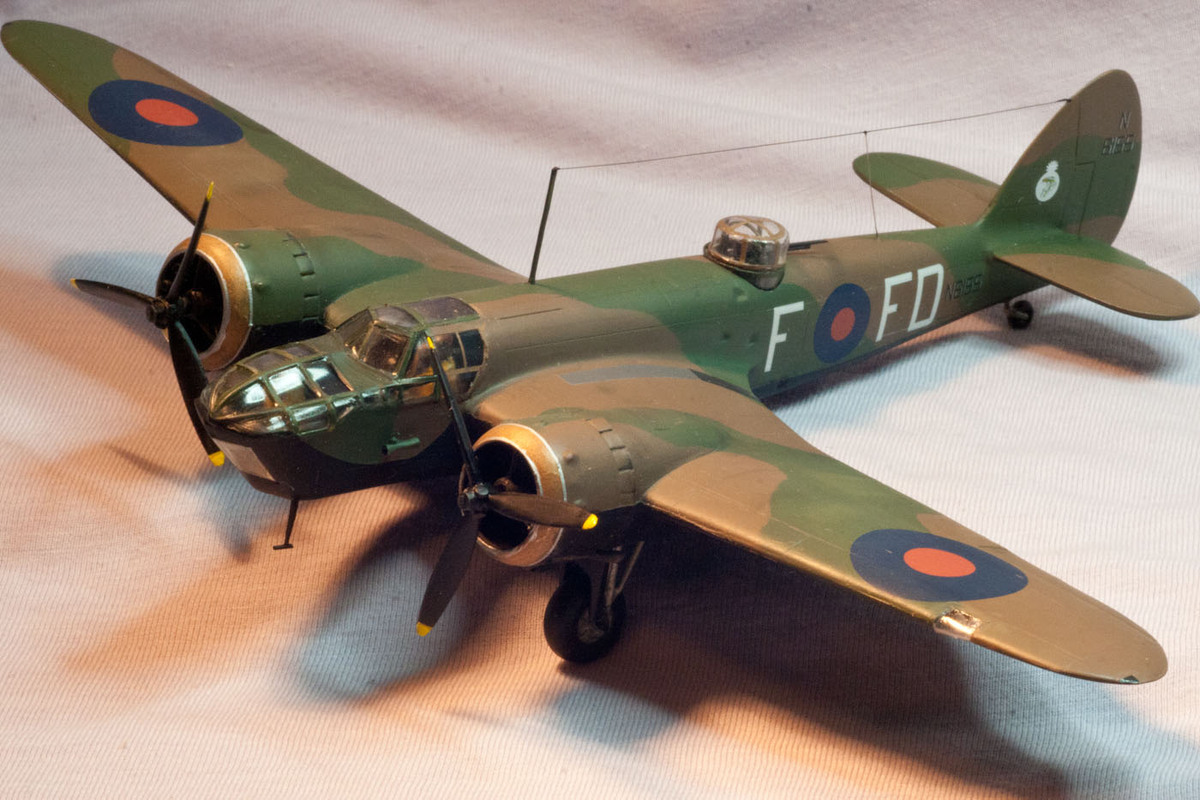
Ray also mentions the leading edge line between cowling and fuselage should be more angled, but I couldn’t see that, and it would mean work so I left it. Otherwise there doesn’t seem to be a lot wrong with the Airfix Blenheim, I’ve always thought it looks like a Blenheim, the sit is right, and with the corrections made I think it looks very Blenheimish!
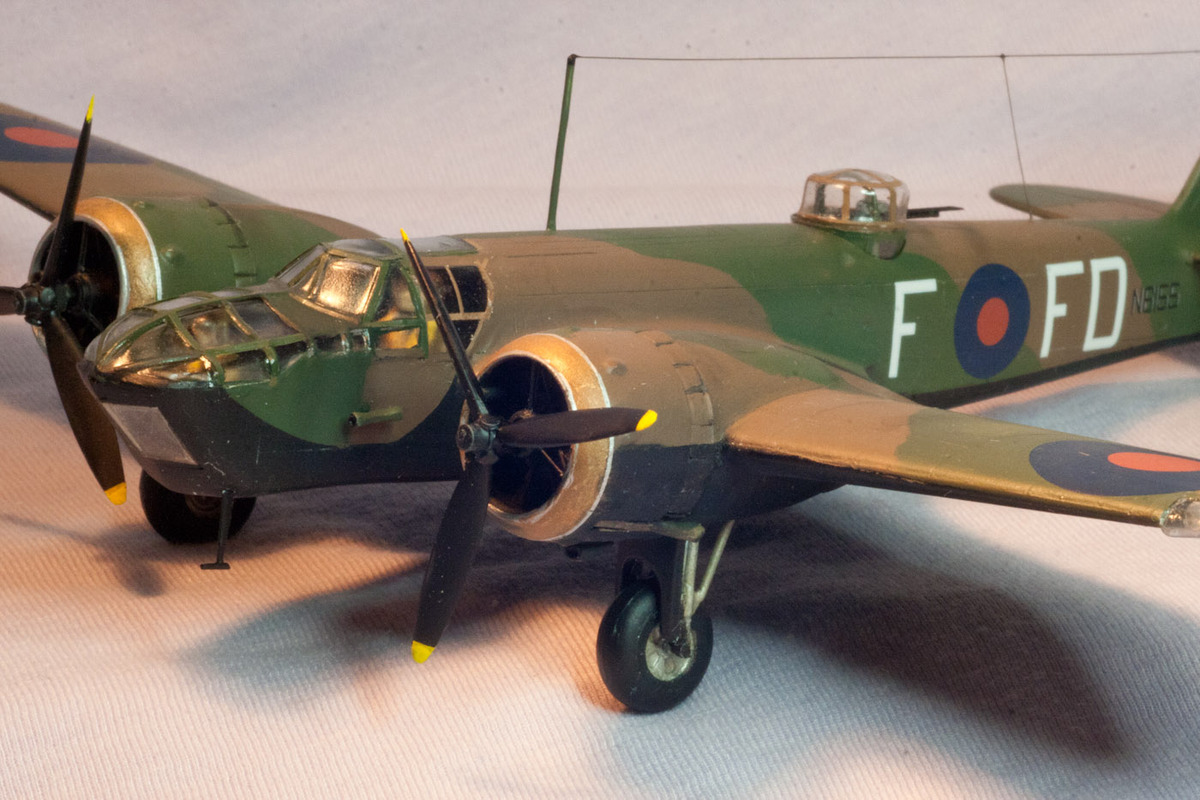
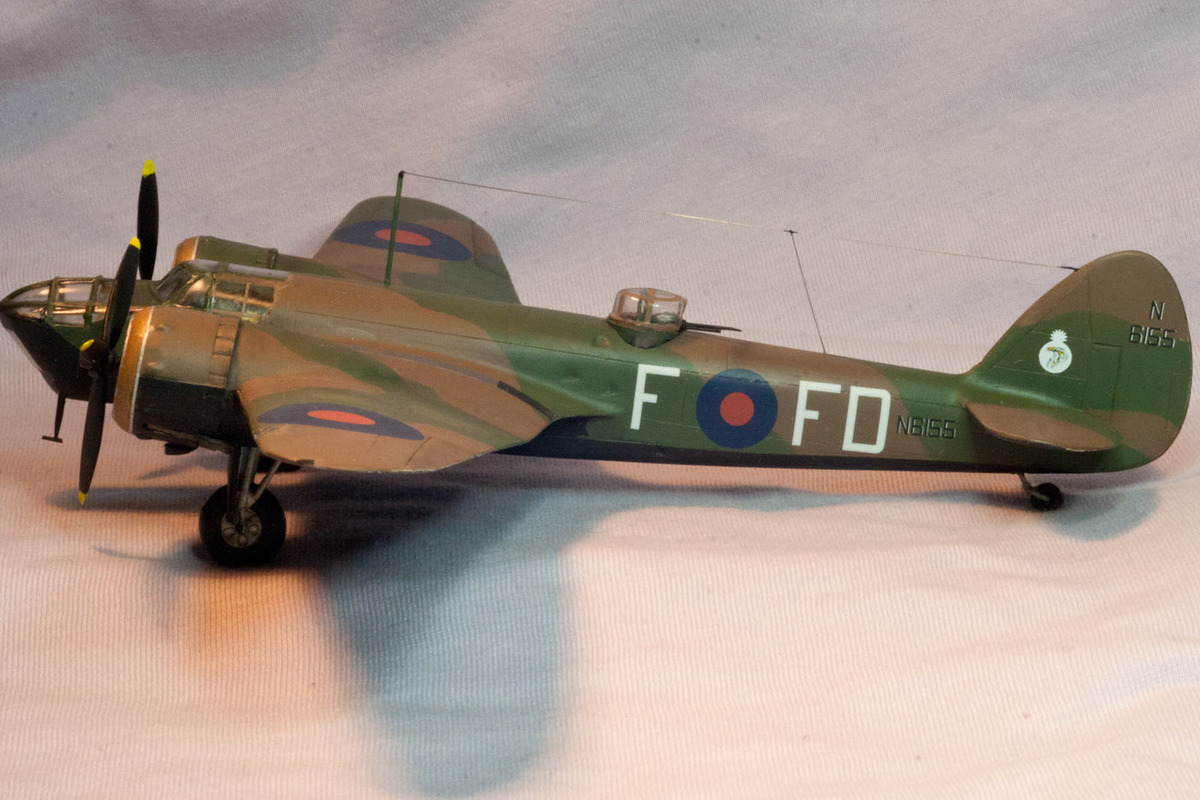
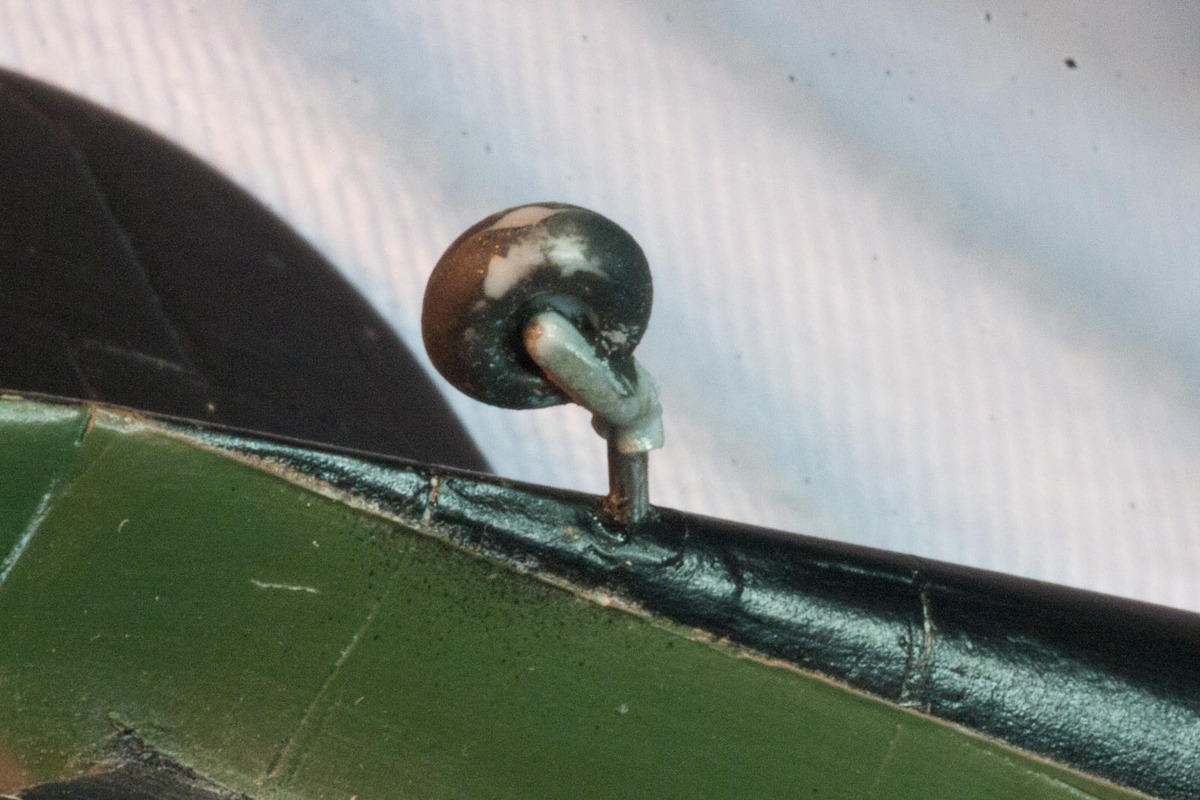
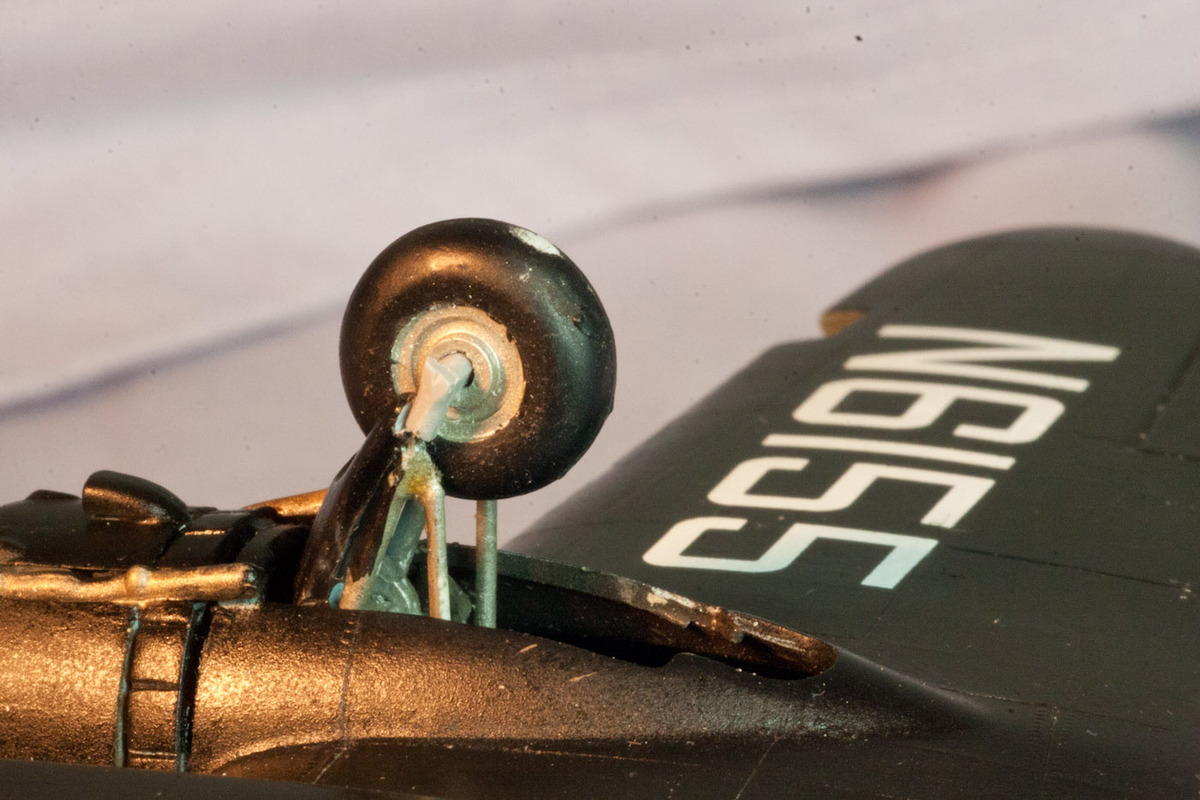
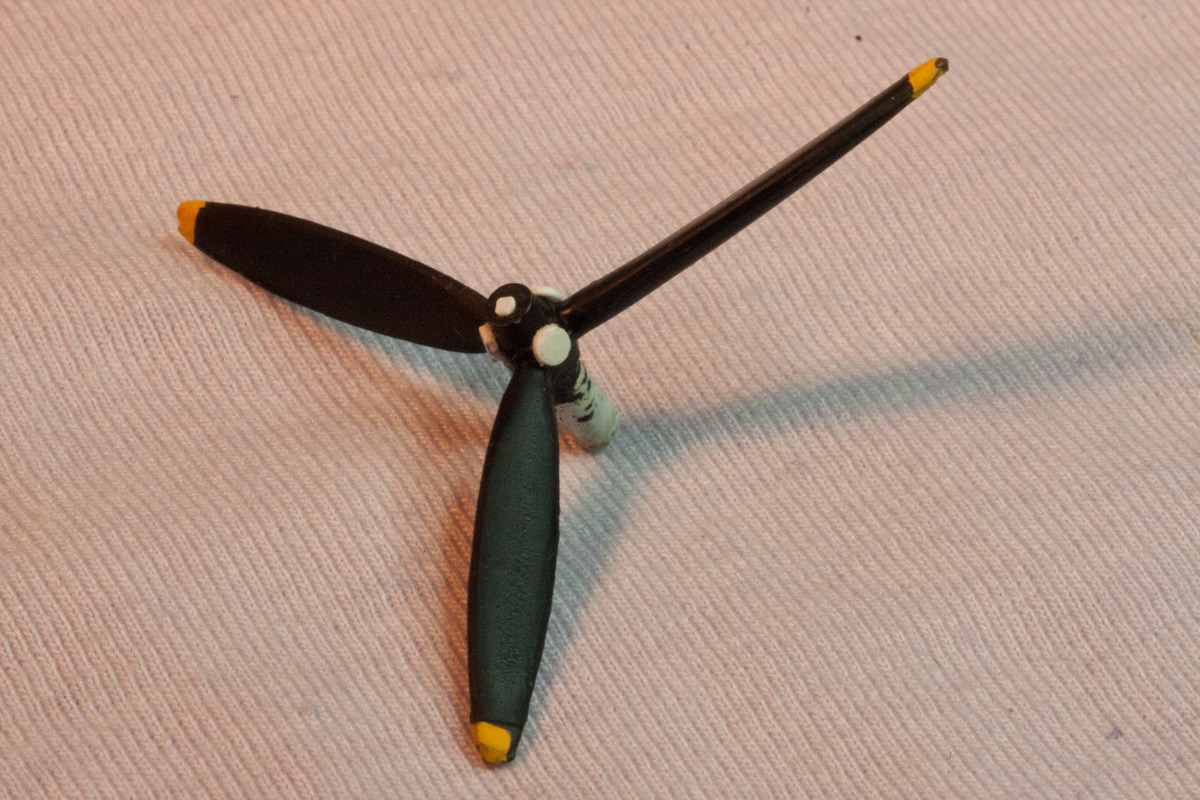
Propellers and wheels are fairly good, unfortunately I’d lost a wheel and the undercarriage was broken, I fixed the undercarriage with a bit of plastic sanded to shape and a wire reinforcement , and I found a Typhoon wheel that looked about the same, curiously the Typhoon and the Blenheim have similarly sized wheels. In the end I’ve decided to replace the wheels with a pair of Frog Blenheim wheels that a Frog enthusiast friend donated (he say’s they’re much nicer than Airfix wheels!). The tail-wheel was repaired with a strategic piece of wire.
And in the very end, I found the missing wheel, and so this entire paragraph could be deleted, but I’ll leave it as an illustration of real modeling!
I removed the turret completely while I tried to decide what to do with it. Once it was all sanded down and the seams filled, I could start engraving panel lines. I use an Olfa P-cutter for this, it makes really sharp lines, but is difficult to use, so I used an ordinary scriber for difficult spots. My method of painting using many coats, means that panel-lines gradually fill with paint, so I re-do the scoring during painting, this also means that the panel lines that aren’t so successful gradually disappear, and the good ones get better.
The cockpit canopy is not too bad, and since a vac-formed canopy would also require a complete interior, I just tidied up the joints as well as I could, sanded and polished a few glue marks. Since I was building an early Blenheim IV, the rear window blisters had to go, and the whole rear window area was a mess ( I wasn’t a truly great modeler at 14). I found some rather nice clear parts from a Matchbox 1/32 Tiger Moth that I had for a strange reason, and sanded them to fit the hole I’d made when I sawed out the blister windows. The whole lot was then coated liberally with Future/Klear, and a great improvement was perceived.
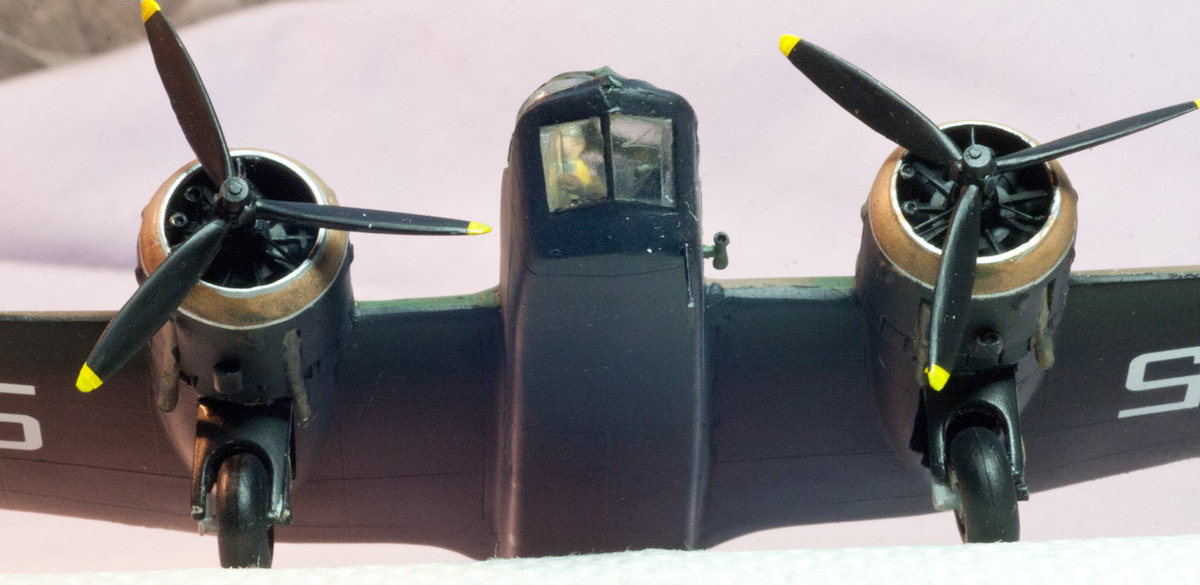
There’s been so much talk about Vallejo paint in the last 10 years that even I’ve begun to notice, so I picked some up at a show recently. Amongst them a black and a matte varnish that I wanted to try out on this model. It was quite surprising paint, I couldn’t get it to flow well in the airbrush, and the paint build-up in the nozzle was amazing, I solved the build-up problem by dipping in alcohol and wiping off, but I never did get it spraying well, despite this the result was very good, with a lovely smooth and well-covered finish. The matte varnish worked the same, I was very impressed, and shall certainly get some more of this strange paint. Brush painting and touching up was a dream too, only disadvantage I found was that it tended to lift when I removed the masking. Odd stuff!
For the top surfaces I found some 35 year old Pactra authentics, which I last used about 20 years ago, they still worked well, but covering power was every bit as poor as it was then. It was all a bit nostalgic, better even than using Humbrol, because I haven’t seen Pactra paint mentioned for years!
After several coats of dark earth, I masked off the camouflage pattern using Tamiya tape, thank god for that innovation, everything wasn’t better in the old days ;-) I laid the tape on a glass plate ( I can’t emphasise enough how useful a glass plate is, as a modeling tool) and cut out the patterns with a sharp knife. I smoothed down the edges as I laid on the patterns, as I wanted a sharp definition. For a slightly fuzzy edge (as later Blenheims often had) you can find a way of raising the edge of the tape a little before spraying. The green was from another old Pactra bottle. Lifting the masking tape was a delight, that’s one big advantage of enamels.
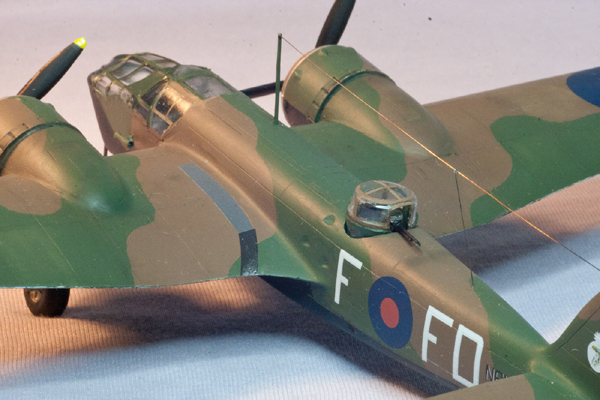
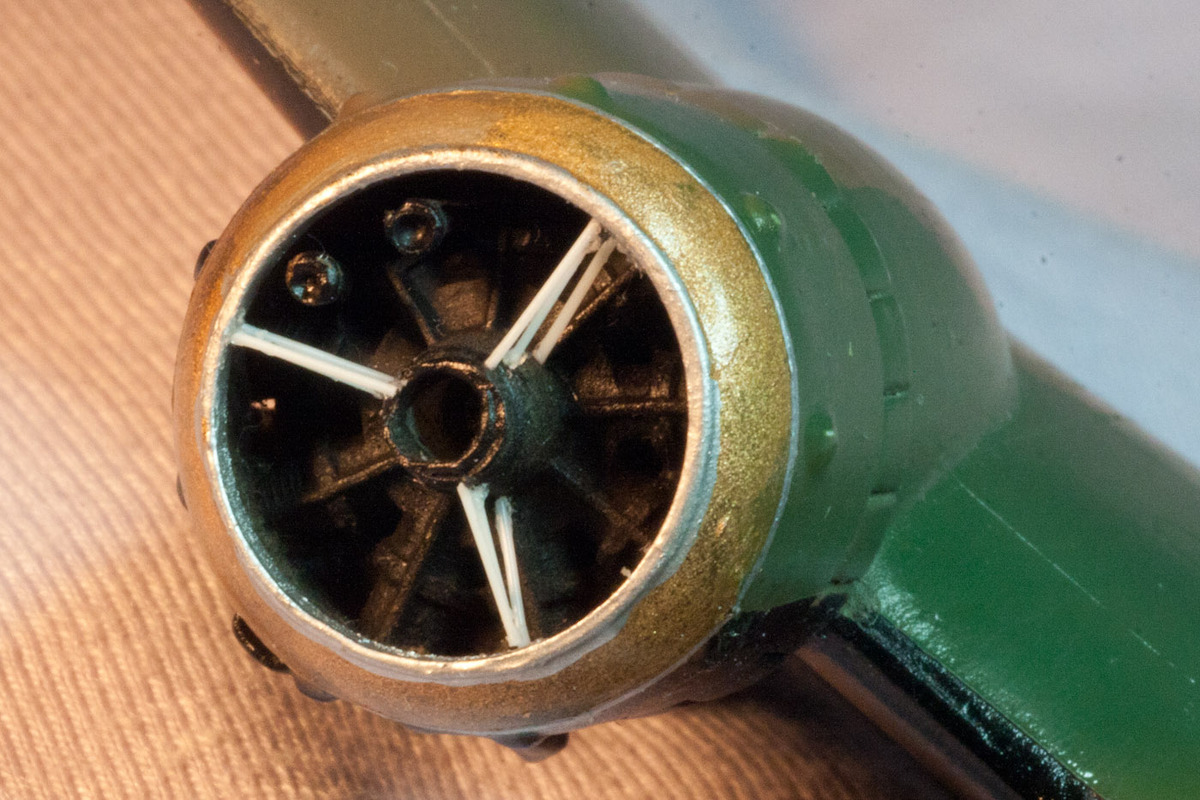
If you look closely at the collector ring on most Blenheims (but not all of them) you’ll see that the leading edge is actually aluminium, then the ring itself is dirty gold coloured, finally and there is a thin aluminium ring attaching to the nacelle. This was very convenient because I did a fairly careless job on masking and the bronze paint leaked a bit, so I just laid a thin ring of silver decal around the rough edge, which improved matters no end. Slicing decal is best done with a very sharp knife, and very shallow wrist angle (I mean keep your wrist close to the table). I use Micro scale silver decal, which is of excellent quality, and doesn’t break up. This applies to a lot of of the British WW2 era radial engine jobs, something often missed on models I think. I have a Wellington where I painted them white for some reason (well stupidity is actually the reason) in any case they look very smart!
Inside the Blenheim nacelle is a wire construction which I made up from heat stretched sprue. Also there, since I glued them there forty years ago, were the oil cooler air intakes, I opened them out quickly, never ignore cheap tricks, it’s important when drilling out tiny things like this to start with a pin prick in the very centre, this forces the drill bit into the right place .
I tarted up the propellers a bit with some discs of plastic that I made with my (home-made) punch&die tool, also on advice from a pedantic friend, I (later) sanded down the tips to make the props look more realistic.
The whole model got sprayed with Future/Klear for a good decal base. The decals are made by Superscale I guess, and thus of the highest quality in many ways, but I was a bit doubtful about the small serial numbers on the tail that seems to white outlined, I’m not sure if they should be, I’ve a feeling it’s mismatch, but who am I to say. In any case,, they all went on like a dream, and thanks to the gloss surface, completely without silvering.
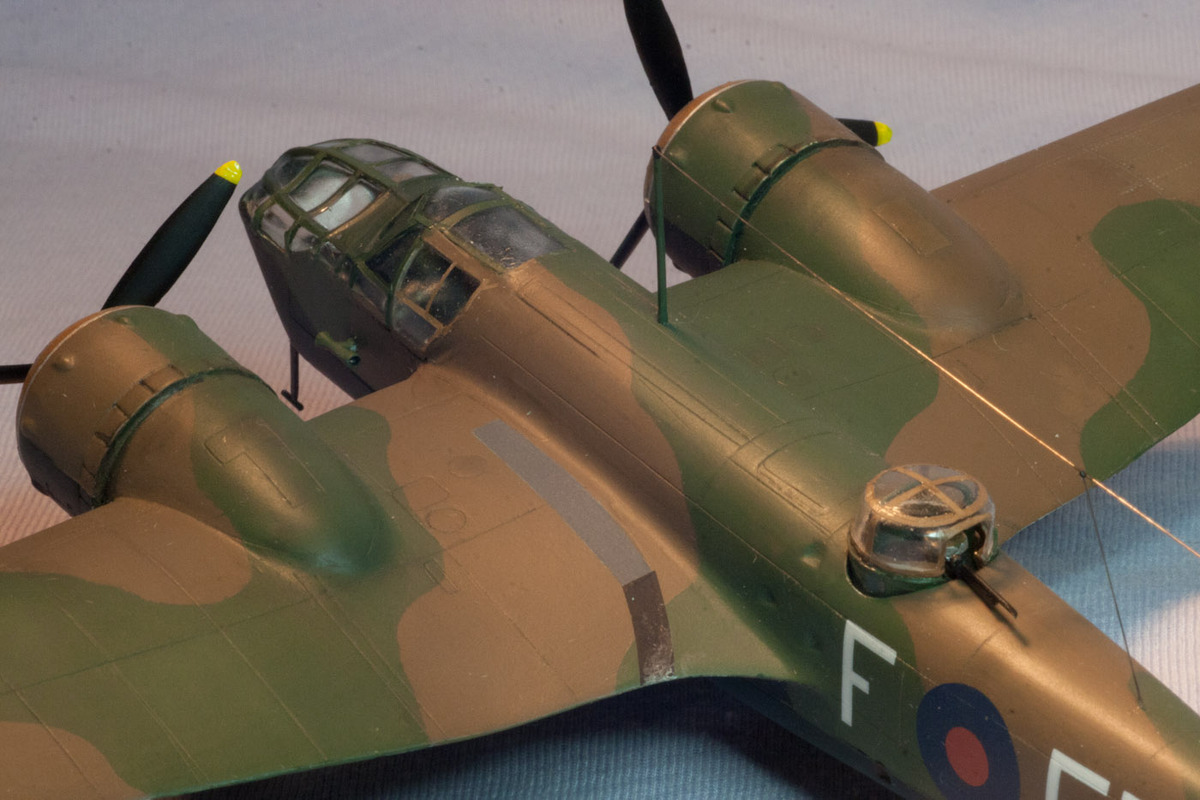
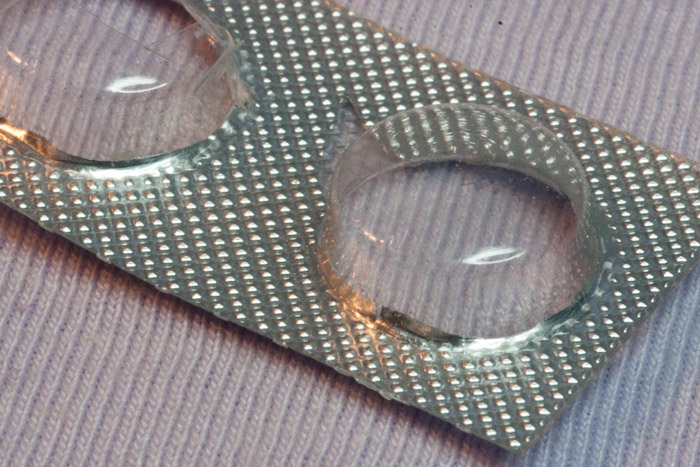
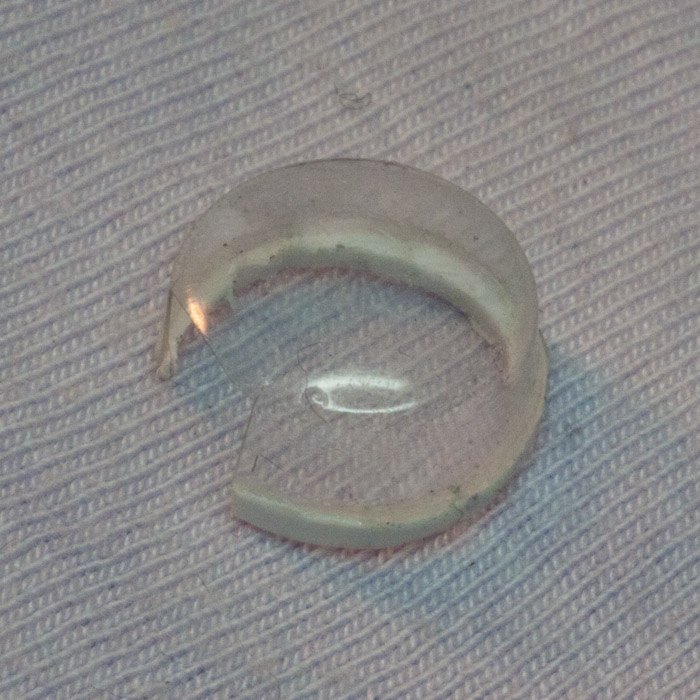
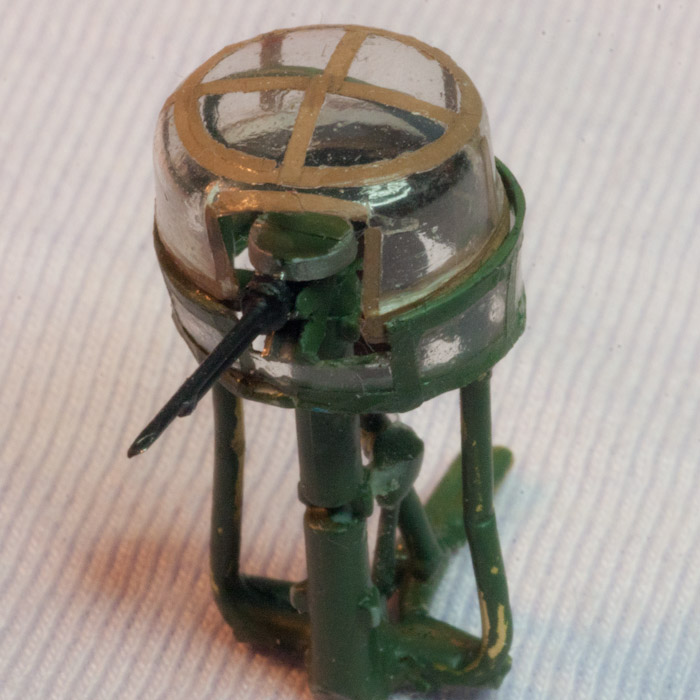
It was now time for the turret, and by now AMS (advanced modeler syndrome) had set in badly. Since this model was just for fun, and AMS is fun, I decided to do a job on the turret. The turret is something of a focal point on a Blenheim so in fact worth the extra effort, and I had some interesting ideas on medicine packaging material that I wanted to try out. I had two kinds of pill blisters, a low one with a fairly flat top, and another which was the correct height but too pointed.
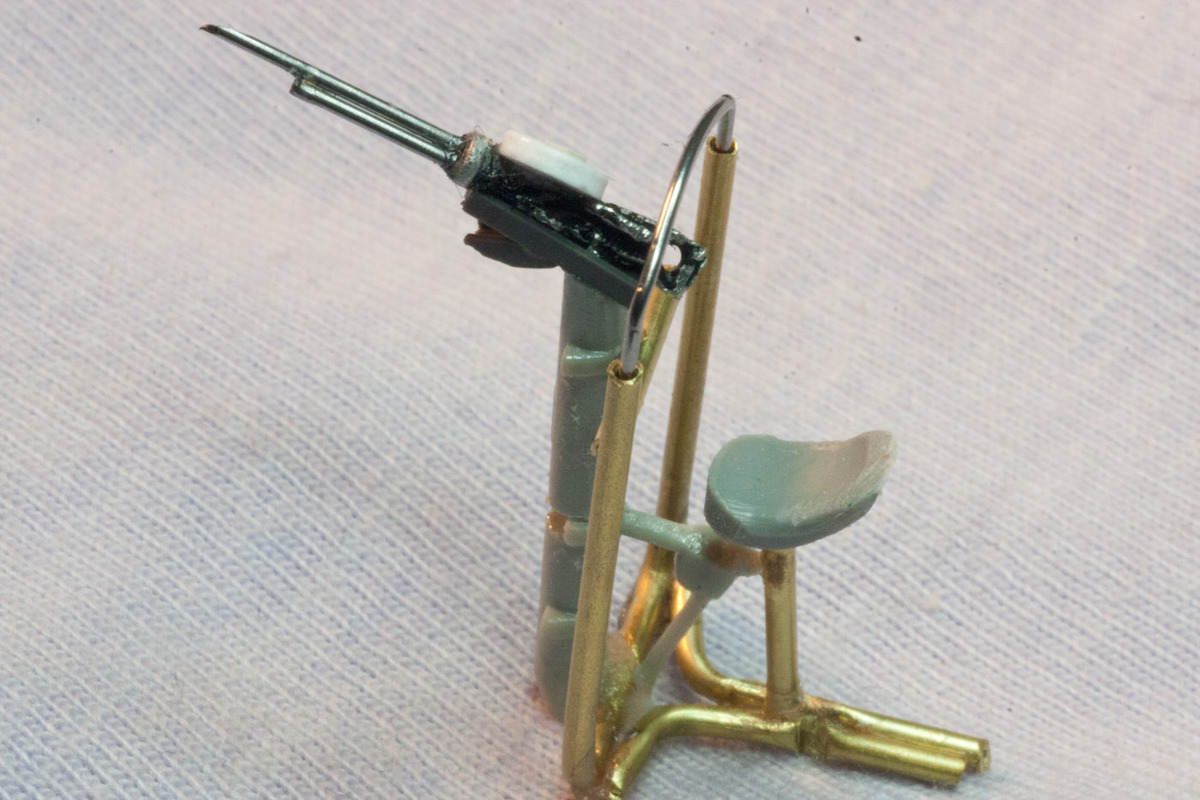
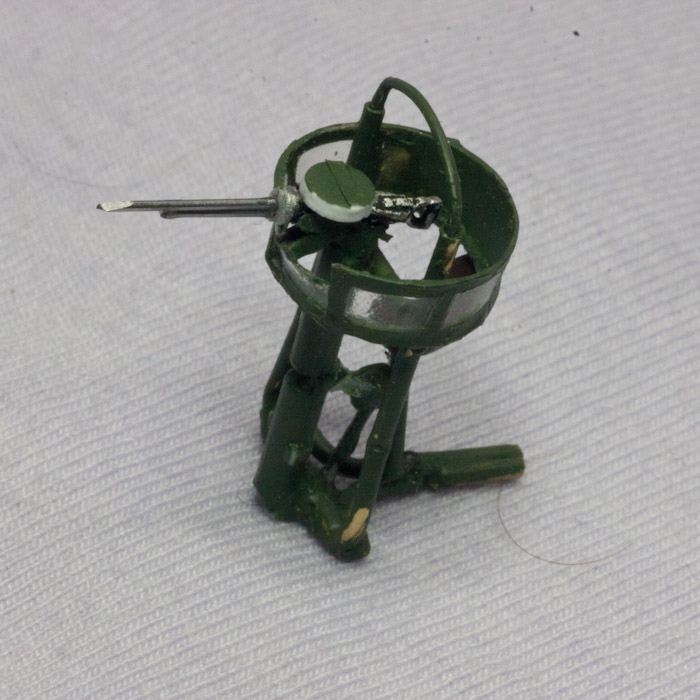
I intended to combine them, but that plan didn’t really work out. I find the best way to get through something as complicated as this, is to just start and adapt the plan as it goes. I started by botching up an interior, so as to get the basic fastening points in place, I used brass tube as it’s strong, straight and I could mount a steel wire “roll-over bar” in the holes on the top to have something on which to mount the bubble, which in the end I never did, but it was a useful height guide.
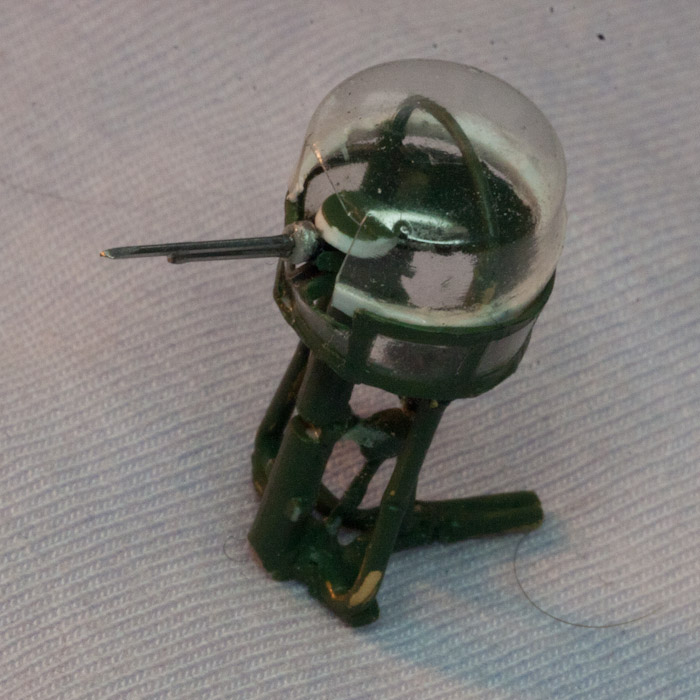
The pill blisters are a bit conical, so I could use one upside-down as the lower part of the turret, and one right way up as the top half, and the top half fits into the lower ring. I was able to glue the lower ring on the turret structure with CA, and then it was easy to glue the top half into the lower ring using white glue.
I coated glass parts with future/klear to save them from CA-fume hazing, and used decal strip for the turret framing.
Early Blenheim IV’s were always (I’m pretty sure) fitted with the Vickers K gun, I didn’t have one so I scratch built one from bits of wire and plastic. All this sounds very complicated and in fact it was, but it does show that it is possible to use pill blisters for a Blenheim turret, whatever that’s worth! I’m sure that many modelers will do it differently and also with decent results.
It was nice to be able to just drop the turret in place, after completing the rest of the model, without risk of damage.
Landing lights are relatively easy so I did them properly. I bent some clear acetone over the leading edge next to the landing light hole, and cut it to shape. The lights themselves I made using a cheap hole-cutter tool (for leather) that I have . First a clear bit from a domed pill blister, then a shiny bit from some chromed plastic I had, then just glued together with white glue, there are two lights behind the cover. Fitting them in place was a little tricky, but a combination of white-glue, Future/klear , paint and then covering the whole mess with matt varnish did the trick.
Weathering is very discrete, as I’m quite allergic to the artistic style of modeling. Also this plane was almost certainly very well maintained and clean.
I gave it a wash of very thin brown oil paint, just enough to darken some of the panel lines a little, especially behind the engines, I particularly hate dark panel lines, so I didn’t want that. Then I did the same with water colours to get some of the panel lines I missed, so it’s not too uneven. I dotted in some silver with a silver pencil around places where it would get worn, The rivets show through in a few places, but I let them do that, I hope it gives the impression of real rivets. A couple of panels were emphasized with pastels, two panels go a long way, if you do too many it looks like patchwork, and finally some blackish pastel on the nacelles, to make them look oily.I really don’t know if I’ve done too much or too little, weathering is the devils handiwork, and should be forbidden in my opinion!
So did this work out? I think so on the whole, it made a nice change from my other projects, and it only took a month, admittedly quite an intensive month, but I think a modern kit would have taken me longer. In the end probably nothing much in it. I would certainly have got bogged down on invisible detail in the cockpit area, and probably spent more time on the undercarriage, perhaps less time on the turret, but I did enjoy that. The end result from a modern kit might have been better (unless I screwed up), but I don’t plan on a competition career for the Blenheim. The most obvious benefit was that I saved enough money rejuvenating my old model, that I can spend it on a state of the art kit of another WW2 bomber!
Random references, there’s lots, but this is what I had without looking too hard:
Aeroplane Monthly: October 2005 & July 2011
Scale Models: March 1980
Air Enthusiast Quarterly No. 28
Wing Masters No.22
And a link for British gun turrets