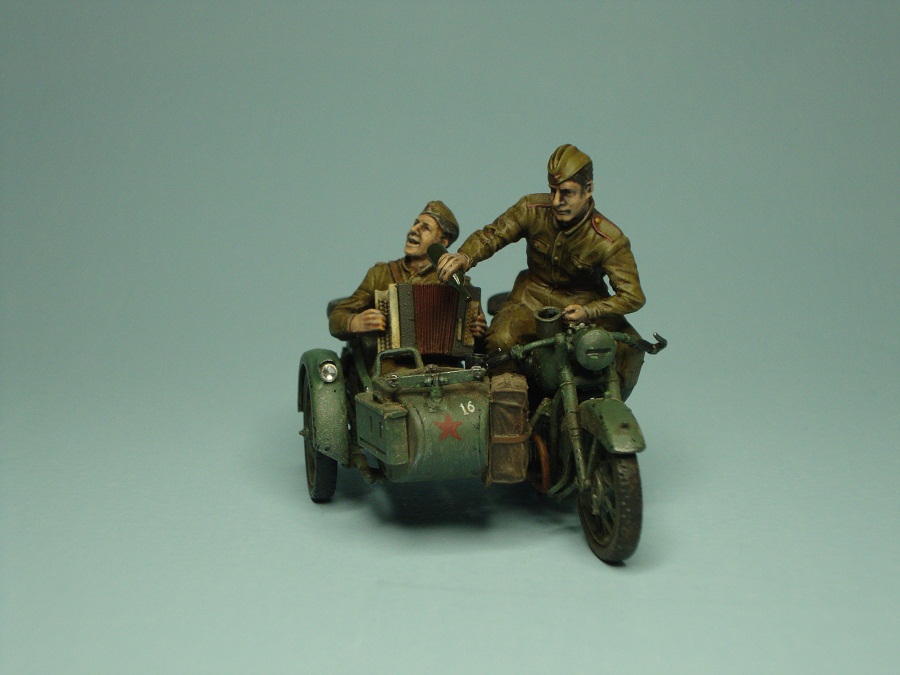
Zvezda 1/35 Soviet Motorcycle M-72 with Sidecar
By Jason Mills
Overview
The Soviet Red Army needed a replacement for their heavy motorcycles and settled on the German BMW design. Transferring the tooling, design and training went smoothly in two Russian factories. This kit is full of details and far from Tamiya and Italeri motorcycle models of the past. The only dislike is the thick spoked wheels included with the kit and lack of detail for the sidecar fender light.
The Build
The build starts with assembly of the three piece engine core; parts fit well with minimal flash and incredible detail. The two piece frame does not come together at this point rather rear shock absorbers are attached separately to each frame prior to frame assembly. I mention this because instruction's image of the proper placement can be misleading, where if done incorrectly it will affect the entire rear end of the build! The two piece frame is assembled next with the engine core, kick stand, and rear tire all coming together with the shaft drive finally attaching to the rear wheel hub. There is a lot that goes together as one step, be sure to dry fit all pieces here so that you totally understand how to do with glue.
 Once you assemble the frame, engine core, and drive shaft the rear fender with supports are next. This is an easy process; be sure to dry fit this piece due to the necessity that the supports connect with the frame and the rear shock absorbers (a better exploded direction view would have greatly assisted the modeler as to linking them with the rear shock absorbers). The rest of the bike goes together quite easily after these steps; assembly of handle bars (choosing handle bars with hands attached or not-this step can actually be done later) front tire and fender, fuel tank, levers and foot pedals.
The side car is an easy four part assembly; and again dry fitting prior to glue will help you understand how pieces must be attached in the required sequence. The two piece side car wheel with fender and spare wheel go together with ease as well as all three shovels and machine gun pintle mount. Support bars that attach the car to the bike must be lined up when glued to match their attach points to the bike.
 Attaching the sidecar to the bike was an easy task due to a simple rear bin that attaches to the rear hub of the bike. The support bars when lined up, will easily attach to the bike and your motorcycle with sidecar is complete.
Two sets of rider and passenger figures are included. I was very impressed with the crisp tooling of the figures and how well they assembled. I built both sets of figures and chose "pouring a drink with and accordion player". The figures fit snuggly into their places without post modification.
Painting
For painting purposes the side car and figures were all separately primed and painted. I painted the bike and side car with Testors Model Master Acrylics; Panzer Olivgrun, Pale Green, and Aircraft Interior Black. Once painted, I sprayed an extremely thin coat of Duracryl (automotive clear gloss resin). Once dried, I washed over everything with each and removed the excess with Q-tips. The model and figures were given a light Dullcote and dry brushed with each corresponding color lightened slightly with white.
Decals
There were minimal decals included, and I did not use them. I choose to paint my own markings on the front nose of the side car. I painted a small red star and the number 16 on the nose of the sidecar.
The Finish
 All pieces were then given a light spray of Testors Dullcote, dry brushing, and minor chipping on parts of the motorcycle that would see excessive wear. The sidecar was attached to the bike, figures seated, and final light Dullcote. MIG pigments and select pastels were lightly dusted to the bike, sidecar, and bike rider.
Conclusion
The Soviet M-72 with sidecar was a great challenging build. This would be a great pick for those of you who are stuck in an armor rut and want to build something different. The build had its challenges but, reviewing and dry fitting pieces are the answer. Zvezda has done a great job and modelers will be pleased with this one. My thanks to Dragon USA for the review sample.
