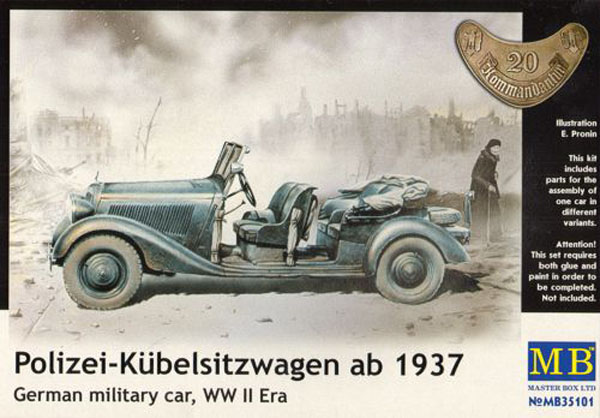
Masterbox 1/35 Polizei-Kubelsitzwagen ab.1937
By Jason Mills
For their 100th plastic kit in 1/35th scale, Master Box Ltd. from the Ukraine, released a Mercedes-Benz 170V Tourenwagen from 1937–1940.
The Model
The model contains four sprues with three further smaller bags containing tires, clear parts and decals. None of the sprues have identification letters or part numbers, but the instructions do have part numbers identified.
- Sprue "A", The chassis and all mechanical parts including a complete engine.
- Sprue "B", Major interior fittings and luggage platform parts.
- Sprue "C", The bonnet and wheels, and minor interior fittings.
- Sprue "D", The car’s floor and four mudguards as one unit, rear seat tub and hood.
- Sprue "E" ,Clear parts, rubber tires and decals.
The 4-page instruction sheet is quite large. The construction images are all CAD drawings and appear clear and easy to follow. There are 22 stages to the building process. Warning notes are minimal with just one piece of advice in English, German and Russian. There are two main building options – one with the convertible roof up and one with the convertible roof down. Minor options involve the lighting with a choice of clear headlight lenses or blackouts. A spotlight in front of the radiator can be optionally fitted on an inverted V-frame. The last lighting option is the fitting of a Notek light on the left mudguard. The four-part engine hood can be modeled open to reveal the detailed engine or closed.
Engine
Nine steps relate to the engine build. There are twenty-one parts to replicate the four-cylinder engine
Chassis
The next step is the chassis of the car. This kit has the bonus of being able to make the chassis separately from the bodywork, speeding up construction and enabling you to paint the chassis and body as two components.
22 steps take you through the complete chassis build including mounting the engine. Each step is very clear and concise, sometimes just adding one part at a time.
Steps 1-3 have you adding more structural components and the double front transverse leaf springs for the front suspension. In steps 4-8, the steering box, steering column and the steering linkages are added. Steps 15-16 have you adding the wheel brake drums, front bumper and front mudguard supports, and the exhaust pipe. Step 17 is mounting the engine and steps 18-20 the driveshaft, radiator and water pipe, fan and belt. At step 21 the wheels and tires are added. The wheels have separate hubcaps. Step 22 has two clear drawings of what your completed chassis should look like from above and below. Tires are made of rubber with a seam and flash around the circumference. Tires have markings on the sidewalls identifying tire dimensions.
Body
27 final steps take us through construction of the bodywork starting with the fuel tank that mounts on the engine bulkhead below the windscreen frame. The driver’s side of the bulkhead is completed with the dashboard, wiper motors, steering wheel and column and separate foot pedals (steps 1-4). Steps 5-9 turn to the body floor adding the gear lever, handbrake, rear luggage platform, the completed front bulkhead and all four bucket seats.
Steps 10-12 deal with items on the rear platform – spare wheel, lockers, tow hook and license plate. Steps 13 and 13A show how to model the four bonnet panels in either open or closed positions and the famous Mercedes badge is added to the radiator grille. If the bonnet is modeled closed, the bonnet top is provided as one piece. The next steps add bonnet latches, the windscreen and wipers.
Step 16, the options start coming into play so you need to decide which lighting alternatives you need and whether to model the hood up or down. Depending on your choices, holes have to be drilled with drill hole dimensions included. Steps 16-18 clearly show your options for the headlights, main spotlight and Notek light.
Step 19, attaching rolled up fabric doors. They are molded as simple featureless tubes, poorly molded. Step 19 adds the side indicators and a small driver’s spotlight on the windscreen frame. The final steps take you through the alternative convertible hood options. – up or down. The convertible roof is poorly molded.
Painting and Markings
The only color given is Panzer Grey. Decal options cover four cars – two Polizei and two Feldpolizei. Decals are also included for the dashboard instrument panel.
Conclusion
Overall, the kit has excellent detail on all parts listed except the roll up doors; which has poor tooling in comparison to the rest of the parts. The kit uses multiple types of plastic sprues; for example the engine and dashboard details were so fine, you have to be sure to use a "fine tooth" saw for removal. I believe a lot of these small parts could have been engineered better to augment the larger pieces. During the assembly of the engine, ensure you dry fit each piece together and semi assemble the engine to the frame along with the hood and side hood parts. The fit on these parts was difficult and near impossible to line all together for a smooth assembly. I didn't like the rubber tires as the seams were difficult to remove and the rubber difficult to paint.
Overall, not one of my funnest builds and nearly my most difficult build. I could only recommend this model to someone that absolutley needs this particular subject and it is not for beginning modelers. Final thoughts: although the kit is over engineered, it features superior detail in most of the parts. I would, however, have liked to see more vehicle options on the instructions. My thanks to Stevens International for providing the review sample.
