
Dragon 1/35 Type 95 Ha-Gō Early Production
By Eric Christianson
Background
From early 1930s, the Japanese army began experimenting on a mechanized warfare unit combining infantry with tanks. However, the Type 89 Medium tank could not keep pace with the motorized infantry, which could move at 40 km/h by truck. To solve this problem, the Army Technical Bureau proposed a new light tank of 7 tons or less capable of 40 km/h speed and started development in 1933. The prototype of the new tank was begun in 1933 and completed in 1934 at the Army's Sagami Arsenal.
 Initial tests were positive but it was too heavy at 7.5 tons and had to be reworked bringing the weight down to 6.5 t. Due to doubts by the infantry as to its capability for infantry support it was tested in Manchuria in the winter of 1934/1935. The reports were favorable and a second prototype built, being completed in November 1935. In 1935, at a meeting in the Army Technical Bureau, the Type 95 was proposed as the main tank for mechanized infantry units. The infantry had concerns that the armor was insufficient; however, the cavalry indicated that the improved speed and armament compensated for thin armor. In the end, the infantry agreed, as the Type 95 was still superior to the only available alternative, which was the armored car.
Production was started in 1936 by Mitsubishi Heavy Industries. By 1939, 100 units had been built. Mitsubishi would go on to build a total of 853 in their own factories, with another 1,250 units built by the Sagami Arsenal, Hitachi Industries, Niigata Tekkoshō, Kobe Seikoshō, and Kokura Arsenal.
What's in the Box
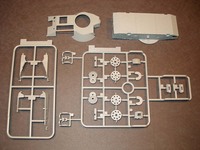
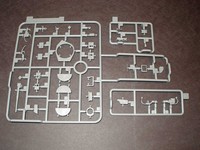
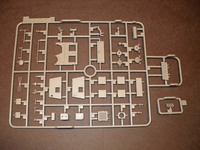
The Ha-Gō comes with:
|
|
|

|
- Eight sprues of soft, grey plastic
- Two lengths of tan DS plastic track in a semi-rigid plastic package
- One sprue of clear plastic
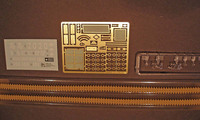
- One small sheet of photo-etch with fan and filter covers
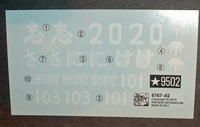
- One small sheet of decals made by Cartograph of Italy
- Separate, turret, upper and lower hulls, individually wrapped
- Folded ten-page Instruction Sheet printed in blue and black ink, with the following color schemes shown in three-view images:
 1st Tank Regiment, Malaya 1941 (four-color camouflage, character, white 20) Kwantung Army, Manchuria 1944 (four-color camouflage, character, white 101) 2nd Company, 7th Tank Regiment, Philippines 1942 (four-color camouflage, insignia, white 9502) 13th Tank Regiment, China (four-color camouflage, character).
The Instructions
 The instructions for this first run kit with new molding shows that the build uses 100% of the parts provided - a new experience for me from Dragon. Consequently, the instructions are accurate and the assembly sequence logical. That said, the (physical) Part C24 on the sprue is not the part identified as C24 in the image of the sprue, which matches the assembly instructions. As it turns out, the part you are given is not critical to the build and can be included or left off.
The three-view painting go-by could have used a fourth and fifth view (the right side and top of the tank are missing) since the paint scheme for all four options is complicated. You are left to wing it on your own.
Construction
 Construction starts with the hull and suspension and, like the rest of the kit, the fit is superb – in many places the parts do not require any glue at all. The coaxial machine gun (like the turret-mounted machine gun) does not have any support without gluing it fast in place. I like the way Dragon engineered the placement of the return wheels (tight or loose) by using a sliding PE shim on the two wheel mounts. When assembling the four wheels that make up the two main return wheels take care to keep track of which ones are which - they look the same but are not.
In Step Four do NOT attach the main drive sprockets. The clearance required for the DS track later on will not be there if you do. I painted these two parts separately and attached them to the hull with the track already wrapped around them. In Step Six, there are two PE hatch mounts (MA12 and MA13) that are only needed if you intend to attach the hatch in the open position. In Step Eight you will need to attach the main upper deck before attaching the front of the hull to the lower hull.
As already discussed above, the lower bracket (Part C24) in Step Ten was not in my kit, but you will find that its omission will not affect the assembly of the main weapon unless you want it to be movable, which I didn't. In Step Thirteen, I suggest that you assemble all the parts for the muffler at once with slow drying glue so you can line things up correctly, saving Part A6 for last.
The Track
 At one point in time DS track runs were thick and difficult to work with, tending to bow outwards when installed. Replicating the track-sag common to some AFV's such as the Ha-Gō involved a lot of effort and rarely looked right. Not anymore. The two runs of DS track in this kit are very thin and beautifully detailed.
Assembly was a snap. I connected the ends using Tamiya 'green top' liquid cement and installed them without any problems. I then dabbed a little Testors 'black bottle' liquid cement to the wheels and return rollers, pulling each section down on the upper portion of the track just a little as the glue set. Perfect.
Painting and Finishing the AFV
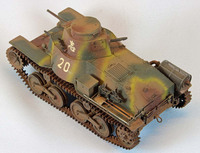
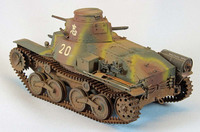
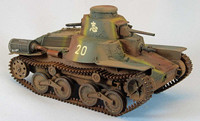
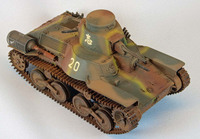 The Ha-Gō is a challenge to paint correctly – I gave it my best shot. The diminutive size of the vehicle, however, makes it quick work providing you have a steady hand, since 80% of the work (can be) done without the help of an airbrush. I personally find coverage using paint brushes unsatisfactory, even with Humbrol enamels or Vallejo acrylics, so I used Tamiya paints and an airbrush. I chose the first scheme option (1st Tank Regiment, Malaya 1941) because I liked the markings, but painted the vehicle more like the third option because I liked the 'vertical fall' of the paint scheme.
(Note: I thin all Tamiya paint and primer products 50:50 with Gunze Mr. Color Leveling Thinner, which has its own retarder for airbrushing. If you haven't tried it, you should. I use a Paasche-H Single-Action airbrush, Number #3 tip, at 20 lbs. pressure for everything. I use Vallejo's own thinner for their paints.)
I set the drive sprockets and tracks aside so I could paint them separately; everything else was painted as assembled, which followed these steps:
-
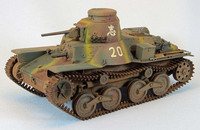 I started with a primer coat of Gunze Mr. Surfacer 1200 thinned 50/50 with Gunze Leveling Thinner. I did this to give the plastic and PE some bite.
 - I then sprayed an overall coat of Tamiya Flat Earth (XF-52).
- I followed this with three camouflage colors using Tamiya Flat Brown (XF-10), Black Green (XF-27) and Flat Yellow (XF-3). I used the three-view go-by on the back page of the instructions. Pulling off a four-color IJA pattern is not a simple feat on a tank with this many protuberances – the scheme provided really helped (for three sides at least!).
- Next I hand-brushed Future on the spots where the decals would go.
- While the Future was drying, I painted the wooden portions of the on-board tools Vallejo Acrylics New Wood and all the steel parts Tamiya Metallic Grey (XF-56). For the hand painting I mix a tiny bit of Vallejo Slow Dry and water with each color until it flows smoothly off a 00 Liner Red Sable brush.
- To give the wooden parts of the tools more depth, I brushed on a little Mig Wash Brown Oil straight from the tube and let that set overnight. Don't let this paint leach out its oil beforehand, like you would when you are using oils for detailing. The oil helps it stay workable. In the morning I carefully removed most of the oil paint using a brush dampened with Mona Lisa, leaving the areas near the buckles and metal parts darker than the center of the wooden shafts.
- I applied the decals for my scheme next using the Red and Blue Micro Sol/Set system without any problems.
- Next, while I still had a flat coat on the model, I applied several filters to enhance the colors. I first gave the whole vehicle a filter of MIG Wash Brown. I then gave the jack and machine guns a filter of MIG Black. I applied a filter of MIG Dark Rust to the exhaust filter and cylinders on the starboard side. I heavily thin all of my washes and filters with Mona Lisa White Spirit.
-
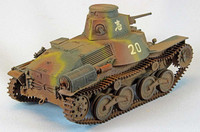 For years I used to give the surface of my model a glossy coat of Future acrylic at this point in the weathering process to prepare it for an oil-based pin wash and possibly some streaking. With experimentation, however, I found that the filters I applied gave the surfaces a slightly satin finish that assisted in spreading a pin wash like it should, using capillary action. Furthermore, using the very mild Mona Lisa thinner with MIG Oils did not disturb the underlying paint and/or finishes, no matter how thick I slathered stuff on. So - I gave the entire vehicle a pin wash using Mig Dark Wash (aka Raw Umber) straight from the bottle. This wash goes on very dark but, on the smooth surface, it stays wet and workable for a long time. Using a clean brush, Mona Lisa thinner and a paper towel, I worked the wash around until I had it just the way I wanted it.
 - Once dry, I flipped the hull over and added a little fine craft sand to a mix of MIG Dark Mud (PO33) and African Earth (PO38) pigments, using Mig Thinner for Washes to create a thin slurry to apply to the tracks and lower chassis. I didn't want to overdo it, but I thought that a Japanese tank in combat is going to be dirty.
- Finally, I shot the whole vehicle with Vallejo Flat Varnish to kill any remaining shine, thinned 50/50 with Vallejo Airbrush Thinner to improve flow.
Conclusion
The diminutive Ha-Gō seems toy-like next to a number of builds I've done recently, but its uniqueness is a pleasure to look at. Both the size and the unusual camouflage pattern set it apart. I strongly recommend this kit to all modelers. The fit is superb, the instructions accurate, and together they make for a really great build.
I would like to thank Dragon USA for providing this kit for review, and to Internet Modeler for giving me the opportunity to build it.
