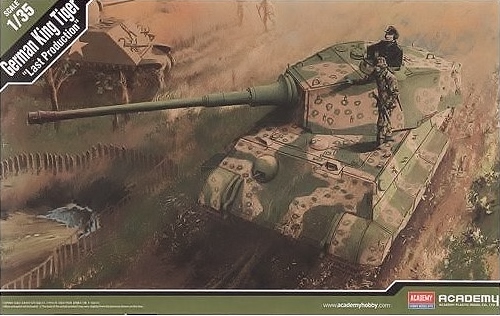
Academy 1/35 German King Tiger Last Prodiction
By Don Barry
Kit # 13229
MSRP: $69.00 USD
Paint codes and names are provided for Gunze Sanyo acrylic and enamel colors, Life Color, Humbrol enamel and acrylic, Testor/Model Master enamel and acryl, Revell enamel and acrylic, and Vallejo Model Color and Model Air paints.
 Examination of the sprues shows clean, crisp molding, with no flash. However, this reviewer feels greater use of ejector “buttons” could have eliminated annoying pin marks on the track links, loader’s hatch, tow shackles, and numerous other locations. That aside, Academy has unfortunately missed the mark on this kit. There are many features which preclude its being a “Last Production” King Tiger. This kit contains the early, two link tracks, instead of the final, single link style, though the correct pattern 18 tooth drive sprocket is provided. There are numerous other inaccuracies, which will be addressed as construction proceeds. It really is a disappointment, as there are many excellent features in this kit rarely or never seen before.
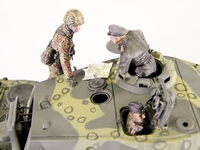 Assembly starts with the turret, adding fittings to the roof such as a complete close-in self defense weapon and choice of closed or open roof plates for it, separate loader’s periscope and frame, and roof-mounted arm for a scissors telescope in the commander’s cupola. The main gun breech assembly is next, and is very nice, including a complete co-axial machine gun and mount, as well as a complete gunner’s sight and mount. These will move with the gun as they should. The remainder of the turret is completed at this time. For a final version, omit the cupola M.G. and its ring mount. There should also be 6 pairs of spare track hangers per side, instead of four, but this is not possible with two part track links. The commander’s cupola is a detailed, multi-piece assembly, with separate periscopes and a lift assist for the hatch. The rear hatch is also well detailed, with separate locking handles, and separate pistol port and cover. Steps 6, 7 and 8 cover the upper hull, with numerous well detailed fittings going on the engine deck and engine hatch. The driver and radio operator hatches are the correct late pattern. There also is a complete hull machine gun, complete with armored sleeve M.G., sight, brow pad, and head assist pad as well as a multi-piece ball mount. I left off the stowage in step 9 until later to avoid breakage. The tow cables were replaced with resin cable heads and nylon kite string. A last production vehicle should not have the track changing cable mounted, but since such nice cable ends were supplied, I decided to use them. The instructions do say these are unused parts.
 Step 10 has the builder assemble the lower hull. The hull sides lock in fairly well, and with the addition of the rear plate, and the included auxiliary bulkhead, a square and true hull is easy to ensure. The torsion bars go in with no drama, leaving some flexibility to the suspension. There is a sink mark on both pieces C-4 and 5 that should be filled and sanded. Assembly of the road wheels is easy if a bit tedious (step 11). Were I to build this kit again, I would drill out the holes for the idler wheels and leave them free swinging until time to fit the tracks. Step 12 is where things went sour. The illustration shows each wheel overlapping the next, from rear to front. This is wrong. The drawing of the finished wheels in step 13 is correct, but I found the that the wheels all needed to be reamed out to slide onto the swing arms, and that they were fouling each other, causing tilting, as if the swing arms were not long enough. I checked reference photos to ensure I was installing the wheels correctly, and it appeared correct. But there was major interference between the inner and outer wheels. Then there is the matter of the tracks. This is the only kit I am aware of that supplies transport tracks only. A nice touch, but the style is incorrect for a last production vehicle. After November/December of 1944, King Tigers were equipped with single link tracks, rather than the A-B style, though the kit does have the proper 18 tooth drive sprockets. If the tracks are assembled exactly as shown, the idler will need to be swung forward in order to join the tracks. Adding two links (A and B) makes them too long. This I discovered the hard way; profit from my mistake. Install the sponson bottom plates (E-1 and 2) after all track work and painting are complete in this area. The final steps, 14 and 15, are anticlimactic in their simplicity.
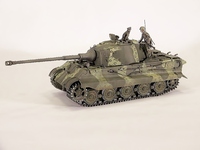
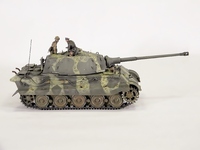
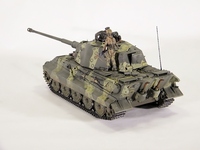
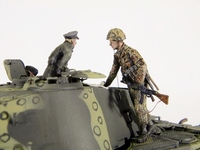
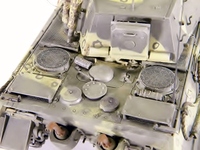 Since I intend to keep this model for my collection, I decided to add what extra detail I could, and to correct, where feasible, to depict a later production vehicle. In the latter days of the war, the U.S. Army response to the appearance of King Tigers was to call down any and all heavy artillery available, air strikes, naval gun support, or all the above. Therefore, I added damage from heavy shrapnel on the right side, still showing fresh, unrusted metal on the side skirts, hull and turret. The front corner pieces of the side skirts were razor sawed off, and the resulting edges thinned for a more realistic thickness. All the mounting “divots” for stowage were filled, and photo-etched or scratch built brackets substituted. A headlight electrical conduit was added. The lower track hanger brackets were drilled out, and drain holes drilled into the “pilzen” sockets on the turret roof. I added cast texture to the mantlet, and casting numbers on the side. The loader’s hatch received the arm that connects to the hatch assist, as well as the pull cord to close. The cupola had hatch stops, an M.G. post mount and manual sight vanes added, as well as the sighting post in front of it. Since the empty shell ejection hatch in the roof is a separate piece, I left it open and added the locking wing nut. The rear hatch was left partly open, showing the included locking handles, as well as the closing assist cable. Model ship chain was added to the pistol port plug. The engine deck was quite complete, only needing the addition of the four fuel tank vent lines, retainer clips, and armored deck covers. Three extra crew members were added, being built from the spares box. My example had a shrink mark in the center of the infantryman’s face, so it was replaced with a resin head.
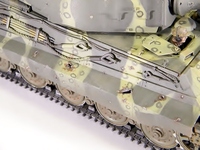 Painting of the lower hull had been done before adding the tracks and wheels, so only the upper hull and turret were left. They were first sprayed with Floquil Pullman green, lightened with a bit of Floquil Foundation. (15%) Areas were masked off with Silly Putty, and it was allowed to set for 30 minutes to “slump” around the details. The yellow is 60% Floquil Mud, and 40% Foundation. After allowing 24 hours between colors, the circles were hand painted with the original green mix. More drying time, then a coat of Future floor wax, even though no decals were added. I find I get less capillary action “creep” if washes are applied over a gloss finish. Also, some washes were enamel based, and the acrylic gloss acts as a barrier to help prevent lifting of the lower coats of paint. Fuel/oil stains, rain streaks, and various highlighting washes were applied and allowed to dry, followed by 2 final coats of Testor’s Dull Coat. Some very light dry brushing in selected areas finished the project.
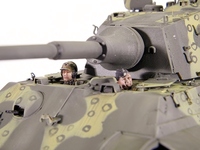 So there you have it, Academy’s “Last Production” King Tiger, with all its pluses and minuses. The general fit and ease of assembly were very good, the wheel/axle issue notwithstanding. There are some really nicely detailed parts; the hull machine gun and turret roof in particular. This is a good kit to use as a fall 1944 production vehicle; but the tracks really preclude its being a final version. One could invest in some after market tracks, but for seventy dollars, they really should have been there to start with. I did like the fact that they are the narrower transport tracks, as I did not have a King T. so equipped in my collection. For those inclined to invest in replacement tracks, and make some corrections, this kit is highly recommended.
Thank you so much to MRC for providing this review sample.
