
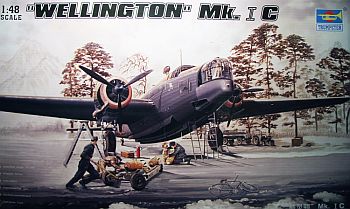
Trumpeter 1/48 Vickers Wellington Mk.IC FL
By Mike Whye
After having spent a good amount of time going through the contents of the box holding Trumpeter's 1/48-scale Vickers Wellington Mk.IC, about all I can say is wow, this has to be one complete kit with about everything you'd want to build a great model of the bomber used by the British Royal Air Force during World War II. As for how well it goes together, I confess to not knowing as I have not built it yet but from what I've seen, it should be a good time.
A Bit of History
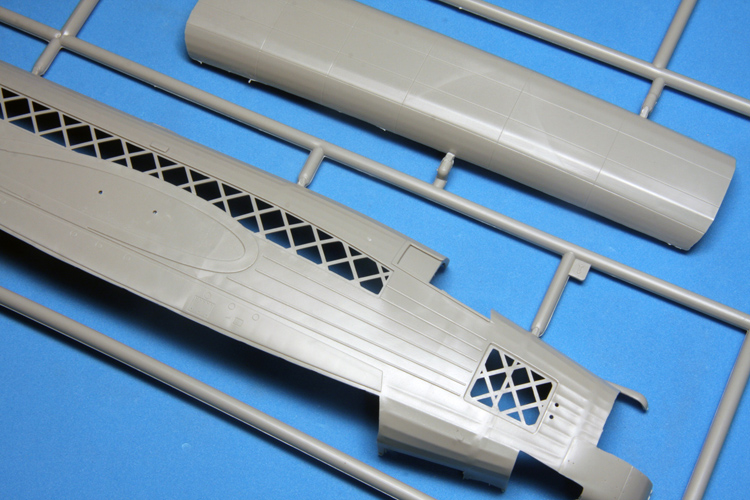
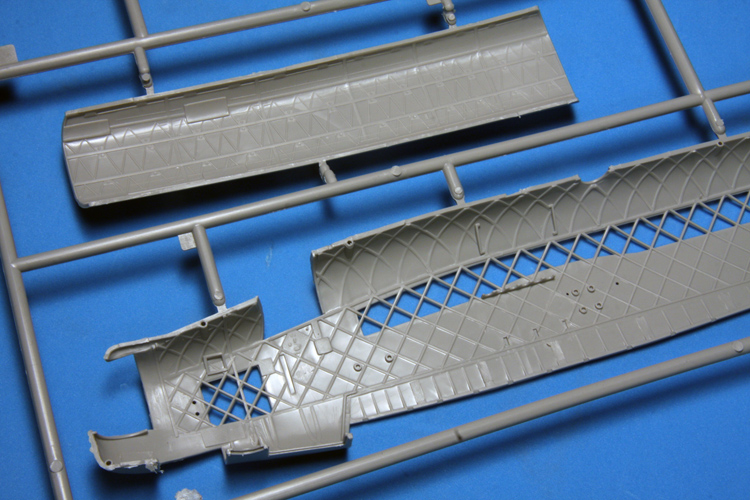
Before going on about the kit, a few words about the Wellington. Designed in the 1930s, this twin-engine bomber had a unique design: a geodesic lattice framework instead of the usual arrangement of longitudinal stringers and vertical formers or frames. Over the framework was placed wooden batten and over that many layers of doped linen. This created a lightweight but sturdy aircraft that could absorb a lot of damage and still hold together.
For much of WWII, the Wellingtons, also affectionately called Wimpy's by their aircrew, carried the brunt of the RAF's bombing campaign against Nazi Germany. In the famous 1,000-plane raid over Germany, nearly 60 percent of the bombers were Wellingtons. Built until October 1945, more than 11,400 Wellingtons took to the air; almost one-quarter of these were the Mk.IC, the version depicted by the Trumpeter kit.
The Wellington had a top speed of 235 mph at 15,000 feet and a range of 2,550 miles with a 4,500-pound bomb load. Manned by a pilot, navigator/bomb aimer, nose gunner, tail gunner, waist gunner and radio operator, the Wellington was powered by two 1,000-horsepower Bristol Pegasus XVIII radial piston engines and was protected by six-to-eight .303 machineguns.
Sixteen variants were made of the Wellingtons which served mostly as bombers as well as long-range maritime patrol aircraft, torpedo bombers, airborne control aircraft, trainers, troop transports and minesweepers. Some were used into the 1950s.
In the Box
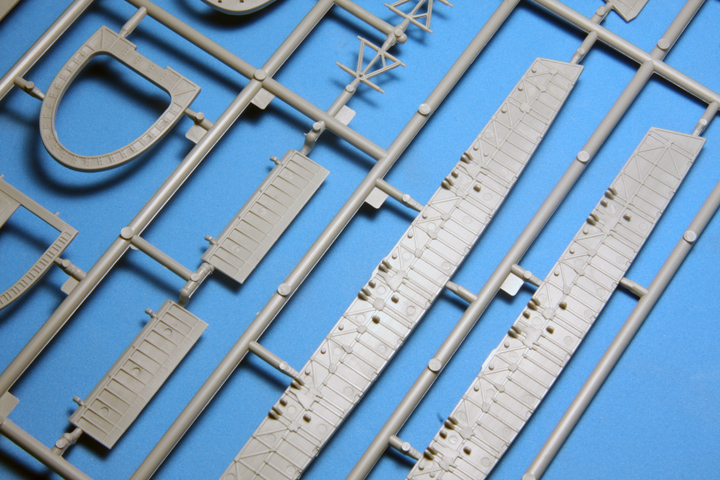
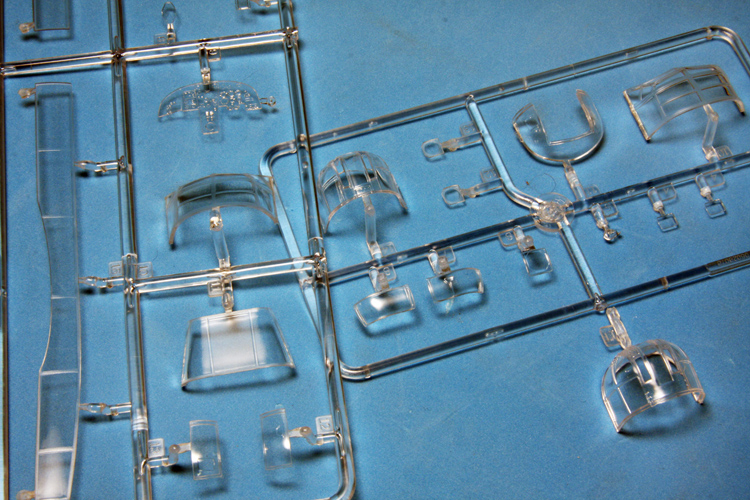
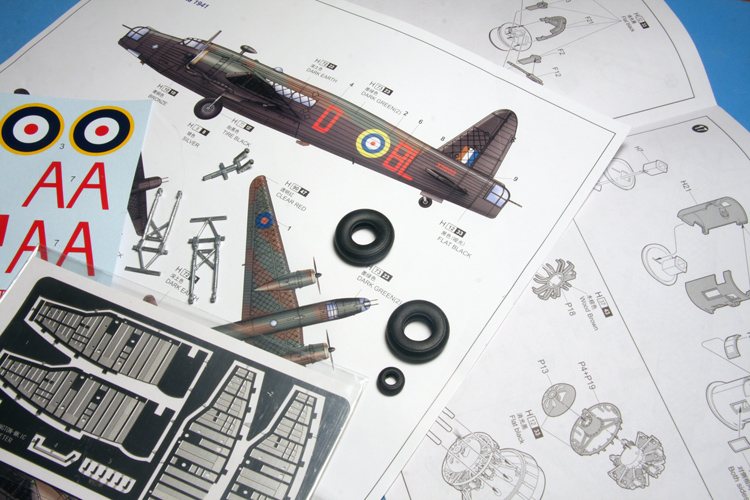
The first thing you notice when you get this kit is it's in one large and sturdy box, typical of the big Trumpeter kits-if you're into stacking boxes, this is one to support a pile of others. Whereas when you open some large boxes used by other kit manufacturers and see a little bit of plastic rattling inside, this box is stuffed with 14 bagged gray plastic sprues plus a small box containing two clear sprues, inscribed vinyl tires for the main gear and tail wheels, a PE fret for the main gear wheel well walls, metal landing gear, three tiny easy-to-miss metal axles for the landing gear and two films for the instrument panels.
The kit includes a 20-page black and white instruction book, a four-color 11x16-inch sheet depicting the markings of the two Wellingtons that can be made of this kit and a bagged set of decals to mark those two aircraft. About the only things wanting in this kit are seatbelts, which I plan to buy, and since I'm no fan of vinyl tires, I bought a set of resin weighted wheels made by Royal Resin.
Just for the fun of it, I held the fuselage and wing pieces near my built Monogram B-17G and the Wellington is only slightly shorter in wingspan and length-I had no idea the Wellington was so large.
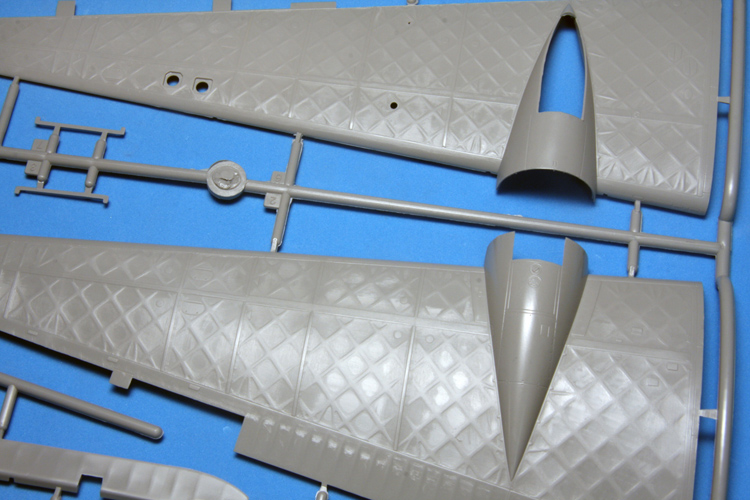
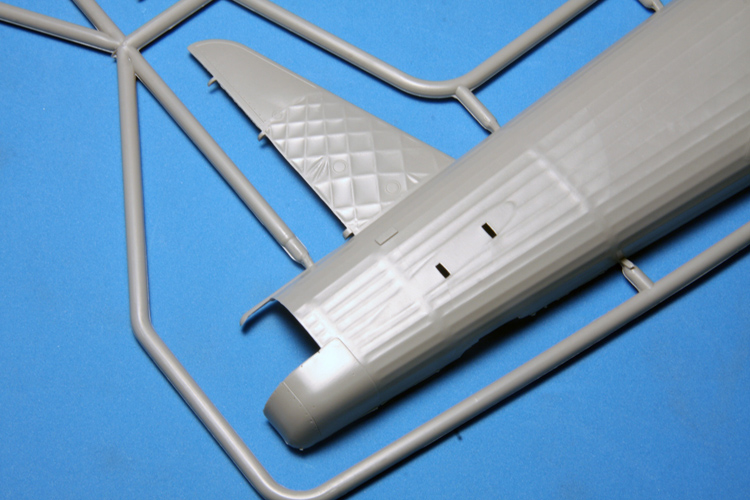
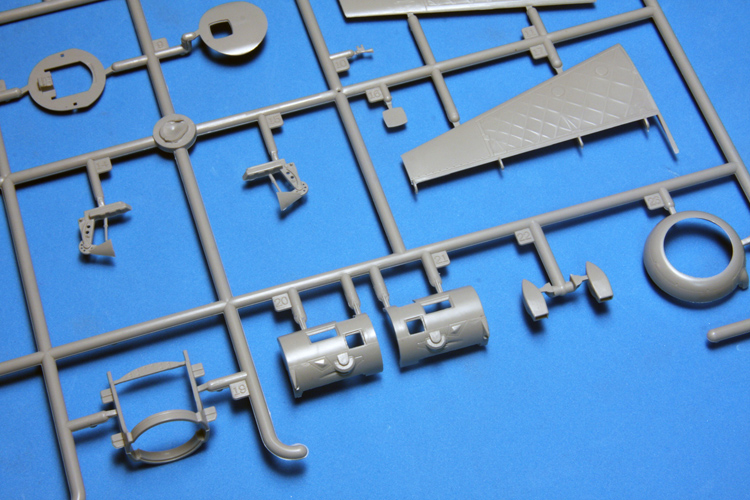
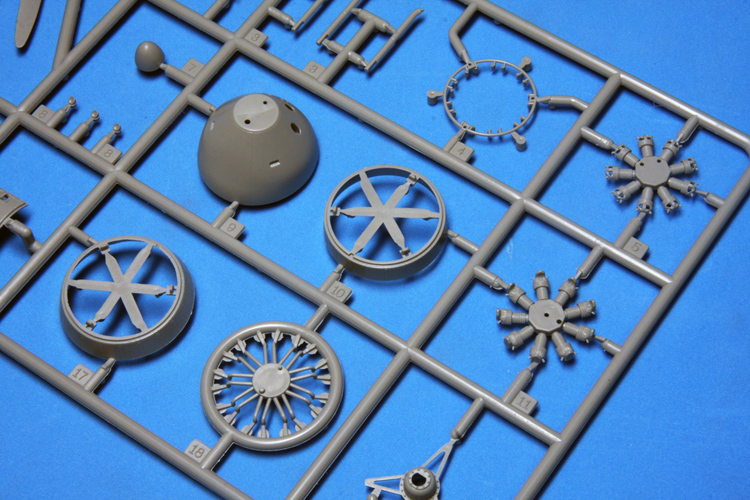
Both gray and clear styrene appear well made and have a bare touch of flash which can be cleaned easily. The sprues are crisp with details such as vent holes in the machinegun barrels and the cooling fins in the piston housings of the radial engines.
I saw no sink marks but did see some ejection pin marks; most of the ejection marks are in areas where they aren't going to appear when the model is finished such as on the inside of the wings, ailerons and so on. Some might be seen, like those on the cabin floor (they should have been arranged so they'd be on the other side of the floor-the smooth roof of the bomb bay-where they could easily be filled and sanded smooth) but then the only real part of the cabin you will see when the fuselage is assembled is the cockpit area where no ejector marks will be visible.
Other ejection marks that might eventually be covered are those on the vertical components of the bomb bay-if you load up the bomb bay with bombs, I'm guessing the bombs will hide the marks well.
However, and this is a big however, the ejector pin marks are very easily seen on the insides of the flaps, the ceilings of the main landing gear wheel wells and the insides of the landing gear doors; you will have some work ahead of you to hide these. I suggest you apply small amounts of putty with a narrow spade-like tool, carefully chisel away the dried excess later and lightly sand what you can if anything needs sanding.
I've read a fair amount of comments about Trumpeter's rendition of the fabric-covered surfaces of the Wellington, particularly the wings and stabilizers. Some say the molded fabric sags too much between the frame components in the wings and tail planes. Being I've never seen a Wellington, I can only rely on photos I have seen of these aircraft and Trumpeter's indentations appear exaggerated. One of my fellow members in IPMS Fort Crook, which meets in Omaha, Nebraska, said he's heard that when the model is painted, the indentations do not appear exaggerated. Well, I'll have to find out for myself someday.
As for the clear pieces, they're just that-clear-and crisp and I can't think of anything better to say than that about their quality. The clear pieces are the cockpit canopy, the long fuselage side windows (one piece each), smaller fuselage windows, bomb aimer's window and, for the nose and tail turrets, front and back halves plus their entry doors which, I guess, can be positioned open.
The instructions are very straight-forward. One look at any part of them and you will be able to understand what goes where. Colors of items to be painted are called out with numbers related to Gunze Sangyo Mr. Color paints as well as the usual color names like flat black, bronze, dark earth, dark green and so on.
The Devil Is In The Details
So far, excepting some ejector pin marks, I've been praising this kit. Now for a complaint: it has too many details. Whoa, who in his right mind would complain about too many details? Well, if you put in all the details that come with this kit and then glue the fuselage halves together, you won't be able to see a lot of what you've built. Aft of the bulkhead behind the pilot's seat is the radio room; you won't be able to see much of this space when the model is built. What looks like a toolbox is to go on the main cabin floor; save it for a diorama. Ditto with the toilet at the rear of the cabin, what appear to be oxygen bottles, radio faces and cabinets and other small details that would otherwise look superb if you were building a visible Wellington with a clear fuselage half. Considering that the insides of the fuselage halves show the lattice framework very well, who knows, maybe Trumpeter is planning to create a visible Wellington.
Now, for the really big item you won't see-the ventral turret. I never knew the Wellington even had one until I went through this kit; it rode inside the fuselage until the plane was airborne and then this tubular affair lowered out of the fuselage; now if you're going to build this kit as though the model is in flight, fine, build the 13-piece turret and show it in its lowered position but otherwise this is a waste of detail, sorry to say, because it is a finely-crafted component of the kit (from what I've read, these turrets were used only in the Wellington Mk.IA's but weren't installed at all in the Mk.IC's so I'm confused as to why Trumpeter even bothered to include it in this kit unless Trumpeter believes some people will want to backdate this kit to a Mk.1A).
In all, I count about 46 parts, including those of the ventral turret, that no one is going to see easily or at all.
The Details You Can See
I've never seen as much detail in visible turrets as what Trumpeter has put into this kit. Both the nose and tail turrets have 21 pieces each. And the details keep showing up-the engines have 12 pieces each. Trumpeter supplies two types of cowling flaps but doesn't explain the differences between them but if you look closely, you will see one set is closed flaps and the other is slightly open.
Each main gear wheel well is very detailed with two photo-etch sidewalls among the ten pieces. The tailpipe can be positioned for the in-flight configuration or in its bent position when the flaps are down. Similarly, the flaps can be positioned down or up in case you want to avoid messing with their ejector pin marks. The rudder, elevators and ailerons can also be positioned as you want them. The wings are secured to the fuselage with the aid of spar boxes helping what would otherwise be a butt-joint.
Bombing Up
Have you ever wanted lots of bombs for something other than Monogram's B-52? Believe me, the real Wellington carried lots of small bombs and this kit has three sprues of them. You can choose among 18 250-lb. armor-piecing bombs, 18 250-lb. general purpose bombs, 9 500-lb. general purpose bombs, 9 500-lb. armor piecing bombs, 2 2000-lb. armor piecing bombs and 2 1000-pound general purpose bombs. By the way, many of the scale bombs have five pieces each so be ready to spend some time at your modeling table assembling your bomb load.
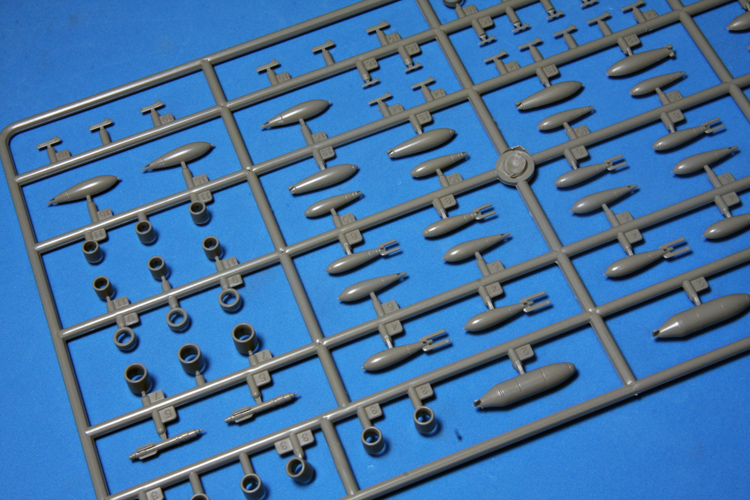
Whichever group you choose, you get to load them into the bomb bay which is divided into three long sections that have 30 doors you get to glue into the open position. I pity the ground crew guys who had to arm the real Wellingtons; that must have been a nightmare.
Of course, you can forego an open bomb bay and just glue the one piece that represents a closed bomb bay but here's another item that makes me wonder what Trumpeter was doing. Even those these doors shown on this single piece of plastic won't be seen as they're in the shut position, Trumpeter put the interior details on them.
Markings
Once you have built the model, the instructions call for it to be painted in the typical dark earth/dark green upper camouflage with black undersides and decaled for either No. 40 Sqn. RAF at Malta in 1941 or No. 75 Sqn. RAF at Norfolk in 1941. Even those the aircraft depicted on the box top art shows a bit of nose art, none is provided on the decal sheet.
Summary
When done, you're going to have a large model on your hands, measuring about 15 inches from front to back and about 25 inches across and with all the detail here, you should have a good-looking one too. It's pricey but if you can find one on sale, I'd pick it up like I did.
Trumpeter's 1/48 Wellington Mk.IC has a MSRP of $124.95. Eduard, CMK, Royal Resin, QuickBoost, Griffon, Pavla and Xtradecals make after-market accessories for this kit.