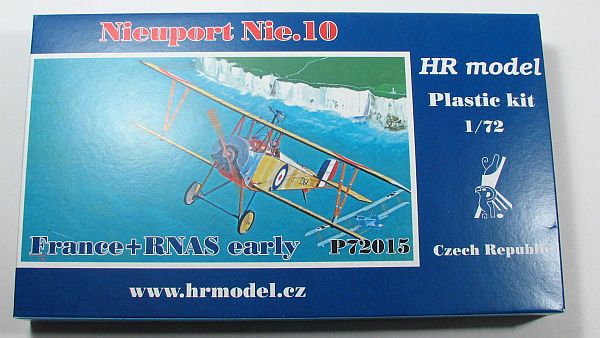
HR Model 1/72 Nieuport 10
By Matt Bittner
Introduction
Prior to the outbreak of World War 1, the Nieuport company favored the monoplane as the prefered aircraft layout. Because of criticism of the restricted view due to the layout of Nieuport monoplanes, some companies - including Nieuport-Macchi of Italy - to adopt the high, parasol wing. In addition, due to various war departments favoring biplanes not only because of sturdy construction and improved manueverability, but also due to their superior rate of climb. The Nieuport 10 was the first sesquiplane layout - that is, where the lower wing is smaller than the uppwer wing - which afforded not only the previously mentioned biplane advantages, but it also helped with downward visibility.
The Nieuport 10 (Nie.10) was the result of the new sesquiplane approach the factory took. It was a two-wing result of the previous Type X monoplane, but retaining only the fuselage and rudder. There were two distinct Nie.10s: an early Nieuport X.B (X being the type, B meaning - basically - "biplane") which can be differentiated from the later Nieuport 10s by the hole in the upper wing (which allowed the observer to stand up and shoot at enemy aircraft). This was because the early X.B placed the observer in the forward cockpit-area, while the later Nie.10s placed the pilot in the front-most cockpit.The Kit
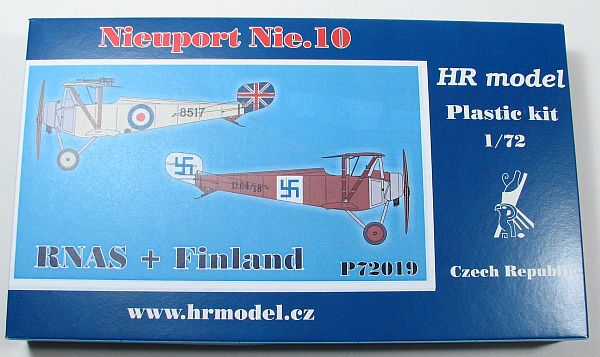
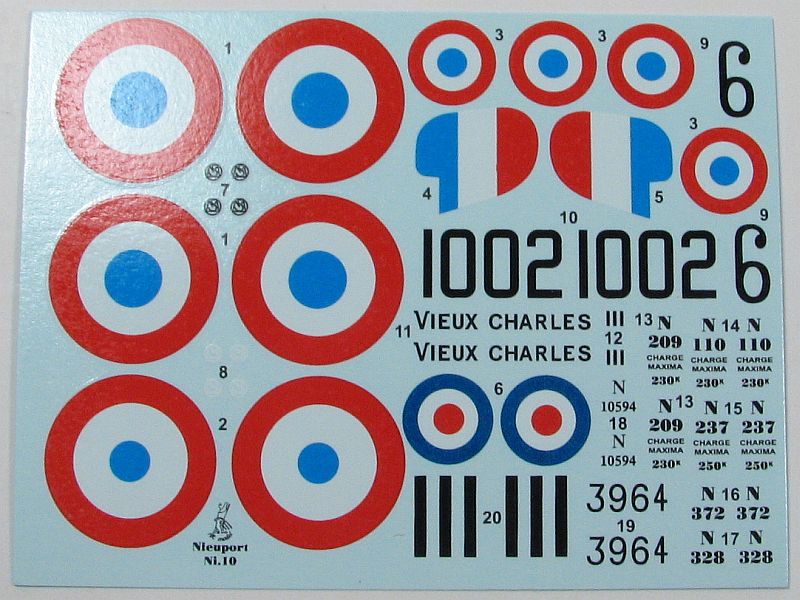
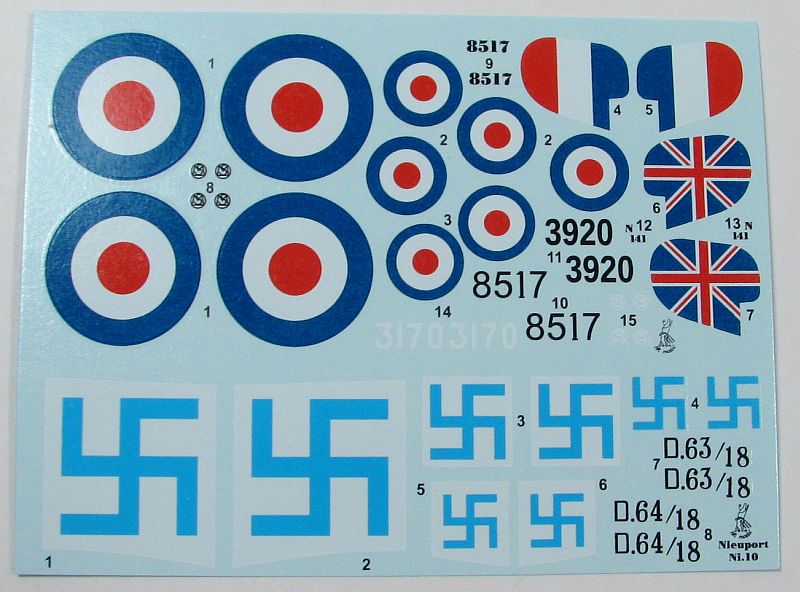
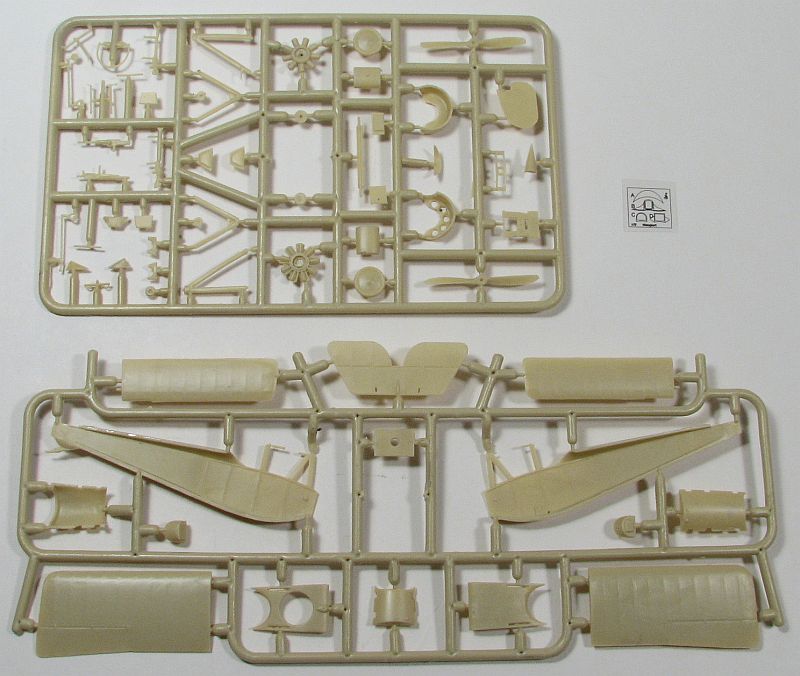
The HR Model 1/72 Nieuport 10 consists of 62 cream-colored, injected plastic parts, one clear foil (to be used for the windscreens) and a decal sheet for various machines, based on the boxing purchased. There are five boxings released by HR Model, each one with different decals for different nations that flew the Nie.10. Those boxings are:
- 72015: France & RNAS Early (consisting of 9 schemes)
- 72016: Japan & Poland (4 schemes)
- 72017: Russian & CCCP (7 schemes)
- 72018: Belgium & Italy (6 schemes)
- 72019: RNAS & Finland (6 schemes)
- RNAS 3964, 4. Wing, Pilot F/Cdr Reginald Bone DSO, single-seat
- Frenc,h, "Vieux Charles", Guynemer's single-seater
- French Esc. N25, 1915, two seater
- French, N372, Training unit, flown by Jan Štork, two seater
- French, N237, single seat
- French "Black 6", unknown unit, two seater
- USAS, N10594, aircraft flown at the Air Instruction Center No.3, two seater
- French, Aeronautical Militarie, Esc MS49, flown by A Pegaud, single seat
- French, N209, single seat
- RNAS, No.8517, 1st Wing, 1916, single seat
- RNAS, 1st Wing, September 1915, two seat
- RNAS, No.141, 2nd Wing, Gallipoli 1915, flown by Cdr Murphy and Lt.B.Jones, two seat
- RNAS, No.3920, 2nd Wing, Imros, two seater
- RNAS, No.3710, 2nd Wing, Dardanelles, 1916, two seat
- Finland, Russian Origin (Dux built), Lappeenranta Base 1918-1919, two seater
All aircraft except for the last two are overall clear-doped-linen. The last RNAS machine - No.3710 - had a brown fuselage (but flying surfaces were still CDL) while the Finnish machine was finished overall in brown.
All decals appear very well done and in register. However, one thing I can't figure out is why the two decal sheets I'm reviewing come with Morane-Saulnier logos, since the Nieuport 10 was a Nieuport-built machine. I'm not complaining, we can all use more M-S logos, but it's just a curiousity.
As you can tell from the above descriptions, you can build the aircraft either as a single-seater or a double-seater. All but one in the 72105 boxing are later-types, with the "solid" center section. If you build "N372" from kit 72015, it is an earlier Nie.10 (X.B) so you'll need the center section with the hole in it for the observer. This is great that HR provides parts to build both early and late Nieuport 10s.
One excellent aspect to these Nie.10s is that the center structs are molded in-situ with the fuselage halves. Excellent! No worries about gluing the upper wing to the model since you initially use the center section struts to glue the wing to.
Construction naturally starts with the cockpit. Glue the rudder pedals, control stick and wood pilot's seat support to the floor, then add the seat. Then you glue the observer's seat to its mounting supports, but pay close attention here. Depending on the machine you build you either glue the seat facing forward, or facing backwards. (Or in the case of "N372 from kit 72105, then you glue the cockpit towards the rear of the fuselage, with the observer's seat towards the front.) The last step to cockpit item construction is gluing the separate fuel tank's halves together (which should be painted aluminum).Hopefully before you started construction you decided on if you wanted to build a single-seater, or a double-seater, because based on that decision is how you proceed with the instruction sequence. Glue the cockpit pieces into one fuselage half then follow that up with gluing the pertinent single- or double-seater forward, upper fuselage to the glued fuselage halves.
Once the fuselage is built - and after you work on the windscreens, machine guns and the forward fuselage bulkhead the engine is attached to - the instructions are then in sections, based on single- or double-seat construction. The first set of instructions are for building the single seater followed by a group of instructions for the double seater.
Both of these sets of instructions include gluing the tail pieces on, gluing another strut to the center section and then gluing the already completed front bulkhead to the fuselage. From there the "cheeks" are added and while the instructions show you glue the engine and cowl on, I would wait until after everything is fiinshed before adding these.
Now the upper wing is glued together (the separate outer wings glued to the center section, which is best done on a flat surface since these had no dihedral at all), the lower wings glued the fuselage and horizontal tail struts added to its underside (again, a step best left until after finishing). Then the upper wing is glued to the center struts, the interplane 'N' struts glued in, and the aileron cranks and rods glued in place (which I would do after the wing is glued on, and not as the instructions show, at the same time the upper wing is glued together). The landing gear struts, axle and wheels are glued on, along with the prop.
If you're used to building biplanes, then you know these last steps are best done after the model has been painted and decaled.
For the two-seater, one aspect that is different is adding the rear-facing Lewis gun for one of the options, otherwise everything is the same as the single-seater construction (minus the "holed" center section for "N372" from kit 72015).
Conclusion
I've reviewed HR's resin Nie.XB in the past, and can honestly say their injected Nieuport 10 kit is heads-and-shoulders above their past resin kit. It's awesome that HR has decided to come out with this type in injected plastic and I hope they continue by releasing the Nieuport 12 (and, seeing as we have had no kits of the type so far, the Nie.14). I am really looking forward to working on this kit.
Huge thanks to HR Model for sending these to us to review.

