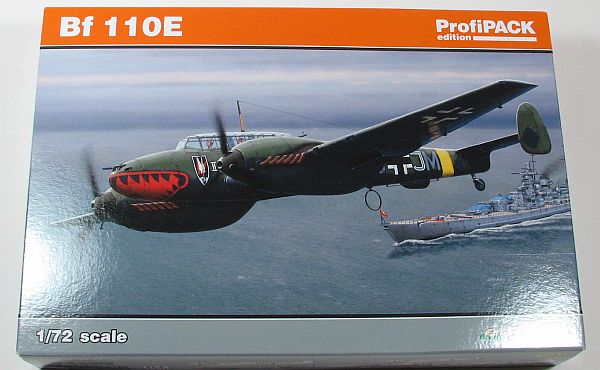
Eduard 1/72 Bf 110E
By Matt Bittner
Introduction
In the past when one would think of quality model companies, one would think of Tamiya and Hasegawa. While the two are still considered very high quality, other model manufacturers can now be added to that list. First and foremost among them is Eduard. As they started to release primarily WW1 models, their quality became higher and higher. Now that they're releasing other than WW1-types, the quality has become even higher. Their WW1 models are still finished to a high quality – it's just that until Wingnut Wings came into existence, Eduard had the corner on high quality WW1 kits. With non-WW1-type kits, Eduard is definitely bringing competition to Tamiya and Hasegawa.The Kit
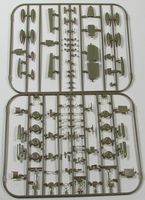
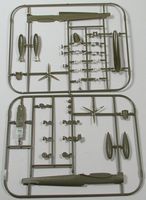
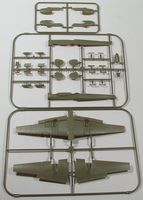
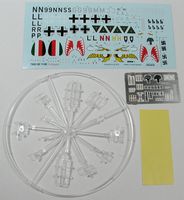
This stunning 1/72 Messerschmitt Bf 110E from Eduard consists of 122 pieces of tan, injected plastic used (there are more pieces on the sprue, but not used for this boxing); 6 pieces of clear for the canopy pieces; and a photoetch fret with 52 pieces. Once again, like their 1/72 F6F series of kits, the molding is top-notch and I can see no problems with the parts at all. The clear is very nicely executed and as thin as injected plastic can be. The photoetch is to the usual Eduard high standards, plus the kit comes with their masks for not only the canopy, but for the wheels, too. Decals are very well done – appear in register – and provide for the following schemes:- G9+JM, 4./NJG 1, St. Trong, France, February 1942
- S9+NN,l 5./ZG "Wespen", Lt Herbert Kutsche, Russia 1942
- LN+LR, 1.(Z)/JG 77, Lt. Felix-Maria Brandis, Malmi, Finland, 1942
- W. Nr. 4035, Sonderkommando Junck, Iraq, Mosul Air Base, May, 1941
- S9+HP
Construction starts with the cockpit, and there are a lot of pieces. Take your time and study the instructions carefully. You can decide not to use the photoetch as most of the pieces on the photoetch fret are replicated in plastic (except for some things like the throttle quadrant and seat belts, etc.) plus there are decals for the instrument panels. However, to get the "most" from the cockpit and everything supplied, I would definitely use the photoetch.
Once all the cockpit pieces are built-up you then assemble the wings. There are various openings in the lower wing section to drill or cut out, so pay attention to what your scheme requires. Once that's accomplished then you can glue the wing pieces together. At the same time the nacelles are glued together and then glued to the wings.Next is assembling the fuselage, include all internal pieces. Again, there are a lot of pieces that go inside the fuselage halves so pay close attention to the instructions and follow carefully. Once all pieces are glued into one fuselage half then the fuselage halves can be glued together. Now that the fuselage is all together construction continues with the addition of the nose - included its guns - as well as all tail pieces.
The next step is masking the clear pieces and adding them to the build. You have the option of either an open or closed pilot's area and the instructions detail what you need to accomplish for each one.
The model is now turned over and items added to the underside. While you'll want to hold off on adding the landing gear until after painting and decaling, you will need to add the underside radiators. Actually the last instruction steps are best left until the end. Those steps include adding the wheels, the tail wheel, the landing gear doors, the DF loop and antenna to the underside, pitot tube and aileron balances, props, exhausts and all ordnance.Conclusion
This is an awesome kit in all ways. Eduard has done extreme justice to the Bf 110 with this - and subsequent - releases and you'll be amiss if you don't pick one up. It will take some time due to all the parts, but it shouldn't be a difficult build, given how Eduard kits have gone together in the past. I'm definitely looking forward to starting this one.
Huge thanks to Eduard for sending this Bf 110E to review.

