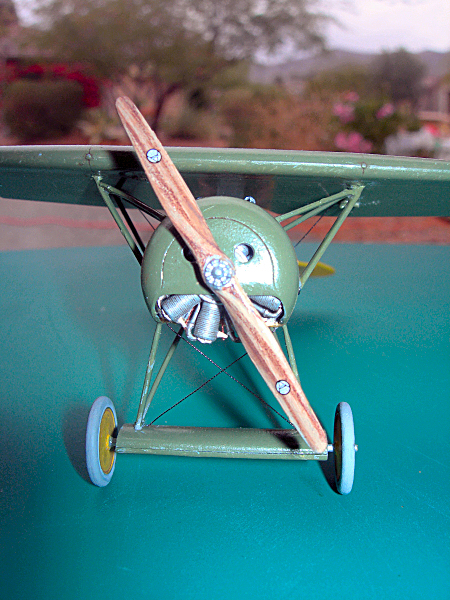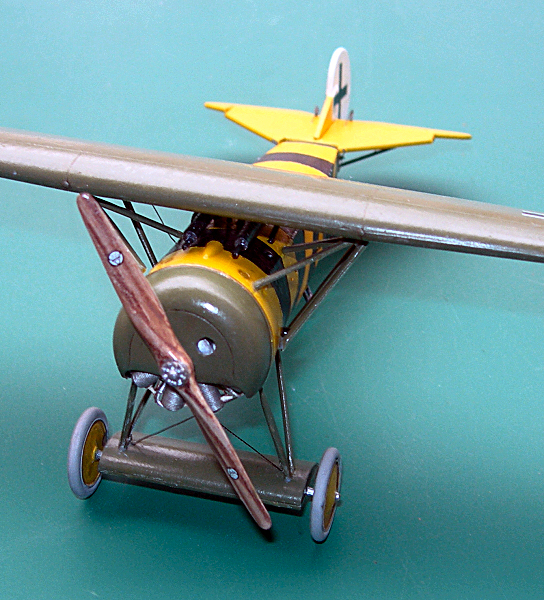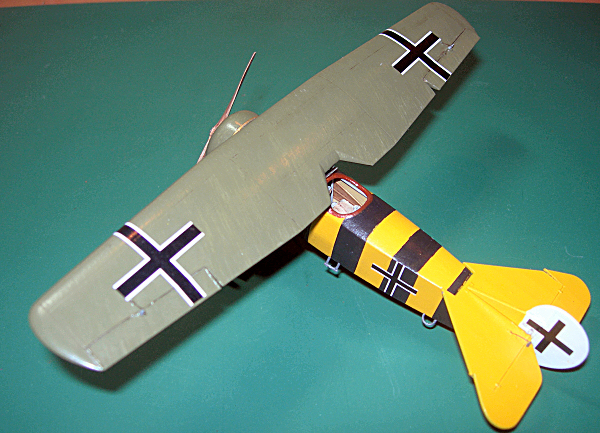
Eduard 1/48 Fokker E.V "Weekend Edition"
By Rob Stewart
Introduction
This kit is the latest release in Eduard's 'Weekend Edition' series of basic kits, perfect for beginners, WWI enthusiasts, or just anyone with a need to have a short project in the work room during the visit of some in-laws.
The Fokker E.V appeared at the front very late in the war, August 1918, and didn't really see much combat. It suffered some fatal wing failures, which involved a subsequent re-design. In September of 1918, further aircraft were sent to the front and it was re-designated the D.VIII. The design was unusual and many aircraft were divided among the eventual victors for further study after the war. In fact, if it had had a better engine, it may have been a stand-out fighter like the Fokker D.VII, although in this respect, time was also very much against it.
The kit comes without PE or masks, and with a single marking option, but that shouldn't put anyone off. For a detailed first look review, please see Mike Whye's First Look. I was impressed, as always, with the quality of the parts on first opening the box, and anxious to get going.
General Construction.
There are no big areas that caused problems, parts are crisply molded with almost no flash or sink/pin marks, and it all went together smoothly, as we have come to expect from Eduard. There is a wee hole in the underside of the fuselage, which is meant for a control horn for the elevator cable, but that can be filled in easily enough. I can sometimes be a bit ham-fisted, so I had to take particular care in separating and trimming the struts and cockpit frames etc. from the sprues, as I have been known to make a mess of these. Two wings are supplied with the kit, although they are exactly the same. Either can be used, leaving you with a spare for painting practice! In an earlier incarnation of this kit, two slightly different wings were included, but Eduard has had another look at the aircraft and changed the molds. I used the guns as is, apart from drilling small holes at the ends of the gun barrels. I added a windshield cut from clear styrene sheet, but apart from that, the kit was pretty much built OOB.
Special care has to be taken when adding the struts and wing to the fuselage. Any kind of jig you can rig up is a good idea. Patience is the key here.
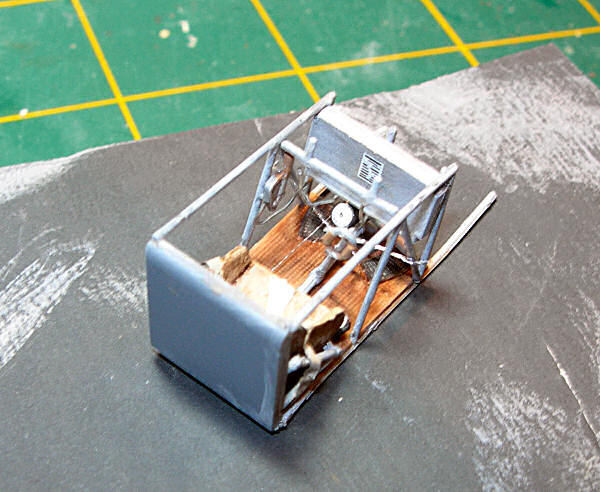
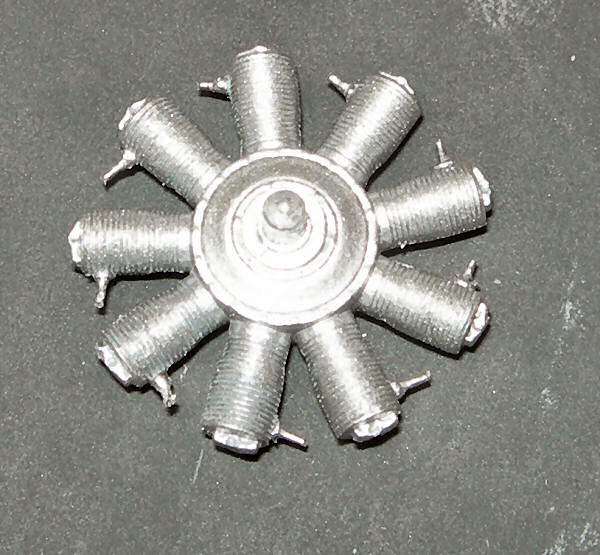
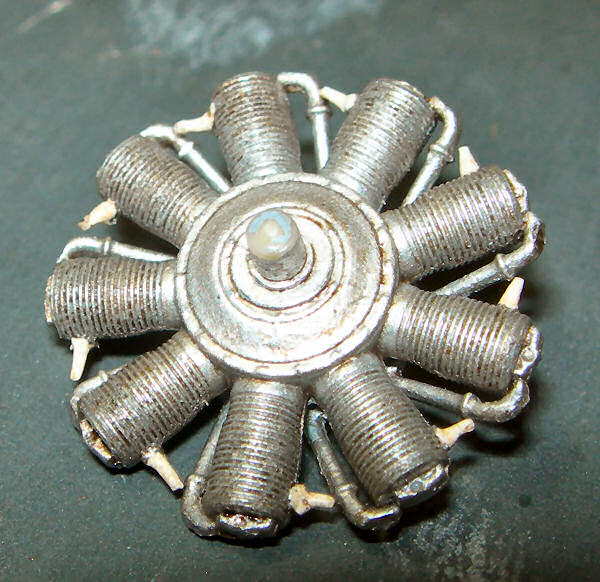
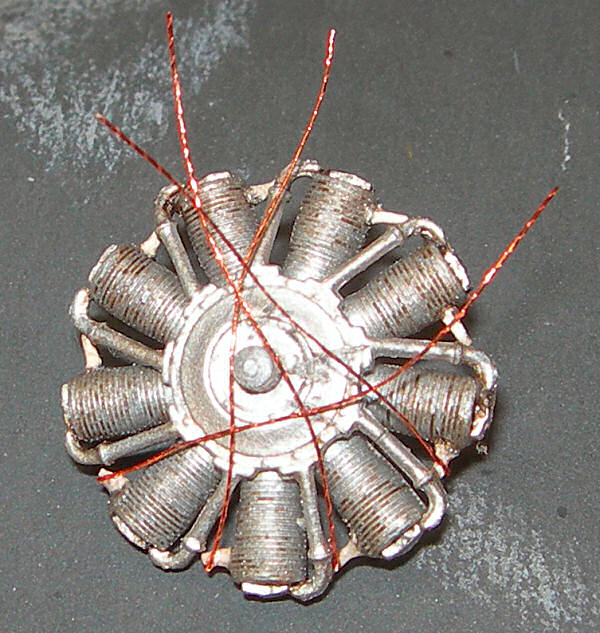
I like to apply a "new to me" technique that I have learned in each kit I build, and this time it was adding a few scratch built parts to the interior and engine.
Interior
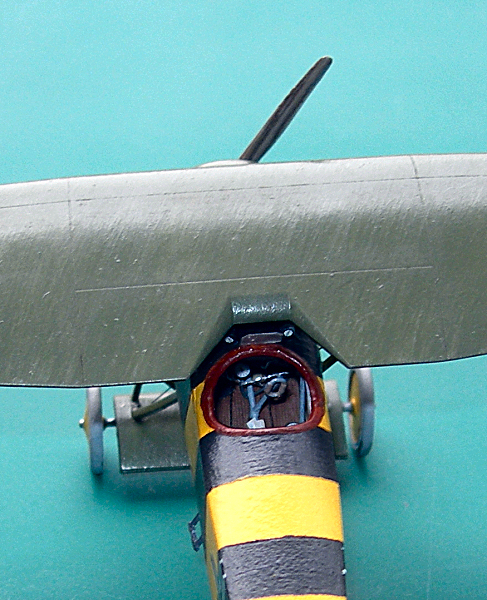
I offset the control surfaces from the molded straight positions, so I had to assemble the cockpit accordingly with the rudder pedals and control column appropriately off center. I added some steel wire for the interrupter gear cables up to the guns and for the throttle, and also some metallic thread for the aileron and rudder cables. Seatbelts were added from cut and painted aluminium foil.
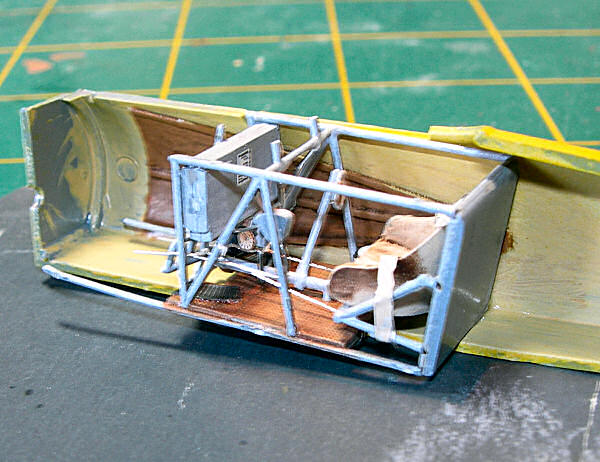
The interior was painted with Misterkit German CDL, with a "wood" colour on the plywood side fairings. Although the purists would say that the prototypes were lozenge covered, and the interior fabric wouldn't have been linen coloured, this is a weekend edition, and nobody is going to see much of the interior anyway, so I painted it according to the instructions. I painted the metal framework a silvery colour and glossed it. The instructions call for the framework to be RLM02, but the Windsock Datafile by Peter Grosz states "the natural color of the metal fuselage frame was retained", so I went with a silvery colour. The seat in the E.V. was aluminum, generally covered with fabric, and was painted accordingly, although the instructions call for a wood-coloured seat. Lastly, the interior was given an oil wash to bring out the details.
Engine
Painting and Markings
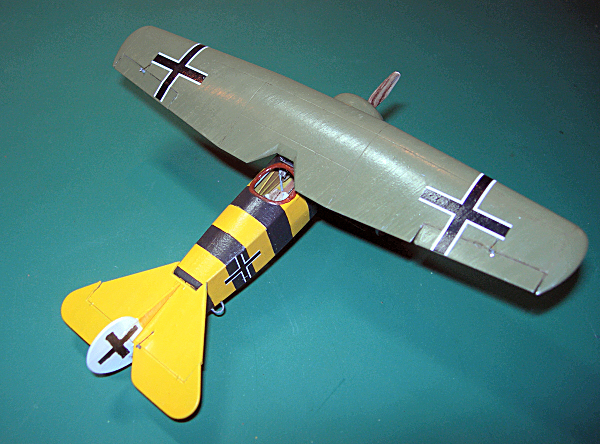
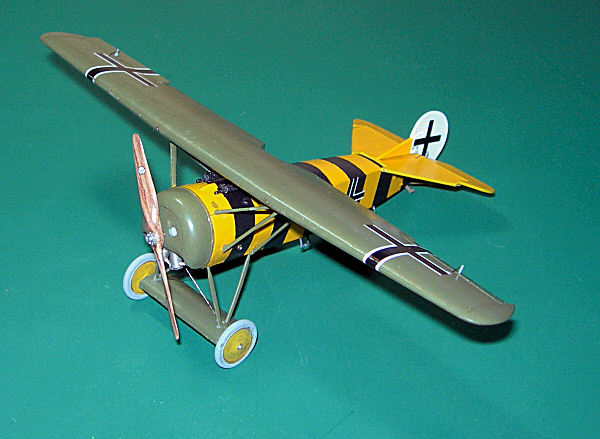
The choice of markings for the single option is an excellent one. Theo Osterkamp was the highest scoring ace in the German Navy in WWI. He survived the war and actually went on to score aerial victories in WWII, making his aircraft an important choice to model. The E.V/D.VIII was generally covered with four-colour lozenge fabric, and that would have been tricky for a Weekend Edition kit. Fortuitously, in his diary, van Osterkamp said he had his fuselage painted in yellow and black stripes, "like a bumble bee". Eduard has extended this yellow/black to include the cowl, axle fairing and the wheel covers.
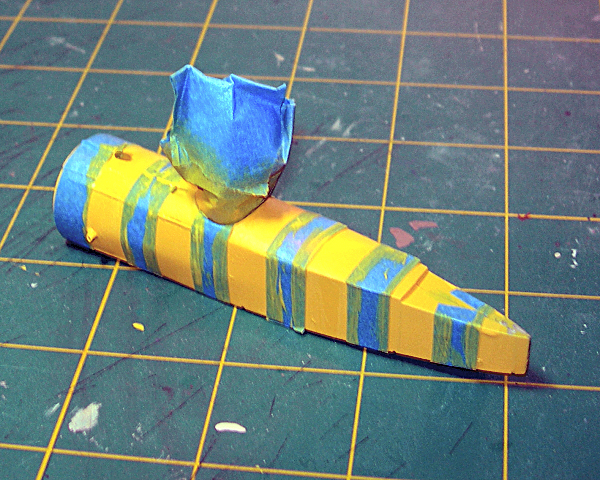
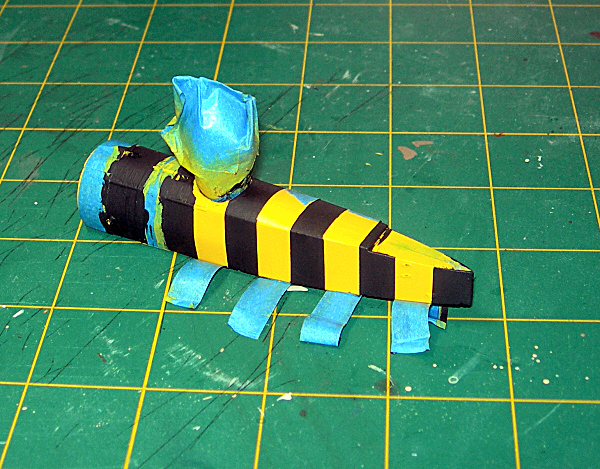
Thanks to Mike for calculating the stripe widths. I had scanned the instructions and printed them to 1/48 scale and measured the stripes. They are actually not all equal, varying from 7 to 9mm. I went with Mike and made them all equal. I have never been good at masking and painting, and have suffered bleeding from every single method I've chosen to date. So this time for the striping, I used a tip from my mother-in-law. Honest! I painted the whole fuselage Misterkit Jasta10 yellow. Then I taped the stripes with painter's tape. Instead of spraying with black, I gave the whole thing another coat of yellow.
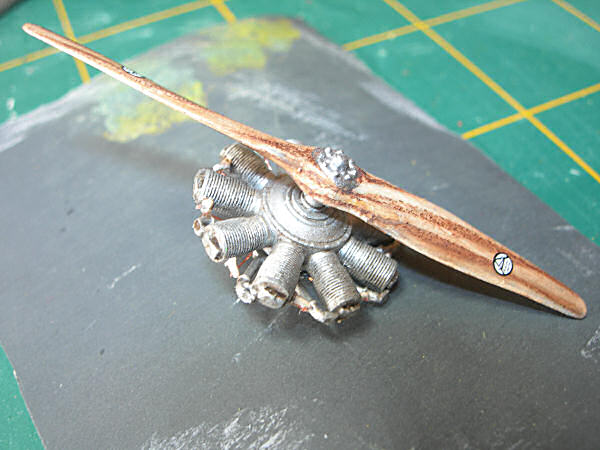
The decals were well printed, as usual, and went on smoothly. They responded perfectly to Micro sol/set, and once they had dried I brushed Future over the whole aircraft. A word of warning; there are several decals for instrument faces. These might need to be trimmed very closely, as real estate is extremely scarce, but for each of the instrument decals, there is a spare. In fact, on my sheet I didn't need to trim at all, the decals were so well printed. Once dried, I added a drop of gloss coat to these, to act as a glass cover. This has a slight magnifying effect, and brings out the decal detail a little more, which is nice. Decal #5 should go on the ammo box facing the pilot. I applied #18, the datum line to the port side, because I believe that this was re-applied in he field to aircraft after a custom paint job a lot of the time.
Apparently Osterkamp preferred his D.VII, so this particular aircraft was hardly flown, and indeed probably never in actual combat, so weathering was kept very light. I just did a light oil wash to punch out a little detail, and added a few oil stains to the axle aerofoil, and some mud on the wheels.
Rigging.
There is very little rigging to worry about, and for what there is a diagram is included. I had pre-drilled the holes right at the start, at approximately the correct angles, so now I had only to drill through some paint to open them up. For the rigging I used metallic cord from Kreinik, that I got at a needlework store. It is 0.15mm in diameter, making it slightly overscale for the kit, but with such little rigging I think I got away with it. I used the pre-coloured "nickel" cord, although a variety of metallic shades are available.
Conclusion
This is a great kit for a newcomer to the WWI genre, or indeed aircraft modeling in general. Also, the subject matter makes it a good one for anyone to add to their WWI collection. Although a basic kit, there are enough aftermarket bits and bobs available to satisfy any degree of AMS suffered by the experienced modeler, although decals for alternative options are scarce. As I said, it is also good to have a few of these Weekend Edition kits in the stash for wet weekends or times of unwanted house guests.
Thanks to Eduard for the kit and to Matt Bittner for allowing me to build it.

