Eduard 1/48 Fw-190A-8 Weekend Edition
|
 |
Introduction
When I saw Eduard’s new Weekend Edition of the 1/48 Fw-190A-8
(Eduard #8429), which came out this January, I wondered what’s the
difference between it and the other Eduard 1/48 Fw-190A-8 (Eduard #8173)
that I acquired last September. That’s because I hadn’t heard
of Eduard’s Weekend Editions--kits that are like many other kits
we’ve been buying for many years--just the plastic, the instructions
and a decal sheet. When compared to the #8173 kit, the new one doesn’t
have photo-etch nor masks nor 4-color instructions. Those are the prime
differences….well, not to mention that the Weekend Edition is $17
cheaper, too, at Eduard‘s suggested retail prices.
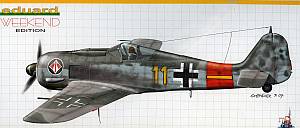
 Otherwise,
they’re basically the same kit although the Weekend Edition has
its own specific decal sheet so the model will represent Yellow 11 Fw-190
flown by Feldwebel Alfred Bindseil, an NCO pilot of the 6./JG Stormede
in Germany during the summer of 1944. The decal sheet in the Weekend Edition
has no variants so if you want to do something else, you’ll need
to shop for some aftermarket decals. Otherwise,
they’re basically the same kit although the Weekend Edition has
its own specific decal sheet so the model will represent Yellow 11 Fw-190
flown by Feldwebel Alfred Bindseil, an NCO pilot of the 6./JG Stormede
in Germany during the summer of 1944. The decal sheet in the Weekend Edition
has no variants so if you want to do something else, you’ll need
to shop for some aftermarket decals.
The Kit
All right, so what does having the weekend kit mean compared to the
earlier issue? Well, for one, you save some bucks as I wrote a moment
ago. Two, you’re still getting a fine fine kit. As modelers learned
last year with Eduard’s earlier Fw-190’s, the molding is fine.
Nowhere on the six sprues of medium olive drab styrene did I see any sink
marks or ejection marks that will matter once the model is assembled.
About the worst I saw were some faint flow marks on the lower wings but,
hey, one coat of paint will eliminate those from sight.
 The
seventh sprue in the kit is made of clear styrene and you get far more
on this sprue than what you will need. Actually, you get double what you
need and then some. From the way things look, this sprue is destined for
one of Eduard’s two-for-one kits with a couple of Fw-190s, like
Eduard’s other Dual Combo kits. What I don’t understand, and
may not until I assemble this kit, is why it has two canopies; according
to the instructions, #N1 is an open canopy and #N7 is for showing it closed
but I can‘t see any differences so far with them on the sprue. The
clear sprue also has a couple trapezoidal pieces; I suppose these represent
armored glass for some other Fw-190 variants. Also, there’s a clear
upper cowling with gun troughs in it. The instructions don’t call
for its use but, still, I wonder how it’s to be used in another
of the Eduard Fw-190 kits. Oh well, wait and see, I guess. The
seventh sprue in the kit is made of clear styrene and you get far more
on this sprue than what you will need. Actually, you get double what you
need and then some. From the way things look, this sprue is destined for
one of Eduard’s two-for-one kits with a couple of Fw-190s, like
Eduard’s other Dual Combo kits. What I don’t understand, and
may not until I assemble this kit, is why it has two canopies; according
to the instructions, #N1 is an open canopy and #N7 is for showing it closed
but I can‘t see any differences so far with them on the sprue. The
clear sprue also has a couple trapezoidal pieces; I suppose these represent
armored glass for some other Fw-190 variants. Also, there’s a clear
upper cowling with gun troughs in it. The instructions don’t call
for its use but, still, I wonder how it’s to be used in another
of the Eduard Fw-190 kits. Oh well, wait and see, I guess.
 Okay,
let’s get on with things at hand. First, I’m not happy with
the instructions because they’re way too small. Whereas the instructions
in Kit #8173 have pages that are each about the size of a sheet of typewriter
paper (and use full color on the painting instructions), the Weekend Edition
instructions are half that size and only in black and white. Got magnifying
glasses? You might need them. Okay,
let’s get on with things at hand. First, I’m not happy with
the instructions because they’re way too small. Whereas the instructions
in Kit #8173 have pages that are each about the size of a sheet of typewriter
paper (and use full color on the painting instructions), the Weekend Edition
instructions are half that size and only in black and white. Got magnifying
glasses? You might need them.
 Aside
from that disappointment, everything else in the kit looks absolutely
fine. Like engines? You’ll like this one--ten pieces form the 14-cylinder
BMW801D-2 and that’s not including the exhaust pipes. And the frame
for holding the engine in place in the fuselage is another four pieces.
Yup, you’re going to get detail in this kit. As for the gun compartment
just behind and above the engine, seven more pieces make up this area
and another 15 pieces are used in the cockpit. If you include the main
wing spar, ten pieces make up the main wheel wells. So, in short, this
kit is rich in detail without having to resort to photo-etch materials. Aside
from that disappointment, everything else in the kit looks absolutely
fine. Like engines? You’ll like this one--ten pieces form the 14-cylinder
BMW801D-2 and that’s not including the exhaust pipes. And the frame
for holding the engine in place in the fuselage is another four pieces.
Yup, you’re going to get detail in this kit. As for the gun compartment
just behind and above the engine, seven more pieces make up this area
and another 15 pieces are used in the cockpit. If you include the main
wing spar, ten pieces make up the main wheel wells. So, in short, this
kit is rich in detail without having to resort to photo-etch materials.
 As
for other details….you can open the gun bays on the wings if you
wish and the ailerons and rudder are molded separately, the only separate
control surfaces. The engine cowling is five pieces that, when glued together,
are designed to simply slip over the engine assembly. I guess I’ll
have to figure out how to assemble this pieces in such a way I can show
off the fabulous engine when I build this model rather than hide all that
wonderful detail. You’re supplied with a bomb, centerline drop tank
and two W.Gr. 1 rockets mounted under the outer wings. As
for other details….you can open the gun bays on the wings if you
wish and the ailerons and rudder are molded separately, the only separate
control surfaces. The engine cowling is five pieces that, when glued together,
are designed to simply slip over the engine assembly. I guess I’ll
have to figure out how to assemble this pieces in such a way I can show
off the fabulous engine when I build this model rather than hide all that
wonderful detail. You’re supplied with a bomb, centerline drop tank
and two W.Gr. 1 rockets mounted under the outer wings.
(Not sure what Alfred Bindseil was packing when he flew his Yellow 11
Fw-190 in the spring and summer of 1944, I researched him and his aircraft
on the internet. A profile
by artist Simon Schatz shows Bindseil was using the drop tank. Bindseil
shot down at least five allied aircraft, including a Spitfire and a Mustang
on July 14, 1944 over Normandy, before being killed in a fight with P-47s
and Spitfires on July 20, 1944).
 If
you want to see more details about Yellow 11, the International
Museum of Flight at Laatzen-Hannover, Germany. My German is way rusty
nowadays so I don’t know if the Fw-190 in the museum is the actual
Yellow 11 (perhaps Bindseil was in another Fw-190 when he died?) or another
Fw-190A-8 painted to resemble Bindseil’s aircraft. One thing to
notice about these photos is the wavy demarcation between the wing’s
top and bottom colors at the leading edge. So now you have a small dilemma:
paint it like Schatz’s painting with a sharp demarcation between
the upper and lower wing colors or use the wavy demarcations as in the
museum photos? Either way, you’ll have proof to back up your decision. If
you want to see more details about Yellow 11, the International
Museum of Flight at Laatzen-Hannover, Germany. My German is way rusty
nowadays so I don’t know if the Fw-190 in the museum is the actual
Yellow 11 (perhaps Bindseil was in another Fw-190 when he died?) or another
Fw-190A-8 painted to resemble Bindseil’s aircraft. One thing to
notice about these photos is the wavy demarcation between the wing’s
top and bottom colors at the leading edge. So now you have a small dilemma:
paint it like Schatz’s painting with a sharp demarcation between
the upper and lower wing colors or use the wavy demarcations as in the
museum photos? Either way, you’ll have proof to back up your decision.
Eduard’s painting guide shows Yellow 11 with a white spiral stripe
on its dark green spinner. The stripe will need to be painted by hand
unless you have a spiral decal hanging out someplace. Other than that,
I don’t see any problems with the decal sheet or the painting instructions
which is all black and white.
 I’ve
read some complaints….er, comments….on a forum that the engine
cooling doors, called gills by some people, in this kit are molded shut.
Well, by gosh, they are! But, after looking in Squadron’s original
Fw-190 In Action book, I found a couple photos showing the gills in a
closed position, including one photo taken during an engine run-up (page
38). Also, if you look at the photos of Yellow 11 on the International
Museum of Flight’s website, it appears, note, appears,
the gills are shut. Since this is the specimen used by Eduard as the basis
for this kit, well then it should be no surprise that Eduard made this
kit with closed gills. I’ve
read some complaints….er, comments….on a forum that the engine
cooling doors, called gills by some people, in this kit are molded shut.
Well, by gosh, they are! But, after looking in Squadron’s original
Fw-190 In Action book, I found a couple photos showing the gills in a
closed position, including one photo taken during an engine run-up (page
38). Also, if you look at the photos of Yellow 11 on the International
Museum of Flight’s website, it appears, note, appears,
the gills are shut. Since this is the specimen used by Eduard as the basis
for this kit, well then it should be no surprise that Eduard made this
kit with closed gills.
Judging from the preponderance of photos showing the Fw-190A-8 with
gills open, having the gills shut was not common but not unheard of either.
If you want an Fw-190A-8 with gills open, you can do one of two things,
buy another model maker’s kit with the gills open (every Fw-190A-8
kit in my stash by other model manufacturers has the gills open so you
won’t have trouble finding one of these) or get out the Dremel and
some styrene sheets and prepare to have spend some time doctoring up this
kit. As for what I’ll do, hey, I’m happy to leave the gills
closed when I build this kit, after all, some photos support this.
Conclusion
 Okay,
now for a wrap-up. Is this a good kit? You bet! Even without the photo-etched
items and the masks of the more expensive Eduard kit, you’re going
to end up with a good-looking model. As for its being called a weekend
kit, well, if you want to build it over one weekend, have at it. I’m
sure it can be done. But I plan on spending a few weekends to put this
one together. It’s not that several weekends are needed, I just
don’t want to rush a good thing and will allow plenty of time for
the various paints to dry. Okay,
now for a wrap-up. Is this a good kit? You bet! Even without the photo-etched
items and the masks of the more expensive Eduard kit, you’re going
to end up with a good-looking model. As for its being called a weekend
kit, well, if you want to build it over one weekend, have at it. I’m
sure it can be done. But I plan on spending a few weekends to put this
one together. It’s not that several weekends are needed, I just
don’t want to rush a good thing and will allow plenty of time for
the various paints to dry.
Eduard’s Fw-190A-8 Weekend Edition (kit #8429) has a suggested
retail price of $22.95.U.S. Thanks to Eduard
for making this kit available for review. |
|


