Testors Lincoln Mint Ultra Metal Series 1/6 Harley-Davidson FLHRCI Road King ClassicBy Vic Mattes |
 |
Introduction
 I
previously posted a First
Look at the Testors Harley Road King and have finally gotten around
to building it. I built it out of the box with no changes. The only painting
was the silver side covers. Other than that, the pieces are as they came.
In general, I am very pleased with the bike as it came out.
I
previously posted a First
Look at the Testors Harley Road King and have finally gotten around
to building it. I built it out of the box with no changes. The only painting
was the silver side covers. Other than that, the pieces are as they came.
In general, I am very pleased with the bike as it came out.
The Build
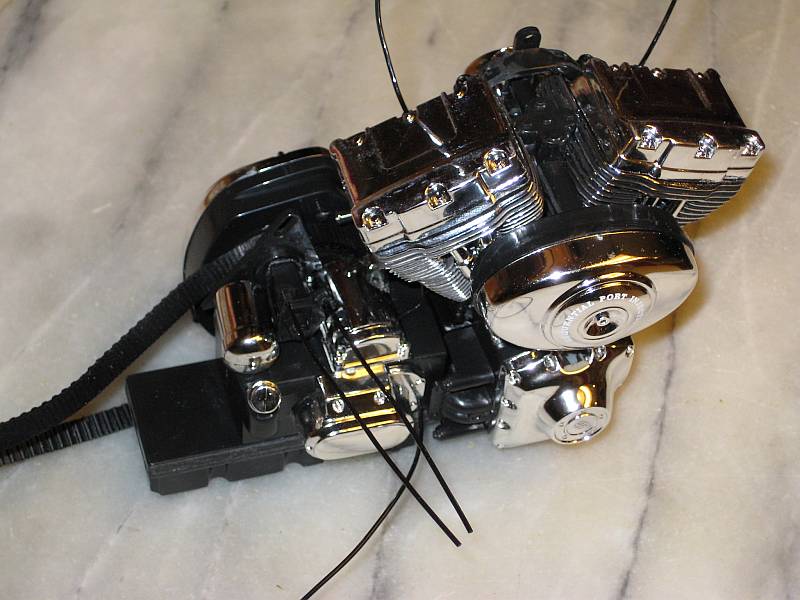
 The
build is, as I indicated in the First Look, quite straight forward. I
will let the pictures talk for themselves as to the construction. A few
tidbits on the build though. First, as the kit uses several materials
(plastic, finished metal, chrome, rubber), what you use to assemble the
pieces can go a long way towards raising or lowering your level of stress.
While plastic cement can be used (which I did) I would recommend using
a more potent adhesive such as super glue particularly for the finished
metal pieces. While the chrome can be scraped before joining, I would
be leery of doing so to the finished metal pieces as the finish on them
is wonderful. I would also recommend using super glue for the bags as
they require the adhesion of a leather-like rubber to the hard plastic
interiors. Were I to build this bike or a similar again, I would pay attention to these points.
The
build is, as I indicated in the First Look, quite straight forward. I
will let the pictures talk for themselves as to the construction. A few
tidbits on the build though. First, as the kit uses several materials
(plastic, finished metal, chrome, rubber), what you use to assemble the
pieces can go a long way towards raising or lowering your level of stress.
While plastic cement can be used (which I did) I would recommend using
a more potent adhesive such as super glue particularly for the finished
metal pieces. While the chrome can be scraped before joining, I would
be leery of doing so to the finished metal pieces as the finish on them
is wonderful. I would also recommend using super glue for the bags as
they require the adhesion of a leather-like rubber to the hard plastic
interiors. Were I to build this bike or a similar again, I would pay attention to these points.

 Secondly,
while Testors does do a good job of showing most parts that attach to
both sides, there are some elements that caused me great frustration but
that I fortunately caught before progressing too far. The classic example
is the side covers. Only one is shown being attached with no comment about
the other. It is appears to have been left off the left frame in step
16 for clarity yet by step 18, it mysteriously appears on the bike. My
advice would be to carefully check pieces for use on both sides and understand
when the other is attached. If not shown, look for the logical place.
Secondly,
while Testors does do a good job of showing most parts that attach to
both sides, there are some elements that caused me great frustration but
that I fortunately caught before progressing too far. The classic example
is the side covers. Only one is shown being attached with no comment about
the other. It is appears to have been left off the left frame in step
16 for clarity yet by step 18, it mysteriously appears on the bike. My
advice would be to carefully check pieces for use on both sides and understand
when the other is attached. If not shown, look for the logical place.

 The
last is a recommendation. Testors uses nylon tubing for the brake and
control lines. While it works well, it might be interesting to replace
them with thin gauge insulated electrical wire. The wire would be easier
to bend and form as you route the lines than the tubing is. Just make
sure the wire is black. Yours for consideration.
The
last is a recommendation. Testors uses nylon tubing for the brake and
control lines. While it works well, it might be interesting to replace
them with thin gauge insulated electrical wire. The wire would be easier
to bend and form as you route the lines than the tubing is. Just make
sure the wire is black. Yours for consideration.

Conclusion
 The
bike came out well as you can see. It is a fun build that does take time.
I would guess that it took me about 8 hours to build the bike. It is a
sharp bike but with all the chrome, you will need to find a way to ‘polish’
it before taking it public. Additionally, it is a heavy bike when completed.
So find a safe place out of the way to show it off. Enjoy it!
The
bike came out well as you can see. It is a fun build that does take time.
I would guess that it took me about 8 hours to build the bike. It is a
sharp bike but with all the chrome, you will need to find a way to ‘polish’
it before taking it public. Additionally, it is a heavy bike when completed.
So find a safe place out of the way to show it off. Enjoy it!
 |
 |
 |
 |
 |
 |
 |
 |