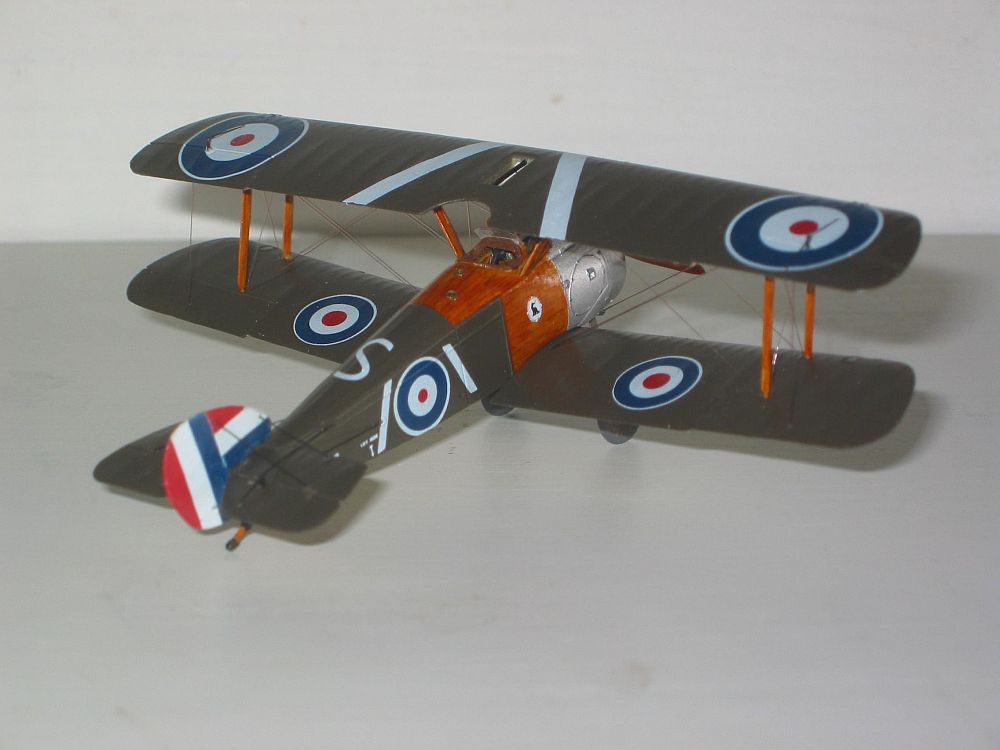
Roden 1/72nd Sopwith F.I Camel
|
 |
For a rundown of the history of this aircraft and the First Look description
of the kit, go to the April
2006 Internet Modeler.
Decisions, Decisions
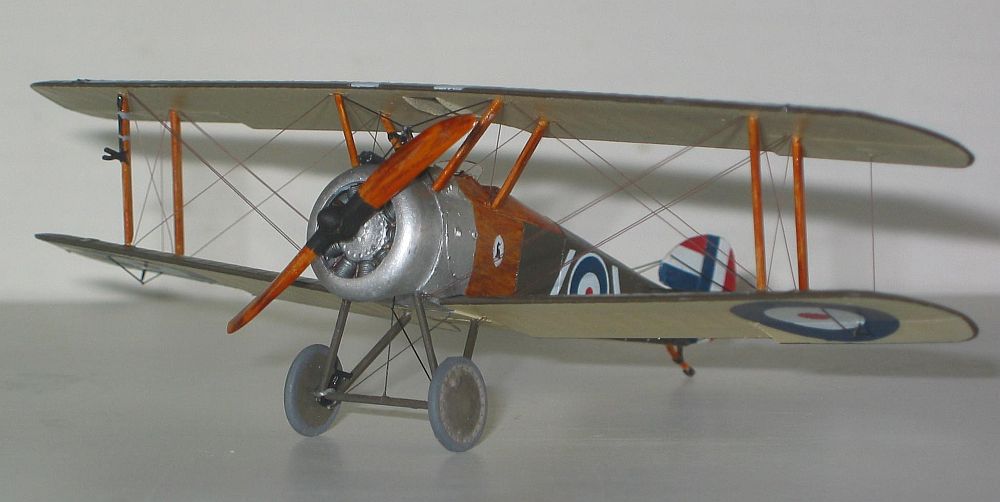
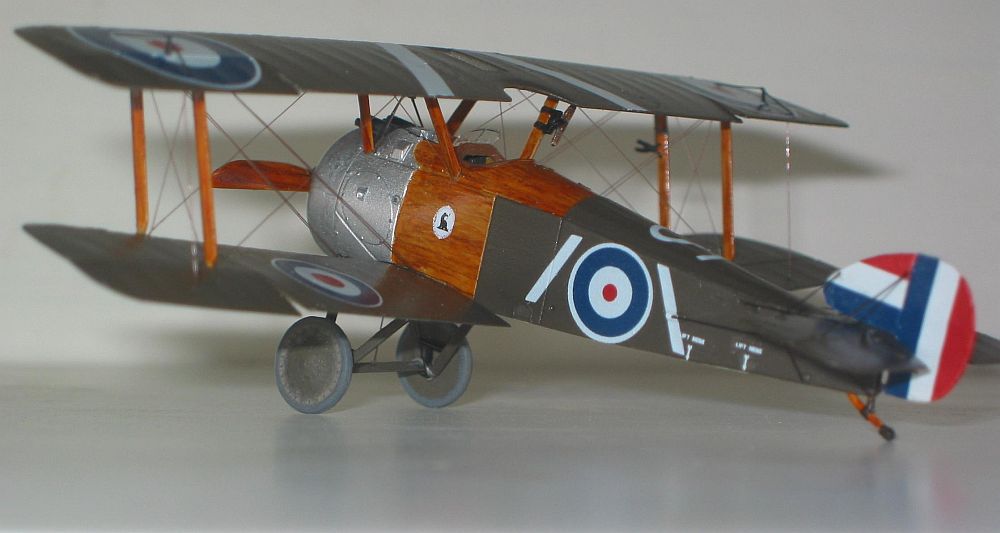
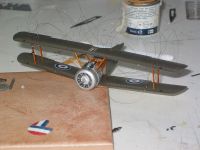
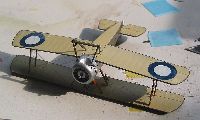
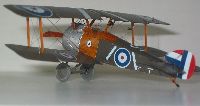
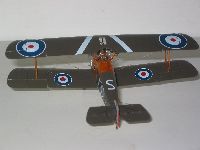
Just one really – which colour scheme to do. I chose D6402 of
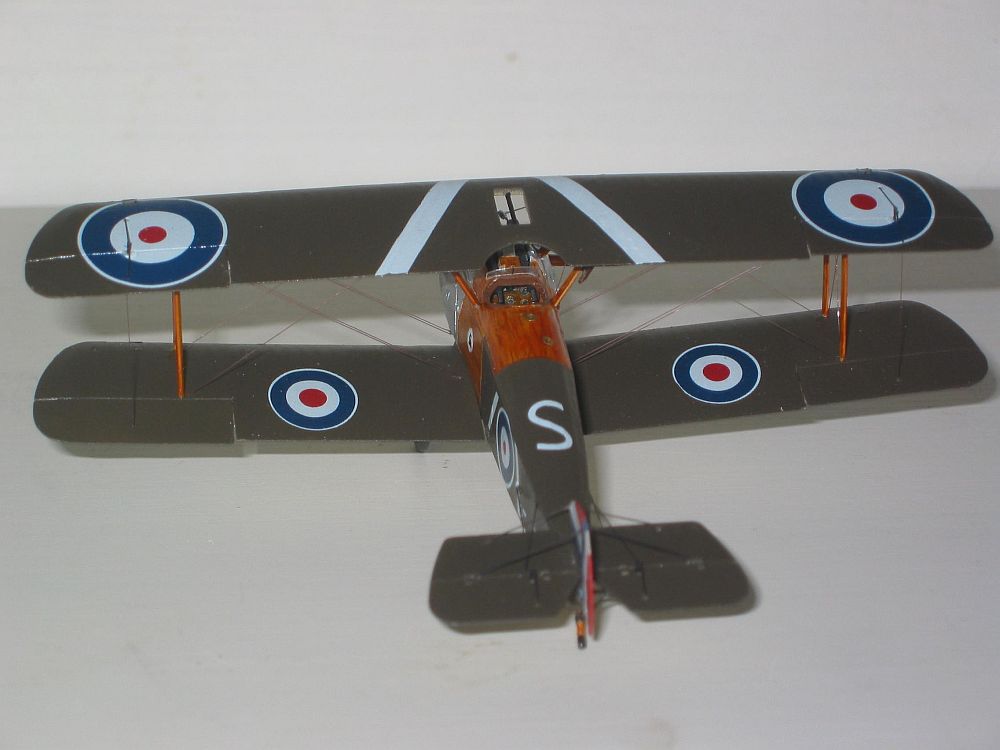
43 squadron, flown by Captain H.W.Woollett. The extra roundels, along
with the overwing stripes and fuselage ‘S’ are unusual. This
one is pictured by Roden with a rounded spinner. The only photo I’ve
seen of this machine doesn’t have a clear view of the prop, so I
just had to trust Roden on this.
On With the Show
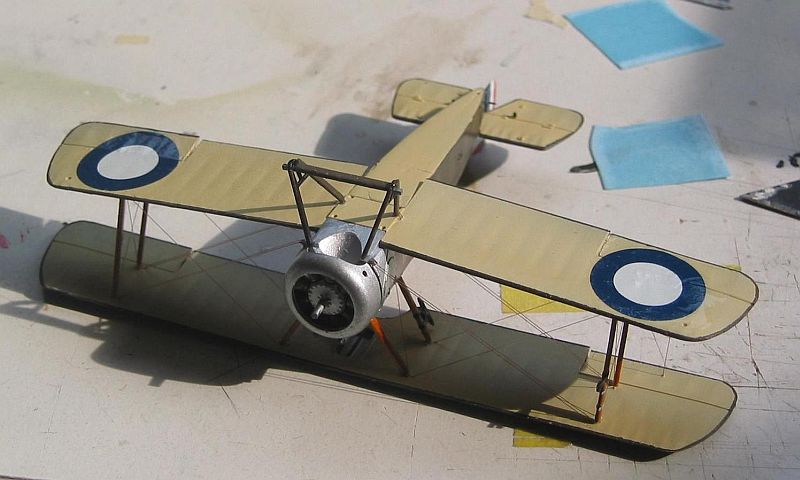
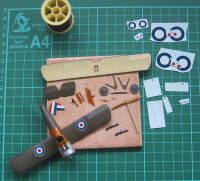
Cleanup, as good a place as any to start. One thing I noticed on closer
acquaintance is a strange texture on many of the parts, as if the master
was wood and the grain has carried over. Only heavy in a few places on
the wings. It wasn’t too obtrusive so I let it be. Anyhow, it would
have been a major pain to fix.
The parts came off the sprues easily with a no.11 blade. Not much flash,
trimmed off easily. The plastic generally was very nice to work with,
not being brittle. This is the first Roden kit where I didn’t break
anything. Care was needed trimming the tags around the top deckings in
order to minimize later use of filler. There were some small ejector pin
remnants needing trimming off around the tailskid socket, and also between
the gun positions. I thinned these openings anyway because dry fitting
the guns showed a tight fit. Inside the engine was half a tower where
the mounting shaft is meant to go. I found it easiest just to drill this
off.
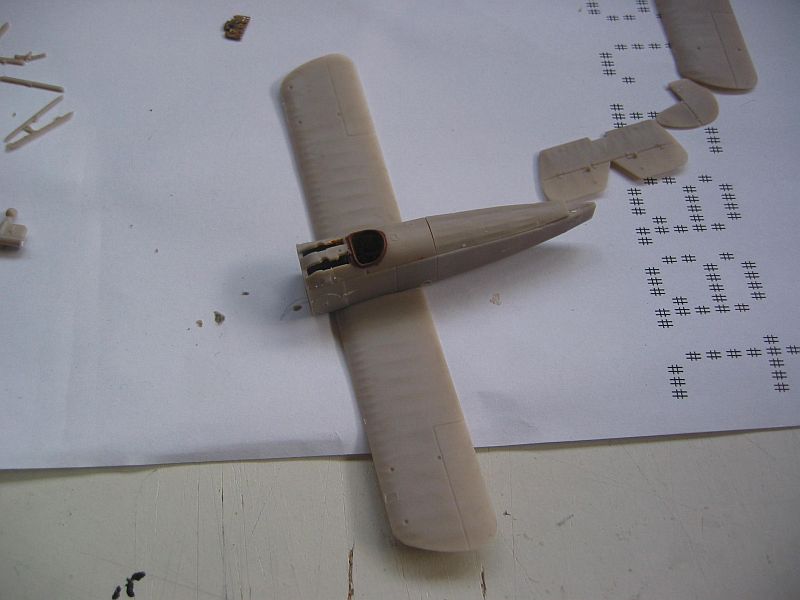
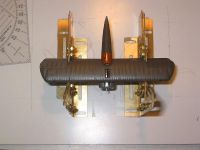
 The
fuselage bits dry-fitted nicely. The sides tended to cave in a bit but
in practise are pushed out by the fuel tank enough to fit snugly under
the turtedeck. The lower wing didn’t fit at all. After sanding away
the leading edge step cause by slight mold mismatch I obtained a snug
fit of the wing by sanding a small amount from the rear of the wing sides,
and scraping a wider recess in the fuselage. No filler was needed here
after assembly. The
fuselage bits dry-fitted nicely. The sides tended to cave in a bit but
in practise are pushed out by the fuel tank enough to fit snugly under
the turtedeck. The lower wing didn’t fit at all. After sanding away
the leading edge step cause by slight mold mismatch I obtained a snug
fit of the wing by sanding a small amount from the rear of the wing sides,
and scraping a wider recess in the fuselage. No filler was needed here
after assembly.
Before starting assembly, I removed the fairing behind the carburettor
intakes (not present on the model I wanted to make),drilled the intakes
out, cut the ailerons for later deflection, scored and deflected the elevators
and rudder, removed the picket rings and those control horns that would
make life hard when adding roundels, drilled out all the rigging holes,
and drilled 2 extra interplane strut holes that had been unacountably
missed by Roden. I also drilled out a cooling hole that was missing from
the cowling.
Fun with Glue and Paint
 First
noticed the seat was missing, so I made up an Eduard PE one. Probably
would have anyway, for the wicker effect. First
noticed the seat was missing, so I made up an Eduard PE one. Probably
would have anyway, for the wicker effect.
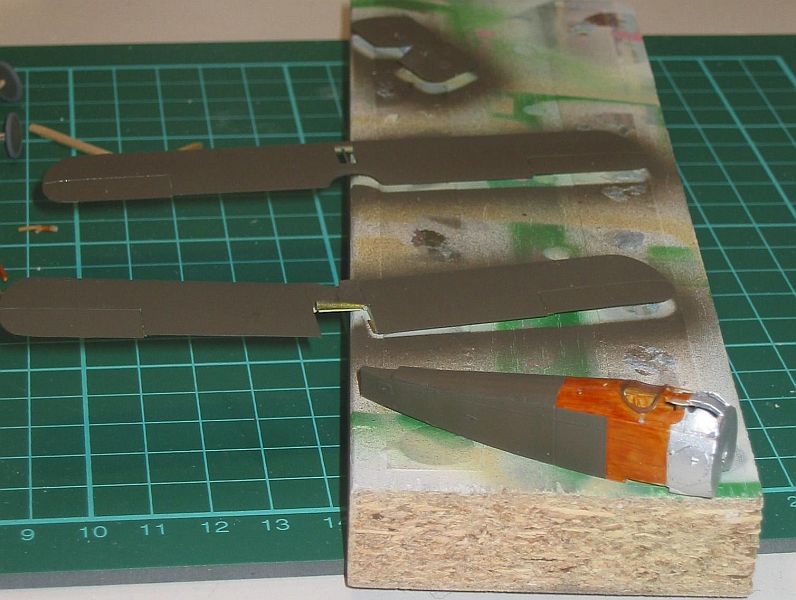
First the boring stuff. I painted a base coat of Humbrol sand on the
airscrew, struts and tailskid, satin oak on the seat and interior wooden
and CDL areas, and wood on the control panel. All the wooden bits except
the prop then got a coat of Tamiya clear orange (with first some vague
grainy streaks with a brown watercolour pencil on the struts). I painted
the interior of the metal panels in dull aluminium.
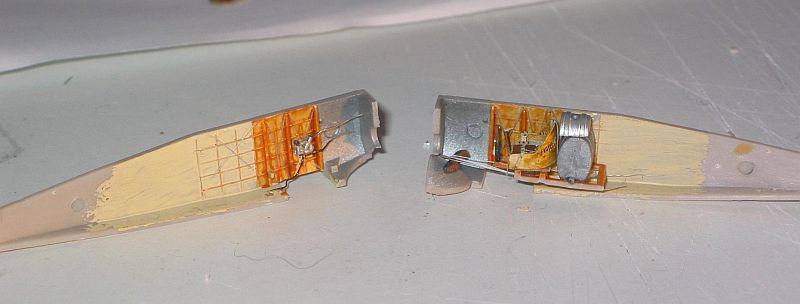
After detailed painting of all the interior bits, and the fabrication
of a few small absent items, I followed the assembly instructions except
I taped the fuselage together in order to fit the underside  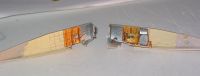 exhaust
channel neatly. The rudder pedals sit on this. At the back the channel
fits very well but at the front I later sanded 2mm off to bring it flush
with the front of the firewall. Everything fitted well, with a tad trimmed
from the floor framework. I added a couple of floorboards which you can’t
see anyway, wiring from fusewire and cross-bracing from sprue. I also
used a Sutton harness from an Eduard set. In no time at all (well, 3 days
actually) it was time to close up the fuselage. I’d figured out
the instrument panel was best fitted later, so after adding the prominent
ducting for the carburretor intakes I glued this to the top decking. exhaust
channel neatly. The rudder pedals sit on this. At the back the channel
fits very well but at the front I later sanded 2mm off to bring it flush
with the front of the firewall. Everything fitted well, with a tad trimmed
from the floor framework. I added a couple of floorboards which you can’t
see anyway, wiring from fusewire and cross-bracing from sprue. I also
used a Sutton harness from an Eduard set. In no time at all (well, 3 days
actually) it was time to close up the fuselage. I’d figured out
the instrument panel was best fitted later, so after adding the prominent
ducting for the carburretor intakes I glued this to the top decking.
 No
expletives were needed when glueing up the fuselage, and that’s
true for the top panels as well. After it had all set up I added the lower
wing, did minimal filling and sanding to the lower fuselage joint, and
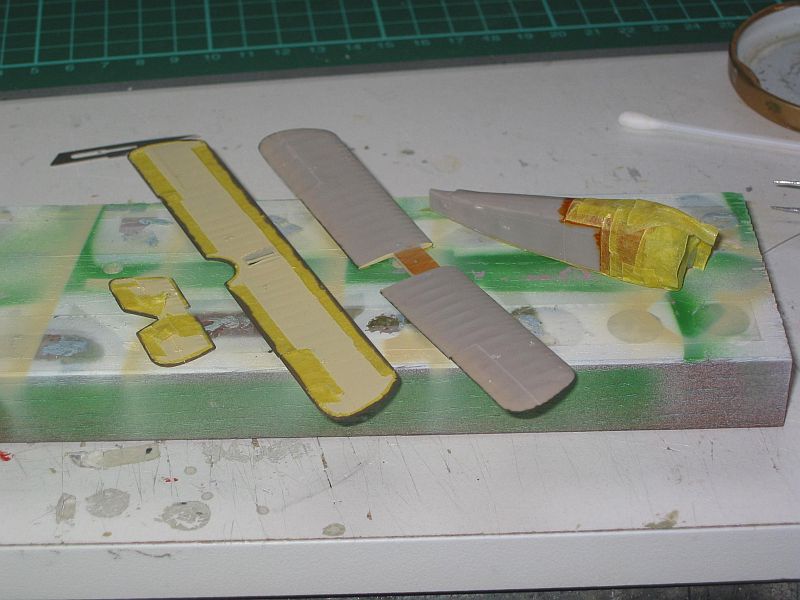
painted the outside. First I used Humbrol Metalcote shiny aluminium for
the cowling and metal panels, sprayed it with something I forget to seal
it, then did little squiggles with a silver gel pen for a poor metal turned
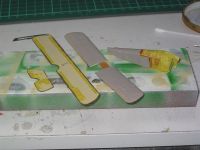
look. Once sealed and dry I painted wings, tailplane and fuselage undersides
Humbrol cream for CDL, masked off and did the wooden panels with sand
base colour, water colour pencil and Tamiya clear orange overcoat. At
the same time I drew laminations on the prop and overcoated it too, then
glued the appropriate spinner on. No
expletives were needed when glueing up the fuselage, and that’s
true for the top panels as well. After it had all set up I added the lower
wing, did minimal filling and sanding to the lower fuselage joint, and
painted the outside. First I used Humbrol Metalcote shiny aluminium for
the cowling and metal panels, sprayed it with something I forget to seal
it, then did little squiggles with a silver gel pen for a poor metal turned
look. Once sealed and dry I painted wings, tailplane and fuselage undersides
Humbrol cream for CDL, masked off and did the wooden panels with sand
base colour, water colour pencil and Tamiya clear orange overcoat. At
the same time I drew laminations on the prop and overcoated it too, then
glued the appropriate spinner on.
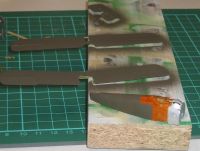  The
wing undersides were masked off and a thin edging of PC10 brush painted
on. When dry I masked the preceding gunk off on the fuselage and sprayed
everything else in sight with PC10 (made from Humbrol dark earth and black,
mixed to look right, according to the phase of the moon). I also painted
the wheel discs PC10 having already used medium grey on the tyres. At
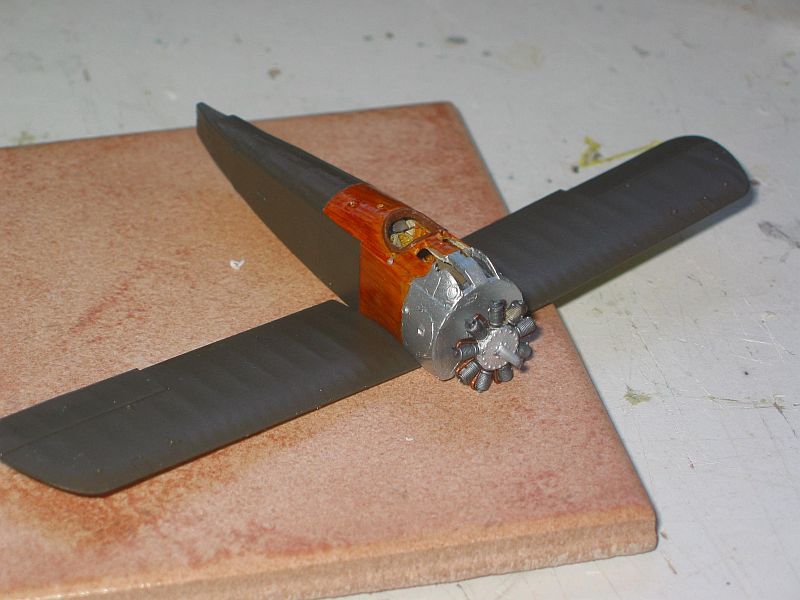
this point all the masking came off, and after much panicky touching in
I added the engine and cowling, both of which fitted very well –
no trimming of the cylinder ends needed. Er, yes, I forgot – I’d
painted the engine with various Testors colours and a black/brown wash,
and decided against the madness of wiring up the sparkies. The
wing undersides were masked off and a thin edging of PC10 brush painted
on. When dry I masked the preceding gunk off on the fuselage and sprayed
everything else in sight with PC10 (made from Humbrol dark earth and black,
mixed to look right, according to the phase of the moon). I also painted
the wheel discs PC10 having already used medium grey on the tyres. At
this point all the masking came off, and after much panicky touching in
I added the engine and cowling, both of which fitted very well –
no trimming of the cylinder ends needed. Er, yes, I forgot – I’d
painted the engine with various Testors colours and a black/brown wash,
and decided against the madness of wiring up the sparkies.
The example I was modelling had roundels on the top of the lower wing,
so these were added and sealed now. I’ll go into more details about
the decals towards the end. Now is Not the Time.
 The
rudder was painted white, and the decals added, then touched in with MrKit
colours. The
rudder was painted white, and the decals added, then touched in with MrKit
colours.
At this late stage I decided I couldn’t live with the filler caps
Roden supply as raised circles, so sanded them off, patched the paintwork,
drilled holes in what I fondly imagine are the right places, and added
bits of rod topped with discs of brass. The outer surrounds were made
from instrument bezels. At this point it dawned on me I needed to install
the guns. I’d been dryfitting these every step of the way so it
went okay. I sliced off the thickish sights supplied, but can’t
see in my one photo what the real plane had, so I left them as is. I also
added the acetate windscreen. This isn’t visible in the photo either,
but I guess there probably was one.
After poking clear the rigging holes, I had a collection of bits that
could be assembled into a Camel. Time for jiggy-jiggy.
Assembly Call
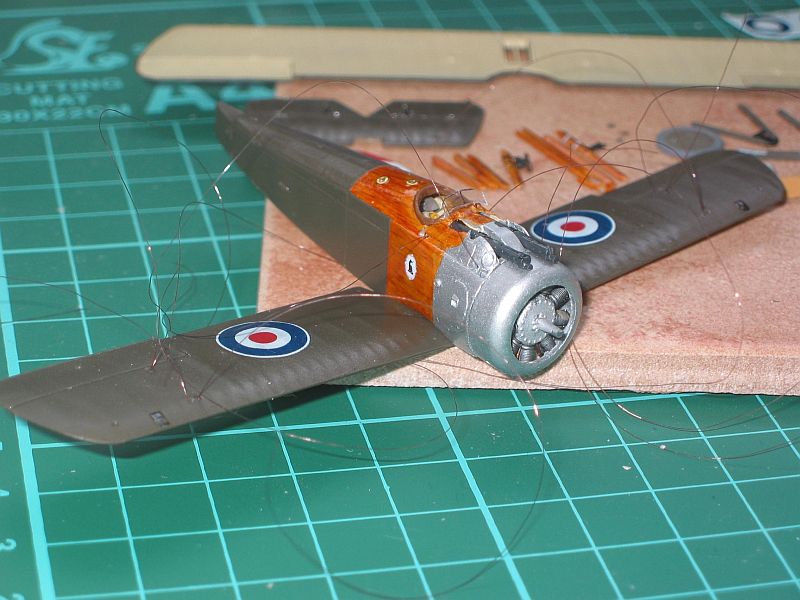
  First
I superglued smoked invisble thread in all those lower holes. First
I superglued smoked invisble thread in all those lower holes.
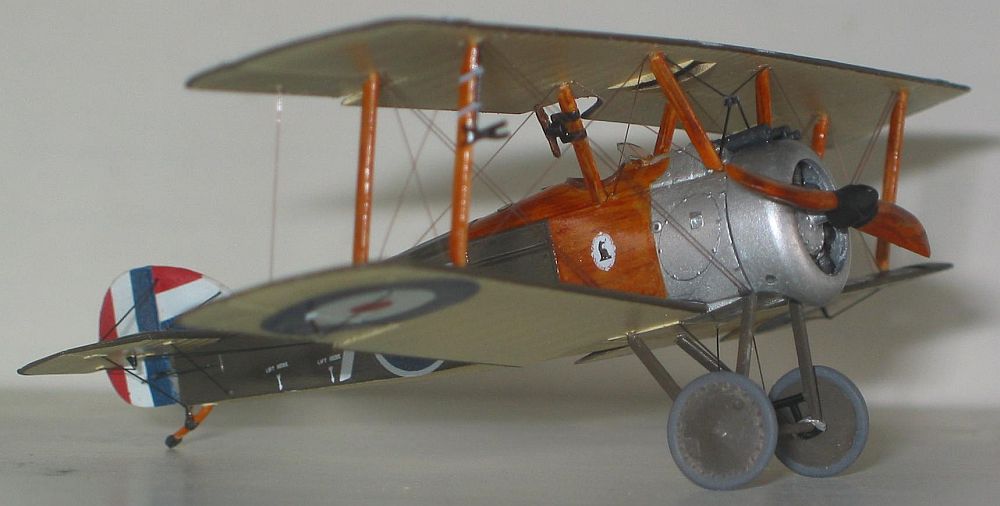
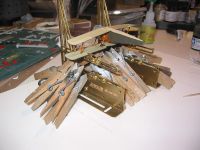
The photos should be clearer than words. Basically, I used the Windsock
Datafile plans to position everything in an Aeroclub jig, locked it all
in place, then added the cabane struts (the generator prop on one of which
I’d sanded down and twisted to improve a bit). The rigging was then
lead through the upper wing so it wouldn’t get in the way, and I
added the interplane struts. The rest of the rigging was then pulled through
and secured with superglue while under tension from hi-tech clothing-suspension
devices liberated from my wife. At some stage in this process the model
was turned upside down obviously.
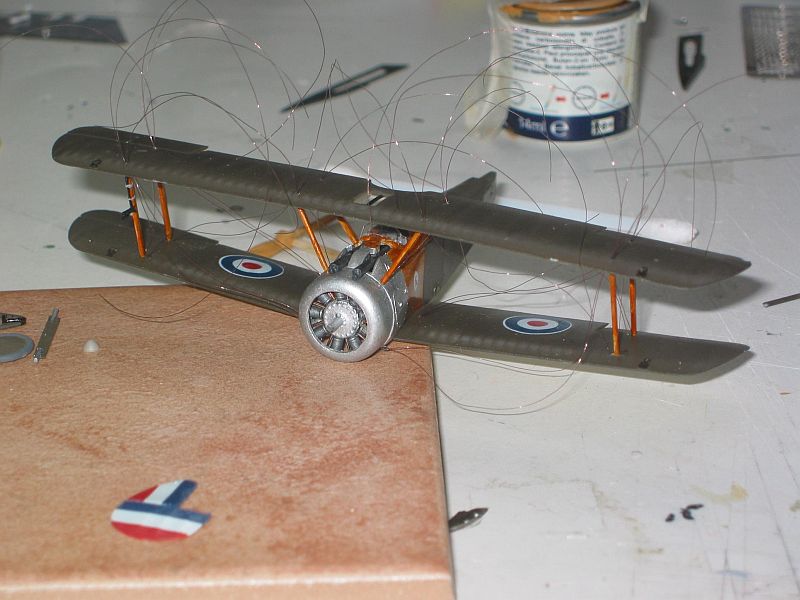
  After
a day to fully cure I liberated the legless model, trimmed the wires,
sanded the glue marks smooth and made good the paintwork. The empennage
was then glued in place – the glueing area on the fin is small so
a fair bit of care was needed here. Then I added the pre-painted undercarriage.
Next were the lower wing decals, followed by simulating the undercarriage
bungee axle springing. For this I used elastic rigging thread from Aeroclub,
plus superglue. Then I braced this bit with HSP, and popped on the wheels
and tailskid. Before the control lines and bracing to the rudder and tailplane
undersides were added I decided to add all the remaining decals and seal
them in with Johnson’s Klear.The rudder and aileron control horns
were supplied by Eduard, but on the elevators I left the kit items. I
used HSP for rigging this lot, then turned the whole lot over to brace
and add control lines to all the topside locations. After
a day to fully cure I liberated the legless model, trimmed the wires,
sanded the glue marks smooth and made good the paintwork. The empennage
was then glued in place – the glueing area on the fin is small so
a fair bit of care was needed here. Then I added the pre-painted undercarriage.
Next were the lower wing decals, followed by simulating the undercarriage
bungee axle springing. For this I used elastic rigging thread from Aeroclub,
plus superglue. Then I braced this bit with HSP, and popped on the wheels
and tailskid. Before the control lines and bracing to the rudder and tailplane
undersides were added I decided to add all the remaining decals and seal
them in with Johnson’s Klear.The rudder and aileron control horns
were supplied by Eduard, but on the elevators I left the kit items. I
used HSP for rigging this lot, then turned the whole lot over to brace
and add control lines to all the topside locations.
 The
final bit of rigging was that between the forward cabane struts, made
from HSP glued to a bit of shaped sprue standing in for the fairing acorn
that keeps these wires at a difficult angle (otherwise I’d have
just used invisible thread). The
final bit of rigging was that between the forward cabane struts, made
from HSP glued to a bit of shaped sprue standing in for the fairing acorn
that keeps these wires at a difficult angle (otherwise I’d have
just used invisible thread).
At this point an overal spray of Humbrol satin was in order. When dry
I went over the metalwork with a drop of Klear and a brush. The spinner
and inner portions of the airscrew were painted matt black and pushed
in place. I did a tiny bit of weathering with some watercolour pencil
and Tamiya smoke. I finally put a dull aluminium paint disk in each of
the wing inspection panels and obliterated them with Tamiya smoke, to
represent pulleys.
Done.
A Word About Decals
 These
are unlike any other’s I’ve used by Roden. Usually they’re
thin but brittle, non-conforming, and unreactive to setting solutions,
needing to be sucked into place by a wet coat of Klear. These couldn’t
have been more different, and I mean that mostly positively. They are
ultra thin, come off the paper in seconds, and are very cantankerous,
like early Propagteam decals in that they fold up easily if you don’t
slide them into place onto a wet surface straight away. However, although
they’re very flexible, they are not elastic, and are extremely tough.
I had 2 fold on me, and although it took a while to unfold them, I was
quite unable to destroy them. I never even put a hole in them. And they
were undistorted. They also settled down amazingly well on a gloss surface.
I added Microsol and they snuggled down cosily and looked just like paint.
No trace of silvering, either. These
are unlike any other’s I’ve used by Roden. Usually they’re
thin but brittle, non-conforming, and unreactive to setting solutions,
needing to be sucked into place by a wet coat of Klear. These couldn’t
have been more different, and I mean that mostly positively. They are
ultra thin, come off the paper in seconds, and are very cantankerous,
like early Propagteam decals in that they fold up easily if you don’t
slide them into place onto a wet surface straight away. However, although
they’re very flexible, they are not elastic, and are extremely tough.
I had 2 fold on me, and although it took a while to unfold them, I was
quite unable to destroy them. I never even put a hole in them. And they
were undistorted. They also settled down amazingly well on a gloss surface.
I added Microsol and they snuggled down cosily and looked just like paint.
No trace of silvering, either.
 There
is one major oddity though. When you trim an item from the decal paper,
something happens that almost stops water penetrating where you made the
cuts, so there’s a rim that stays too dry for the glue to disolve
for several minutes. Once you know this, you can cut so as to minimise
the effect. I found out the hard way and after 4 minutes of prodding a
roundel with the edge stuck the free part was so liquid I thought I’d
never get it off in one piece, let alone in place. However, due to the
resilience to tearing of the carrier film, in every case the decals went
on fine. There
is one major oddity though. When you trim an item from the decal paper,
something happens that almost stops water penetrating where you made the
cuts, so there’s a rim that stays too dry for the glue to disolve
for several minutes. Once you know this, you can cut so as to minimise
the effect. I found out the hard way and after 4 minutes of prodding a
roundel with the edge stuck the free part was so liquid I thought I’d
never get it off in one piece, let alone in place. However, due to the
resilience to tearing of the carrier film, in every case the decals went
on fine.
There’s one more bugbear, the usual one, the white is out of register.
Not show-stoppingly, but I could live without it.
Conclusion
 Like
all Roden kits this one won’t fall together without a little effort,
but it makes up with less adjustment needed than in previous kits by them,
and because of the nature of the plastic it’s much easier to build
than, for example, the Fokker D.VIIs or the Albatrossen. There’s
enough detail that you really don’t need to add much to what’s
in the box. The decals are a great advance on the previous attempts, unless
I got an unusual batch. They’re harder than normal to actually get
onto the model, but the result is infinitely better. Like
all Roden kits this one won’t fall together without a little effort,
but it makes up with less adjustment needed than in previous kits by them,
and because of the nature of the plastic it’s much easier to build
than, for example, the Fokker D.VIIs or the Albatrossen. There’s
enough detail that you really don’t need to add much to what’s
in the box. The decals are a great advance on the previous attempts, unless
I got an unusual batch. They’re harder than normal to actually get
onto the model, but the result is infinitely better.
I really enjoyed building this kit, and thanks go to Matt Bittner for
sending it my way. Thanks to Roden
for supplying the kit.
References
Windsock Datafile 26, Sopwith Camel, by J.M. Bruce, Albatros Productions
Ltd.
Sopwith Camel, by Edward Kocent-Zielinski, Kagero.
Sopwith Camel, by J.M. Bruce, Arms and Armour.
The Camel File, by Ray Sturtivant and Gordon Page, Air-Britain.
Sopwith Camel, King of Combat, by Chaz Bowyer, Glasney Press
|
|