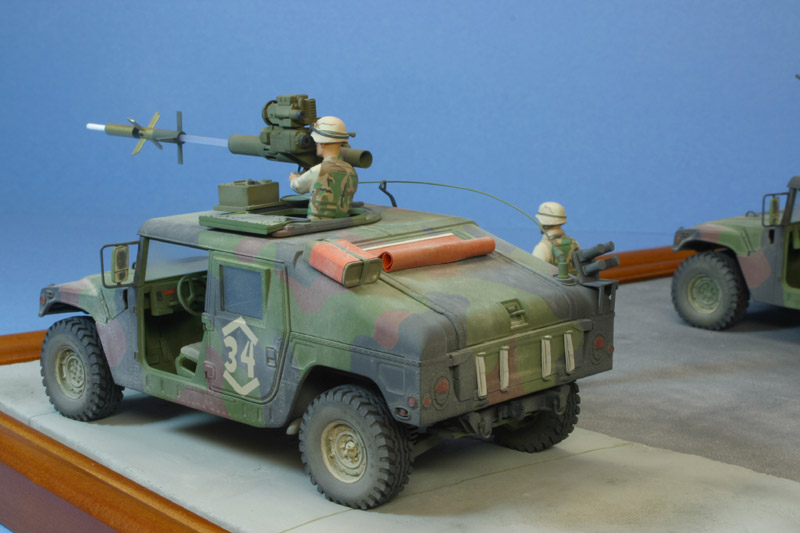
"Shoot-Out in Mosul", a 1/35 Diorama
|
 |
Photos by Gary Meinert and Will Riepl
Introduction
 On
July 22, 2003, Saddam Hussein's sons Uday and Qusay were discovered in
a residential area of Mosul, Iraq. Attempts to arrests the sons and their
accomplices were met by violent resistance. When it was clear that they
would not surrender, the decision was made to apply some heavy fire-power
to the situation, which included several TOW missiles and numerous .50
caliber rounds. The building occupied by Uday and Qusay was soon devastated,
resulting in their deaths. On
July 22, 2003, Saddam Hussein's sons Uday and Qusay were discovered in
a residential area of Mosul, Iraq. Attempts to arrests the sons and their
accomplices were met by violent resistance. When it was clear that they
would not surrender, the decision was made to apply some heavy fire-power
to the situation, which included several TOW missiles and numerous .50
caliber rounds. The building occupied by Uday and Qusay was soon devastated,
resulting in their deaths.
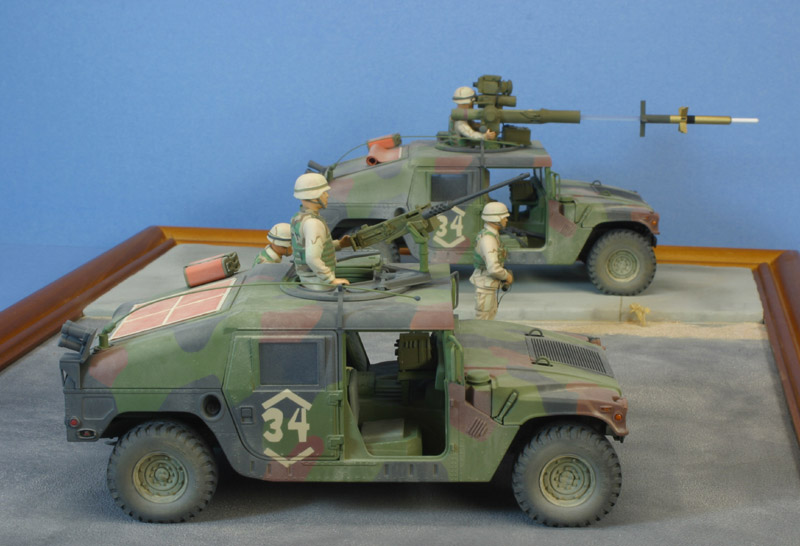
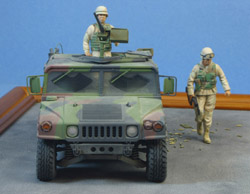
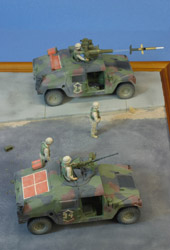
My diorama depicts part of the action of this historic event with troops
and Humvees of the 101st Airborne Division's 2nd Brigade.
HUMVEE History
 By
the late 1970s, the U.S. Army was ready to replace the legendary Jeep,
and its call for proposals attracted three designs. The winning design
for the High Mobility Multi-Purpose Wheeled Vehicle( HMMWV) was produced
by the AM General Company. These were soon called Hummers or Humvees and
production contracts followed starting in 1983. By
the late 1970s, the U.S. Army was ready to replace the legendary Jeep,
and its call for proposals attracted three designs. The winning design
for the High Mobility Multi-Purpose Wheeled Vehicle( HMMWV) was produced
by the AM General Company. These were soon called Hummers or Humvees and
production contracts followed starting in 1983.
The original family of Humvees was the M998 Cargo /Troop Carrier and
related variants. The M998A1 and A2 series had more armor and other improvements,
while the M1114 Up-armored vehicles offered the greatest protection for
crew members. It should be noted that, as originally designed, most HMMWVs
were not required to have any armor protection, since they would be operated
in rear areas or on established front lines. ( Exceptions to this included
the armament carriers and ambulance versions.)
The Iraq and Afghanistan conflicts have necessitated many changes to
these vehicles. It seems that new and improved Humvees are morphing almost
monthly via a combination of factory production and field modifications.
My HUMVEES
 To
model the vehicles in this diorama, I used the Tamiya M1046 TOW Missile
Carrier. I converted this to the M1045 by simple omitting the front-end
winch. For the second vehicle, I used the Tamiya M1025 Armament Carrier.
This was converted to the M1043 by replacing the kit doors with supplemental
armor doors(obtained by purchasing an extra part tree with doors from
Tamiya's M1046 kit.) Both vehicles therefore ended up with the correct
doors. To
model the vehicles in this diorama, I used the Tamiya M1046 TOW Missile
Carrier. I converted this to the M1045 by simple omitting the front-end
winch. For the second vehicle, I used the Tamiya M1025 Armament Carrier.
This was converted to the M1043 by replacing the kit doors with supplemental
armor doors(obtained by purchasing an extra part tree with doors from
Tamiya's M1046 kit.) Both vehicles therefore ended up with the correct
doors.
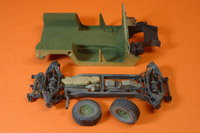
The Tamiya kits are well-engineered, with excellent fit and detail.
However, there are two important omissions: no brake pedal & accelerator
pedal for the cabin, and no whip antenna. I scratch-built all of these
items. The prominent whip antenna assembly was made from solder wire with
a drop of epoxy to form the eye guard. The antenna tie-down device was
made from sheet styrene and photo-etch metal.
 Many
other modifications were made, including scratch building the smoke discharger
platforms ( the dischargers were robbed from a Trumpeter LAV-25 kit),
the jerry can straps, the orange ID panels(made from lead foil), and tail-gate
cargo straps for the TOW carrier vehicle. Many
other modifications were made, including scratch building the smoke discharger
platforms ( the dischargers were robbed from a Trumpeter LAV-25 kit),
the jerry can straps, the orange ID panels(made from lead foil), and tail-gate
cargo straps for the TOW carrier vehicle.
An important improvement was to discard the kit's vinyl tires and replace
them with resin wheels. My references did not show the tire tread pattern,
so I elected to go with the early-tread pattern Caliber 35 resin wheels.
(Both early and late patterns were in use in Iraq in 2003).
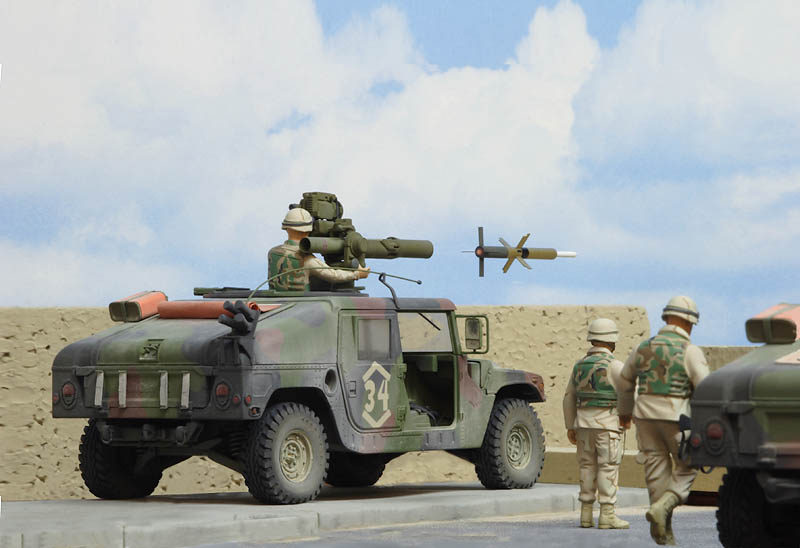
TOW Details
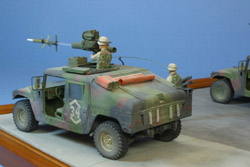
 Of course, the
TOW (Tube launched, Optically tracked, Wire guided)missile itself was
scratch-built from plastic tube and rod, with fins cut from sheet styrene.
The missile is mounted on a piece of blue-tinted fiber optic plastic tube.
The shine on this plastic tube was reduced by sanding it and coating it
with flat clear. The real TOW has two guide wires streaming behind it,
but these would be so tiny in 1/35th scale as to be essentially invisible.
The empty missile tube was made from a section of plastic soda straw.
A scratch-built plastic cover was made for the upper (infra-red) TOW optics
window. A solder-wire cable was also added to the launcher unit. Of course, the
TOW (Tube launched, Optically tracked, Wire guided)missile itself was
scratch-built from plastic tube and rod, with fins cut from sheet styrene.
The missile is mounted on a piece of blue-tinted fiber optic plastic tube.
The shine on this plastic tube was reduced by sanding it and coating it
with flat clear. The real TOW has two guide wires streaming behind it,
but these would be so tiny in 1/35th scale as to be essentially invisible.
The empty missile tube was made from a section of plastic soda straw.
A scratch-built plastic cover was made for the upper (infra-red) TOW optics
window. A solder-wire cable was also added to the launcher unit.
The real vehicle in my reference photo has the later-style TOW optics/sensor
package, but I was stuck with the earlier version in the Tamiya kit--so
I made the best of it.
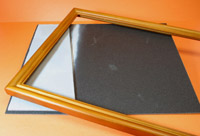
Diorama Base
 The
base consists of a piece of .093 inch acrylic sheet trimmed to fit into
an 11 X 14 inch picture frame. I used contact cement to attach 150 grit
sandpaper onto the acrylic sheet; this effectively represents the asphalt
street. The raised section is another piece of acrylic sheet glued over
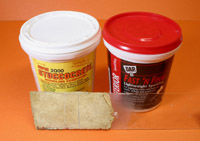
the sandpaper after being coated with Stuccocrete(a product I had purchased
from Micro-Mark several years ago.) The
base consists of a piece of .093 inch acrylic sheet trimmed to fit into
an 11 X 14 inch picture frame. I used contact cement to attach 150 grit
sandpaper onto the acrylic sheet; this effectively represents the asphalt
street. The raised section is another piece of acrylic sheet glued over
the sandpaper after being coated with Stuccocrete(a product I had purchased
from Micro-Mark several years ago.)
The Stuccocrete modeling compound produces a realistic concrete surface,
although it is a bit rough. I smoothed out some areas with spackling paste.
The final result was a worn, dilapidated concrete surface--just what I
wanted. Pouring concrete was a new skill I learned for this diorama project!
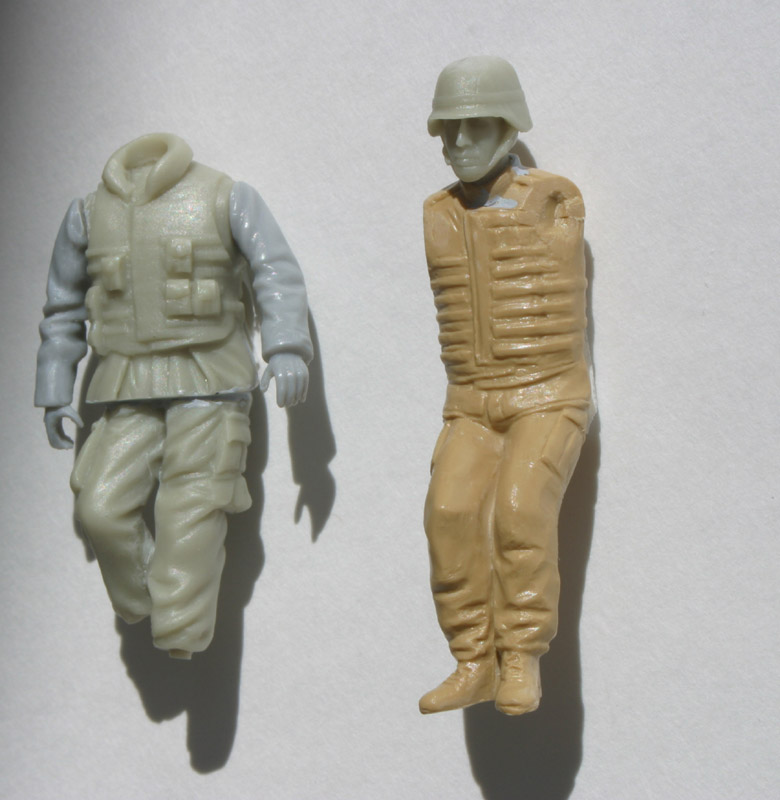
Figure Frustration
 I
had to use the two Tamiya Humvee gunner figures that came with the kits,
although they are of mediocre quality and don't fit into the vehicles
particularly well. I replaced their heads with Verlinden heads, and one
of them has a Dragon torso as well. I
had to use the two Tamiya Humvee gunner figures that came with the kits,
although they are of mediocre quality and don't fit into the vehicles
particularly well. I replaced their heads with Verlinden heads, and one
of them has a Dragon torso as well.
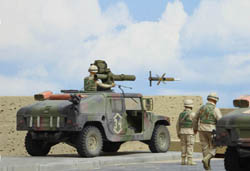
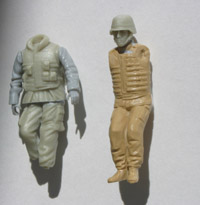
I thought initially that it would be easy to find aftermarket soldier
figures to pose on the street, but almost all the ones I looked at had
inappropriate postures and/or equipment. I basically wanted figures that
were simply standing and looking straight ahead, without packs, pouches,
and personal gear, as per my reference photos. No such luck. An arduous
campaign of kit bashing and modification was therefore necessary. The
standing soldier in my diorama has Nemrod legs, Verlinden torso &
head, Dragon arms, and he is holding Tamiya binoculars. The advancing
soldier is mostly Verlinden, but he has Dragon arms , a replacement right
hand, and is carrying a Dragon M-16 rifle with a scratch-built sling.
 I
was also annoyed at the amount of clean-up necessary for all of my figures.
The resin ones in particular had numerous gouges, pin holes, and other
imperfections. The prime, fill, sand, and prime again routine was repeated
numerous times. I
was also annoyed at the amount of clean-up necessary for all of my figures.
The resin ones in particular had numerous gouges, pin holes, and other
imperfections. The prime, fill, sand, and prime again routine was repeated
numerous times.
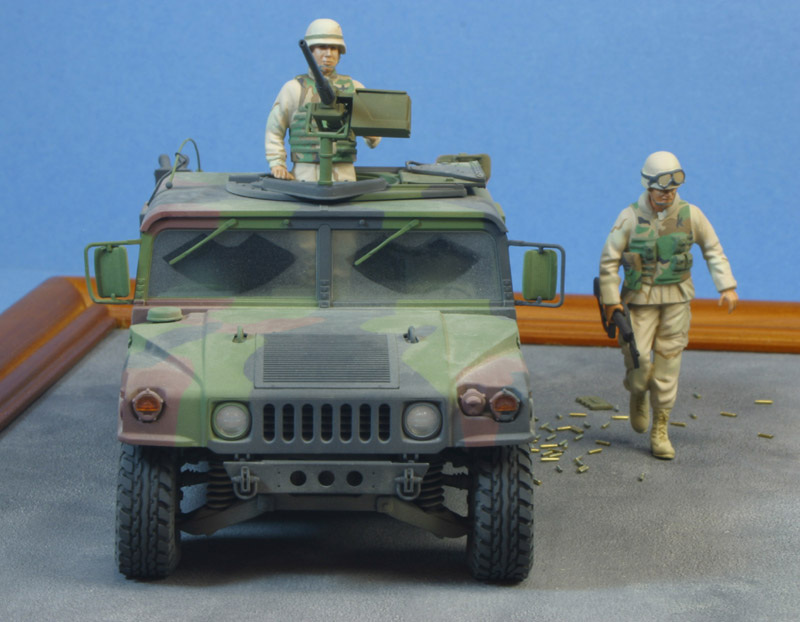
Accessories
Several accessory kits were very helpful in this diorama, including
The Tamiya Modern U.S. Military Equipment Set, the Academy U.S. Machine
Gun set, and the Mission Models .50 cal. brass spent shells.
Painting
 My
beloved Humbrol enamels were used to airbrush the vehicles. I found that
Humbrol 105 green, 160 red-brown, and 67 dark grey were ideal colors for
the Humvee NATO tri-color scheme. The complex camouflage scheme was masked
with combinations of frisket film and masking tape. Enlarged copies of
the painting guide in the Tamiya instructions served as my reference for
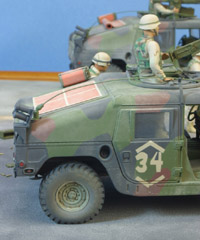
the color patterns. The unit identification markings "34" were
airbrushed with stencils that I made from frisket film. My
beloved Humbrol enamels were used to airbrush the vehicles. I found that
Humbrol 105 green, 160 red-brown, and 67 dark grey were ideal colors for
the Humvee NATO tri-color scheme. The complex camouflage scheme was masked
with combinations of frisket film and masking tape. Enlarged copies of
the painting guide in the Tamiya instructions served as my reference for
the color patterns. The unit identification markings "34" were
airbrushed with stencils that I made from frisket film.
The figures were also painted mostly with Humbrol enamels. Light Stone
121 was airbrushed as the base uniform color. The other uniform and body
armor colors were mixed and hand-painted with small brushes. The flesh
areas were hand painted with Windsor and Newton artist oils over a Polly-scale
undercoat.
 The
street was painted with two shades of Floquil Grimy Black, and the sidewalk
was painted with lightened Humbrol 162 Surface Grey. The
street was painted with two shades of Floquil Grimy Black, and the sidewalk
was painted with lightened Humbrol 162 Surface Grey.
Weathering—Dust is King
I applied dark washes in a few selected areas,like the hood baffles.
The sides of the tires were lightly sprayed with gray and brown enamel
washes. A few small parts like the hood latches were dry-brushed. I also
misted on a light gray wash over the Humvees to tone down the colors a
bit.
 Most of the weathering,
however, was done with MMP weathering powders , a great product. They
can be mixed with Isopropyl (Rubbing) Alcohol and sprayed through the
air brush, or hand brushed either wet or dry. Once sprayed on and dry,
they can be brushed or stippled to create streaks and other patterns.
MMP No. 14 Lt. North African Sand was sprayed onto the Humvees, resulting
in a convincing dusty coat. I also built up multiple layers of MMP on
the wheels/tires. The MMP powders don't stick well to smooth surfaces
like the clear plastic windows--so I sprayed Floquil dust on the windshield
and door windows. Most of the weathering,
however, was done with MMP weathering powders , a great product. They
can be mixed with Isopropyl (Rubbing) Alcohol and sprayed through the
air brush, or hand brushed either wet or dry. Once sprayed on and dry,
they can be brushed or stippled to create streaks and other patterns.
MMP No. 14 Lt. North African Sand was sprayed onto the Humvees, resulting
in a convincing dusty coat. I also built up multiple layers of MMP on
the wheels/tires. The MMP powders don't stick well to smooth surfaces
like the clear plastic windows--so I sprayed Floquil dust on the windshield
and door windows.
I used a combination of Polly-Scale Dust and MMP weathering powders
on the street. The street also has some areas of dirt near the curb, which
came from my bag of Arizona Rock & Mineral Co. desert soil.
Conclusion
 Dedicated
Hummer Heads will probably grumble about certain details of the vehicles
or the figures in this diorama. But considering what I had to work with,
I think that I effectively captured the drama of the event. It was a good
learning experience that made me a more well-rounded modeler( I usually
build airplanes). Dedicated
Hummer Heads will probably grumble about certain details of the vehicles
or the figures in this diorama. But considering what I had to work with,
I think that I effectively captured the drama of the event. It was a good
learning experience that made me a more well-rounded modeler( I usually
build airplanes).
References
Concord No. 7510 HMMWV Workhorse of the U.S. Army
Concord No. 7513 HMMWVs in Iraq
Squadron No.32 Hummer in Action
Numerous magazine photos, including the August 4, 2003 Newsweek coverage
of the Mosul event. Event photos are also on the Internet.
TOW info at the FAS
Website.
|
|