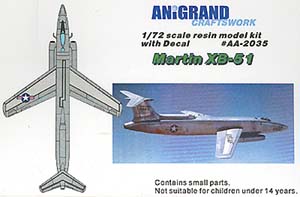
Anigrand 1/72 Martin XB-51
Kit #AA-2035
$73.00 (including shipping)
|
 |
History
In 1946, the Army Air Force clearly saw a need for a replacement for
the WWII era Douglas A-26 Invader. At that time the A-26 was designated
as a ground support aircraft. Martin started work on the XA-45 as an attempt
to win that contract. Shortly after winning that competition with the
XA-45, the Attack designation was eliminated and the new proposal, broadly
based on the XA-45 design was significantly redesigned to become the XB-51.
 The
news design was a radical departure from current designs in several areas,
two of the more noticeable being the odd engine locations and the bicycle
style landing gear. Two of the J-47s were hung in pods below the edges
of the lower forward fuselage and the third was buried in the tail. The
unusual landing gear locations had been extensively tested by Martin on
a surplus B-26 Marauder and installed on Martin’s unsuccessful XB-48.
Boeing had won that competition with their XB-47, and it too had the bicycle
gear, so it was no longer considered radically new. The
news design was a radical departure from current designs in several areas,
two of the more noticeable being the odd engine locations and the bicycle
style landing gear. Two of the J-47s were hung in pods below the edges
of the lower forward fuselage and the third was buried in the tail. The
unusual landing gear locations had been extensively tested by Martin on
a surplus B-26 Marauder and installed on Martin’s unsuccessful XB-48.
Boeing had won that competition with their XB-47, and it too had the bicycle
gear, so it was no longer considered radically new.
There were other innovative ideas on the XB-51 as well. Both the wing
and horizontal tails had variable incidence capability. By changing the
angle of the whole wing and tail, the fuselage was able to stay reasonably
level during take off and landing.
Also incorporated into the design was a rotating bomb bay. By eliminating
the large bomb bay doors and their resulting drag and airflow disturbance
when open, the attack speeds could be considerably increased.
In addition to a large bomb load, the XB-51 was to be armed with no
less than eight 20MM guns in the nose. Fast maneuverable, heavy bomb load
and lots of guns! How could Martin not win with this airplane, especially
when the competition consisted of three rather ordinary appearing aircraft.
First was the Navy AJ-1 Savage, next was the Canadian CF-100 Fighter,
and last was the English Electric Canberra. After a very spirited fly-off,
and considerable debate the Canberra was declared the winner.
As a consolation prize, Martin was awarded manufacturing rights to the
Canberra and went on to manufacture the B-57 Canberra for USAF service.
Only two XB-51s were built, and both were lost in accidents so there
are no survivors.
The Kit
One of the things that most of us modelers seem to be drawn to is the
unusual appearance of some aircraft. Some look sleek, fast and purposeful.
Others are businesslike with a bunch of stuff hanging all over them. The
XB-51 is clearly in the first category. What did surprise me when I opened
the box was the size of the fuselage. The fuselage is almost 14 inches
long. The next thing is the wings are really small compared to the body.
As with all of the Anigrand kits, everything is resin. No metal or injection
molded stuff nor any etched metal details. The fuselage is split vertically,
with front and back halves, for a total of four parts.. I suspect the
joint between the front and back parts will require some careful work
to get a good joint. Wall thickness is only slightly thicker than a comparable
plastic kit and the cockpit area, and both wheel wells are molded integral
with the fuselage.
Cockpit detail is a bit on the sparse side with an inaccurate instrument
panel included. Also a wheel and seat are included. The instrument panel
is a conventional “T” shaped panel and the actual aircraft
had a much more rectangular panel with integral angled side panels. Since
the cockpit cutout is very small, and the canopy is a very small fighter
sized bubble, I don’t think the sparse interior will be even visible.
The second crewmember sat behind and a bit below the pilot and had small
round window on the starboard side and a skylight in the top of the fuselage
just behind the pilot’s canopy. Anigrand provided a vacu-formed
part for the bomb/Nav. ceiling, but a small flat piece of clear plastic
might be a better way to go. There is no provision other than a scribed
line for the clear bomb aiming window in the nose. Making this a clear
part would be very difficult and I would suspect the best answer is just
painting it black or using black decal here.
The two lower front engine nacelles are provided as upper and lower
halves, with insert disks for the front turbine blades and small tubes
for the exhaust pipes. One nice feature here is the integral pylons with
indexing holes to the parts align quickly and accurately. There is also
of course another tail pipe to insert in the aft end of the fuselage.
The XB-51 center engine intake was built so the center engine could be
shut down during cruise and the intake had a rotating door that smoothed
over the intake to reduce drag. There is no provision in the kit to do
this and I suspect few would choose to do it anyway.
The variable incidence wing makes for a quick wing to fuselage join.
It just attaches directly to the fuselage with no fairings, gap filling
or smoothing required. The real airplane actually had a open joint there
so the model requires nothing more than a good flat joint. The kit provides
indexing pins on the wings and corresponding holes in the fuselage so
location and strength are well covered.
The gear struts, wheels and gear doors are a bit on the thick side and
do require a bit of careful clean up. The gear doors are cast in one piece
so if the model is to be built gear up the work is much easier. I initially
thought about replacing the rather simple gear struts with something more
representative of the rather complex gear, but I think when assembled
very little will be visible deep in that wheel well and between the wheels
and tires.
One significant item is the panel lines. This is going to have to have
a natural metal finish and the inconsistent and oversized panel lines
are going to be very noticeable. I can see where panel lines don’t
match between left and right sides, end in odd places and are not cleanly
scribed. Filling are re-scribing panel lines can be very frustrating.
I have found that Apoxie Sculpt works quite well. When dry it tends to
scribe very well and has about the same hardness as the surrounding resin.
The decals provided are very basic, four national insignias, the serial
numbers in the odd font found on the aircraft and the Martin XB-51 logo
found on the nose. The last item is incorrect an it should be white outlined
red lettering. The decal in the kit is only red. The very top of the fuselage
walkway outlines and wing and horizontal tail walkways are not provided
nor are the variable incidence wing indexing marks that should be just
aft of the wing on the fuselage provided.
Conclusions
This will add another interesting and rather odd looking airplane to
my display case. I anticipate a rather simple build with attention needed
on the fuselage joints and a lot of time spent trying to redo the panel
lines. Since this is going to be a natural metal finish, I anticipate
a lot of time just getting surface quality right prior to paint. This
one will be fun to experiment with various shades of gray and natural
metal to make it look like aluminum.
It will also require a complete redo of the decal sheet. Some stenciling,
wing indexing lettering, walkways everywhere and a redraw of the nose
logo that is such a prominent item, and about the only color on this big
bird. Thank goodness for the ALPs printer!
Oh yeah! I‘ll also have to either re-arrange my display case or
issue an eviction notice for some residents in there to reclaim enough
space to put this big bird
Anigrand continues to provide us with good kits of some of the really
obscure and odd subjects no one else seems to be willing to do. While
they often require a bit more work than a plastic kit the end results
in my opinion, are well worth both the cost and effort..
|
|


