Build-up Review of HA-1112 1/48 by Academy
|
 |
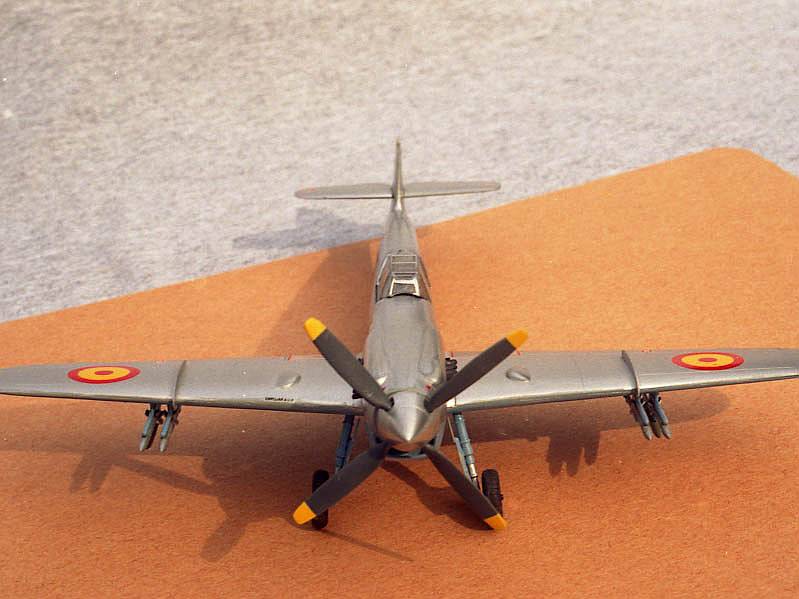
Background
 One
might think that at the end of World War II, no Me-109s were flying anymore.
However, some were still in the air, usually in different configurations
than those used by Nazi Germany and her Axis partners. One of those versions
was Spain's Hispano HA-1112. During the war, Spain had some Me-109s and
after the war, because the German engines were no longer available, equipped
them with the Spanish-built Hispano-Suiza engines; these were called the
HA-1109. Eventually, the Spanish decided to equip 170 of the Messerschmitt
airframes with Rolls Royce Merlin engines similar to those that had powered
the Messerschmitt's famous adversary, the Spitfire, creating what one
might call a Messer-spit; this was the HA-1112 Buchon (buchon being a
pigeon-like bird found in Spain). One
might think that at the end of World War II, no Me-109s were flying anymore.
However, some were still in the air, usually in different configurations
than those used by Nazi Germany and her Axis partners. One of those versions
was Spain's Hispano HA-1112. During the war, Spain had some Me-109s and
after the war, because the German engines were no longer available, equipped
them with the Spanish-built Hispano-Suiza engines; these were called the
HA-1109. Eventually, the Spanish decided to equip 170 of the Messerschmitt
airframes with Rolls Royce Merlin engines similar to those that had powered
the Messerschmitt's famous adversary, the Spitfire, creating what one
might call a Messer-spit; this was the HA-1112 Buchon (buchon being a
pigeon-like bird found in Spain).
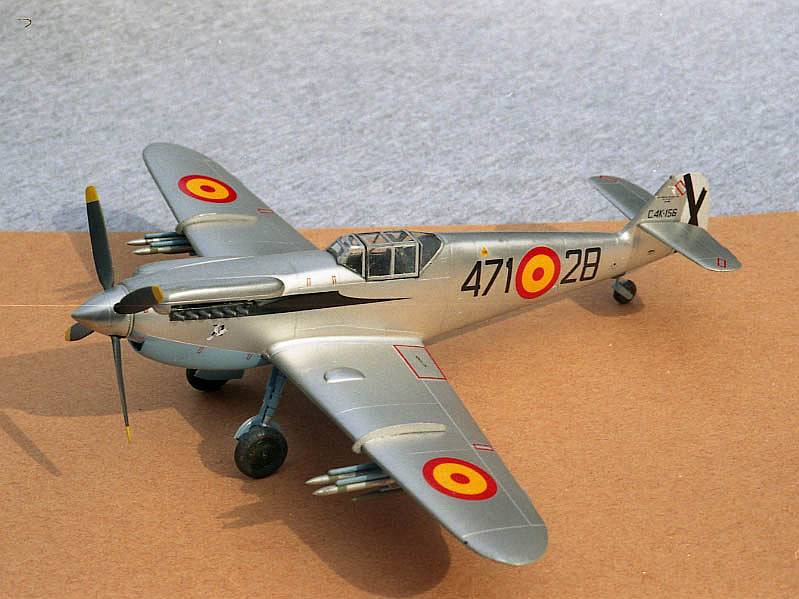
 While
the basic layout of the HA-1112 certainly looked like an Me-109, from
the windscreen forward, it resembled one of the last Spitfires to see
action; of course, that's not surprising since a V-12 Merlin under the
cowling, delivering more than 1,600 horsepower. According to some histories,
the HA-1112s served Spain until the 1960s when they were retired. Some
are still seen, however, most often when dressed up by television and
motion picture companies to look like the Me-109s that flew during WWII. While
the basic layout of the HA-1112 certainly looked like an Me-109, from
the windscreen forward, it resembled one of the last Spitfires to see
action; of course, that's not surprising since a V-12 Merlin under the
cowling, delivering more than 1,600 horsepower. According to some histories,
the HA-1112s served Spain until the 1960s when they were retired. Some
are still seen, however, most often when dressed up by television and
motion picture companies to look like the Me-109s that flew during WWII.
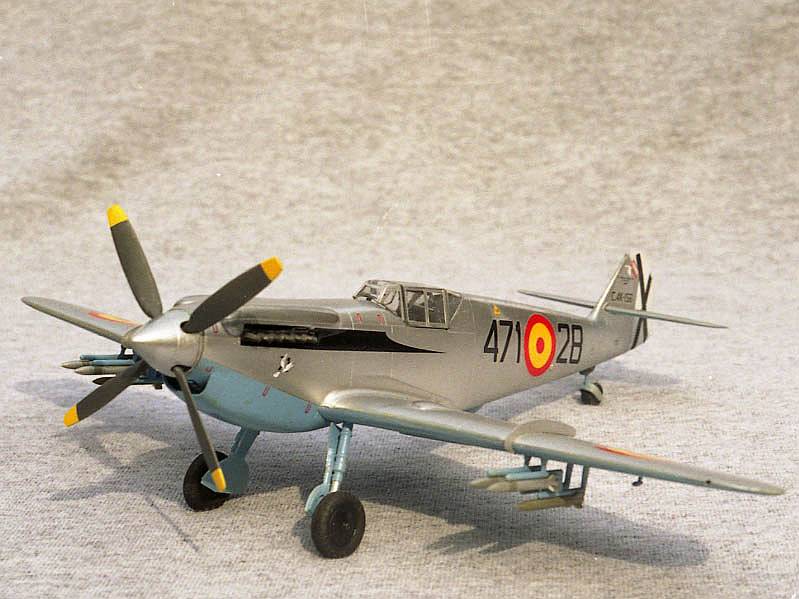
The Academy Kit
 Kits
of the HA-1112 have appeared now and then and Academy has come up with
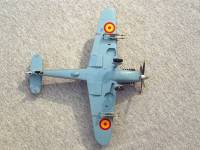
the latest offering, in 1/48th scale. The box top art shows one in the
silver and blue scheme worn by the HA-1112s in Spanish service. The kit
allows you to build that version or one that served as a faux Me-109 in
the movies. The light gray styrene parts are in sealed plastic bags and
appear well-made although one small part, a section of a wing cannon,
was slightly deformed on the kit that I received. Also, the parts have
engraved lines which are nice to have. Kits
of the HA-1112 have appeared now and then and Academy has come up with
the latest offering, in 1/48th scale. The box top art shows one in the
silver and blue scheme worn by the HA-1112s in Spanish service. The kit
allows you to build that version or one that served as a faux Me-109 in
the movies. The light gray styrene parts are in sealed plastic bags and
appear well-made although one small part, a section of a wing cannon,
was slightly deformed on the kit that I received. Also, the parts have
engraved lines which are nice to have.
Despite that missing part, I went ahead with the kit, choosing to build
the Spanish silver and blue version; after all, I've seen enough camouflaged
WWII versions of the Me-109.
Construction
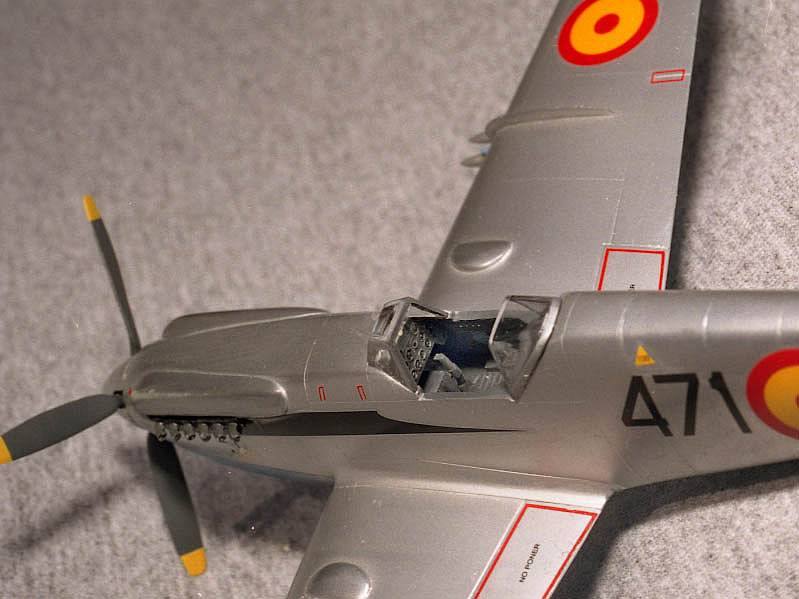
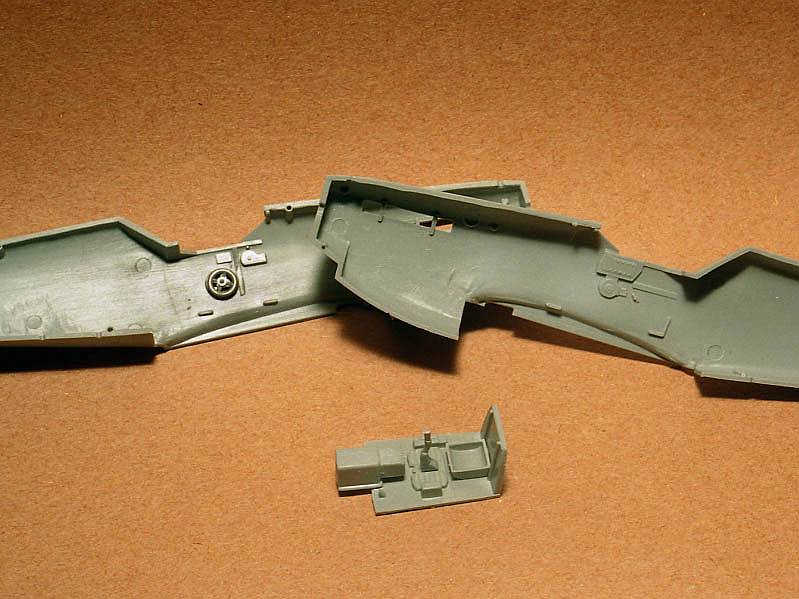
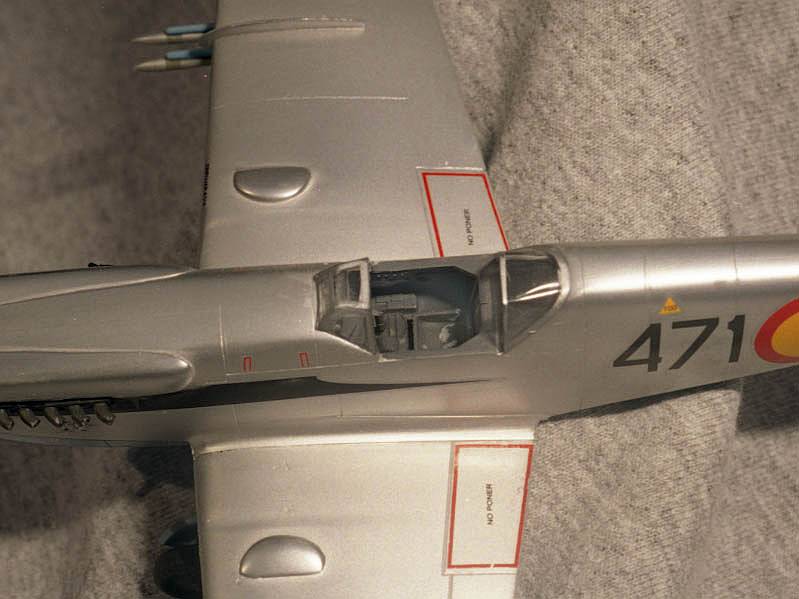
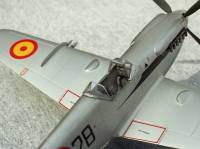
 I
sprayed the cockpit area of the fuselage halves and the other items for
the cockpit with a dark gray, Schwarzgrau, as directed by the instructions.
The seat was basically a seat pan without a back; I'm no expert on the
HA-1112 but I wonder if that was an accurate depiction of where the pilot
sat. After the paint was dry, I used a white pencil to draw in the seat
belts. I painted the face of the instrument panel dark gray too but later
painted the dials glossy black and once the black was dry, used a white
pencil again to pick out details there. I also painted the outer edges
of the trim wheels red as they were on the German 109s. Assembly of the
cockpit was straight-forward with rudder pedals, a control stick and the
housing between the rudder pedals where, at least on the German fighters
(as far as I'm aware), a cannon once was. Why it's on the HA-1112, which
had its cannon in the wings, I don't know but perhaps the real 1112's
did; again, I'm no expert on the real HA-1112. I
sprayed the cockpit area of the fuselage halves and the other items for
the cockpit with a dark gray, Schwarzgrau, as directed by the instructions.
The seat was basically a seat pan without a back; I'm no expert on the
HA-1112 but I wonder if that was an accurate depiction of where the pilot
sat. After the paint was dry, I used a white pencil to draw in the seat
belts. I painted the face of the instrument panel dark gray too but later
painted the dials glossy black and once the black was dry, used a white
pencil again to pick out details there. I also painted the outer edges
of the trim wheels red as they were on the German 109s. Assembly of the
cockpit was straight-forward with rudder pedals, a control stick and the
housing between the rudder pedals where, at least on the German fighters
(as far as I'm aware), a cannon once was. Why it's on the HA-1112, which
had its cannon in the wings, I don't know but perhaps the real 1112's
did; again, I'm no expert on the real HA-1112.
 Step
two shows that you should glue the exhaust stacks into place.....I say
no....wait and do that toward the very end of everything. In the meantime,
I chose to use a fine bit to create light indentations in the ends of
the exhaust stacks. Step
two shows that you should glue the exhaust stacks into place.....I say
no....wait and do that toward the very end of everything. In the meantime,
I chose to use a fine bit to create light indentations in the ends of
the exhaust stacks.
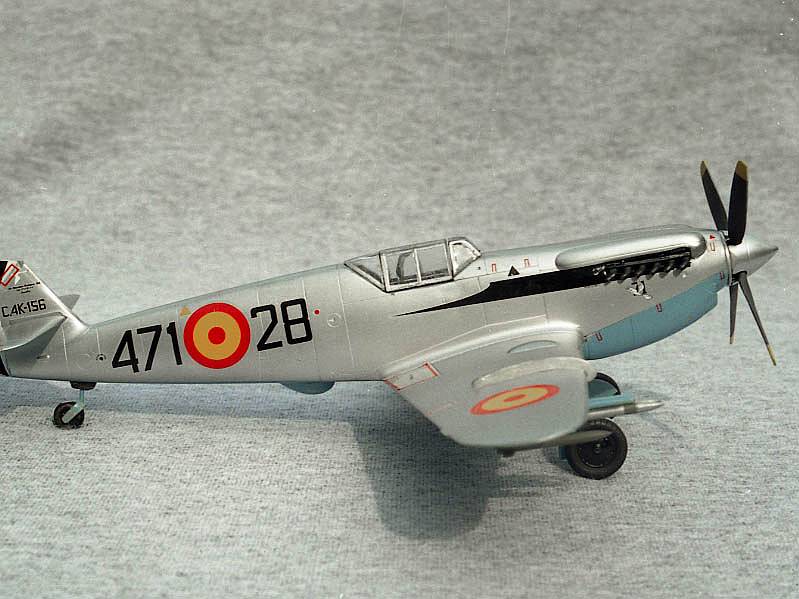
After gluing together the fuselage halves and sanding down their seams,
I prepared to glue on the big valve covers which are located just above
the exhaust stacks on each side. However, when I dry-fitted the valve
covers onto the fuselage, I realized the holes for the pins of the valve
covers were oversized. So I filled the holes with super glue and, a few
minutes later after the glue had dried, sanded those areas smooth. Then
I cut off the locator pins on each valve cover. As I next held each valve
cover in place, I brushed a liquid glue into the underside of each valve
cover (basically through the opening where the exhaust stacks would be)
and capillary action drew the glue into place and voila, the valve covers
were set.
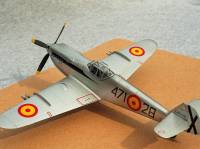
 In
step 4, you're shown to drill holes in the top and bottom portions of
the wings; these are to help you position the rocket racks, wheel well
bulges, wing fences and aileron balances. Those for the rocket racks are
fine. However, you might want to think about those for the wheel well
bulges.....I wished I had not drilled out those on my kit but had simply
cut off the locator pins on the bulges (parts F38 and F39) and carefully
positioned them atop the wings. As it happened, I had a fair amount of
work trying to hide those holes once the wheel well bulges were in place. In
step 4, you're shown to drill holes in the top and bottom portions of
the wings; these are to help you position the rocket racks, wheel well
bulges, wing fences and aileron balances. Those for the rocket racks are
fine. However, you might want to think about those for the wheel well
bulges.....I wished I had not drilled out those on my kit but had simply
cut off the locator pins on the bulges (parts F38 and F39) and carefully
positioned them atop the wings. As it happened, I had a fair amount of
work trying to hide those holes once the wheel well bulges were in place.
Similarly, think about not drilling out the holes to locate the wing fences
on the upper wings. When I did that, even though I was using a very tiny
bit in my Dremel, the resulting hole was going to show badly once the
fence was in place. So once more, I was busy filling holes and sanding
them smooth. I also cut the locator pins off the wing fences, which also
had to be sanded lightly to remove some ejection pin marks, and set those
aside to glue on later.
 Upon
dry-fitting the upper and lower wings, I realized that the wheel wells
were too deep to permit the upper and lower pieces to match perfectly.
So I had to sand the wheel wells to make sure the upper and lower pieces
fit as they should. After gluing those pieces together, I found they fit
well to the fuselage and needed just the lightest of sanding where the
upper wings met the fuselage. A small bit of putty was needed to fill
a thin gap where the back edge of the wing assembly met the underside
of the fuselage. Upon
dry-fitting the upper and lower wings, I realized that the wheel wells
were too deep to permit the upper and lower pieces to match perfectly.
So I had to sand the wheel wells to make sure the upper and lower pieces
fit as they should. After gluing those pieces together, I found they fit
well to the fuselage and needed just the lightest of sanding where the
upper wings met the fuselage. A small bit of putty was needed to fill
a thin gap where the back edge of the wing assembly met the underside
of the fuselage.
I also had to use a bit of putty to smooth over where the lower radiator
intake was glued to the lower fuselage.
Although the instructions say to next put on the landing gear, I held
off with that until the very end, just to avoid the possibility of breaking
those while working on other parts or painting or decaling.
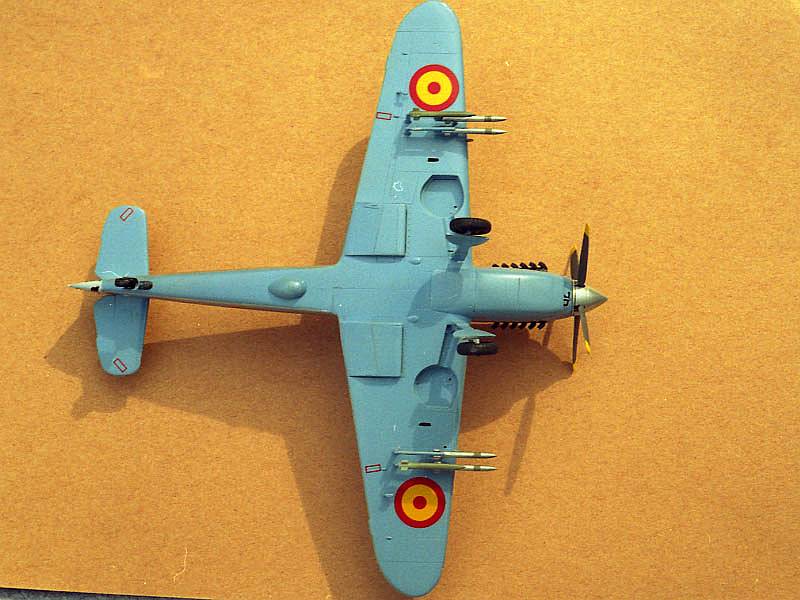
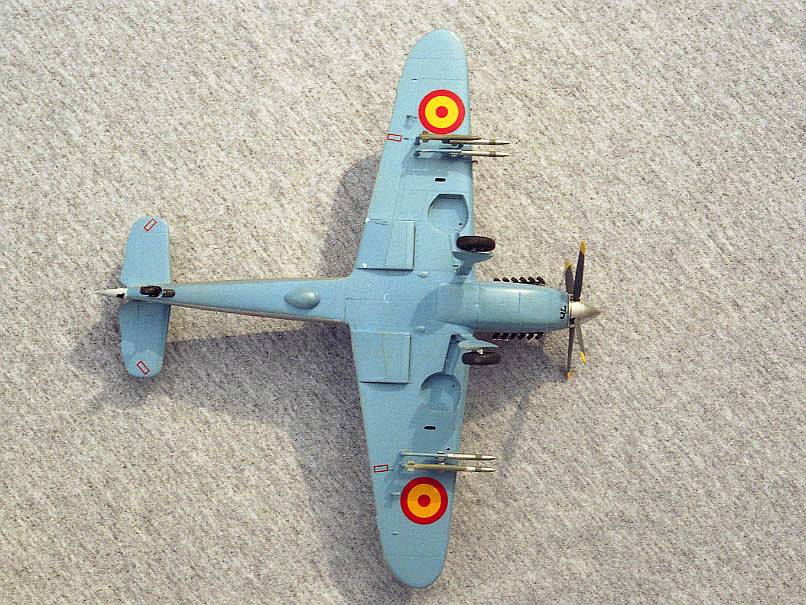
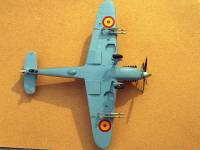
Painting
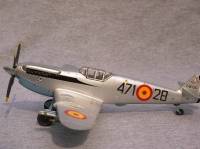 At
this point, I prepared the model for painting, finishing my final sanding
and then polishing everything with Brasso, which is what I like to do
just before applying paints for natural metal finishes. I used Xtracolor
RAF Azure Blue to paint the underside of the model and one of the nice
things about the HA-1112 is that nearly everything down there was painted,
including most of the landing gear struts and all of the interior of the
wheel wells.....not masking off those wheel wells made my day! At
this point, I prepared the model for painting, finishing my final sanding
and then polishing everything with Brasso, which is what I like to do
just before applying paints for natural metal finishes. I used Xtracolor
RAF Azure Blue to paint the underside of the model and one of the nice
things about the HA-1112 is that nearly everything down there was painted,
including most of the landing gear struts and all of the interior of the
wheel wells.....not masking off those wheel wells made my day!
Now I turned my attention to the wing fences once more. While I held each
one in place, I touched a bit of liquid glue to where it met the leading
edge of the wing and, again, capillary action drew the glue into place.
In a few moments, the wing fences were set just fine.
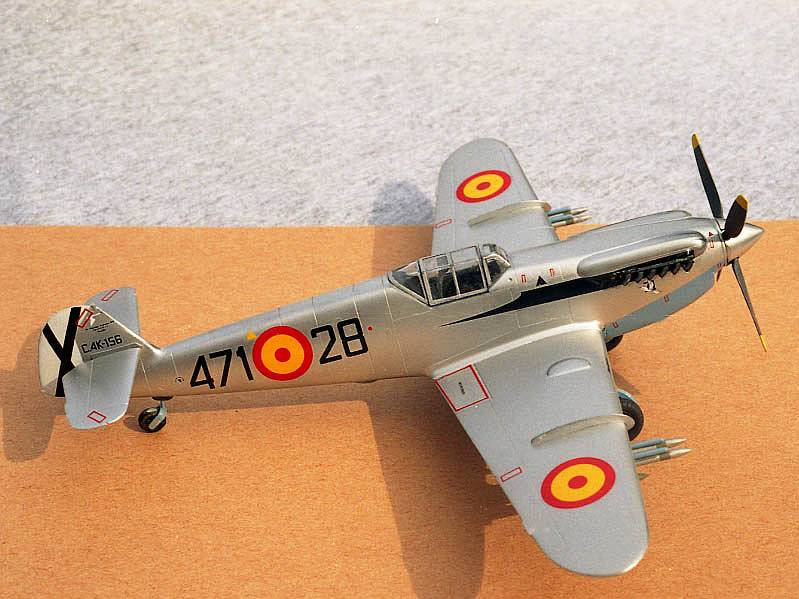
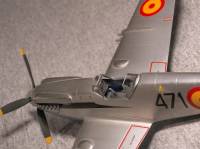
 After
the blue paint had dried for a few days, I masked it off as I also did
the open cockpit and applied Model Master Aluminum, the buffing type.
After that was dry, I used an old T-shirt to polish it some. I wasn't
trying to go for a high gloss, just a good look. After
the blue paint had dried for a few days, I masked it off as I also did
the open cockpit and applied Model Master Aluminum, the buffing type.
After that was dry, I used an old T-shirt to polish it some. I wasn't
trying to go for a high gloss, just a good look.
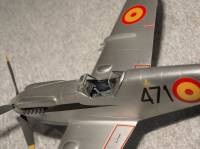
For the canopy frames, I masked the clear portions, shot the pieces first
with the dark gray interior color and then applied the Model Master Aluminum
over that later.
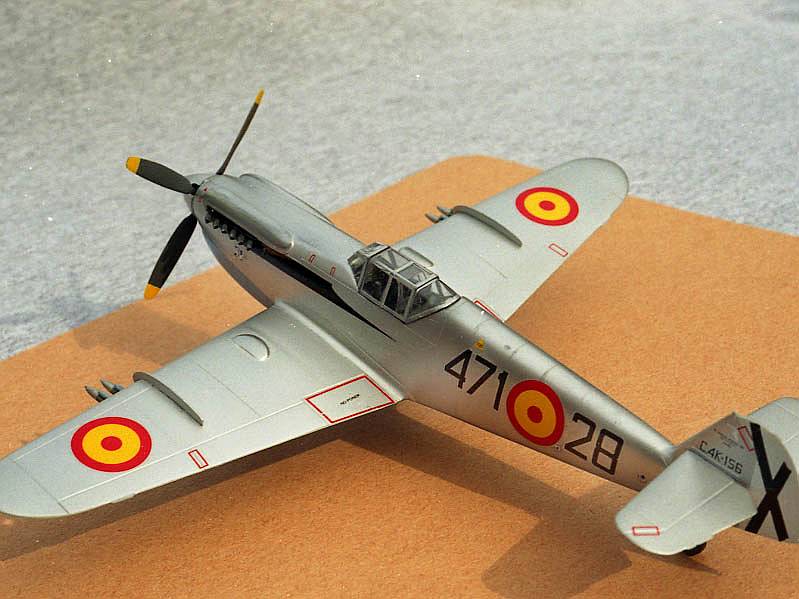
Decals
 Finally
came the decals which are glossy, by the way. Most went on without a problem.
Occasionally, one would not set right so I brushed a small bit of a 50-50
mix of white glue and water under it and that took care of things. I had
to immediately use a wet cloth to remove any extra glue-water mix to prevent
that from marring the surface of the model. Finally
came the decals which are glossy, by the way. Most went on without a problem.
Occasionally, one would not set right so I brushed a small bit of a 50-50
mix of white glue and water under it and that took care of things. I had
to immediately use a wet cloth to remove any extra glue-water mix to prevent
that from marring the surface of the model.
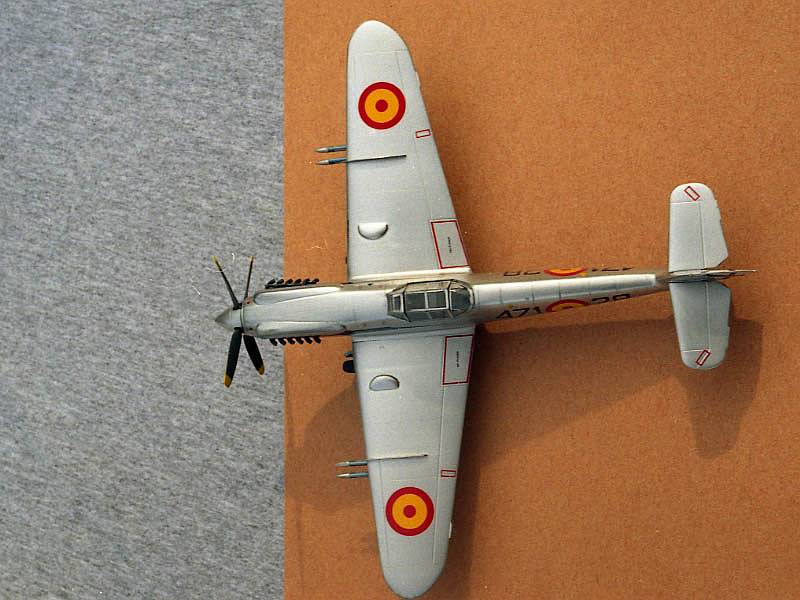
As I wrote, most of the decals went on without a problem. The two exceptions
were decals 38 and 39....the long black strips that start around the exhaust
stacks and go back from there, tapering to a point. These are to fit on
the flat sides of the fuselage and slightly up on the bottom side of the
valve covers. Well, I tried and wasn't happy with what I got. If I had
to do this again. I would paint the appropriate areas of the valve covers
glossy black and trim away the areas of the decals that were to have been
on the valve  covers.
As it is, those black stripes on my model have some small but still unsightly
wrinkles in them where they meet the valve covers.....argh. After this
experience, I was wondering if I should have built the faux Me-109 version. covers.
As it is, those black stripes on my model have some small but still unsightly
wrinkles in them where they meet the valve covers.....argh. After this
experience, I was wondering if I should have built the faux Me-109 version.
By the way, because of how the decal sheet is printed, I did not realize
that the black X for the rudder is already on a white background that's
the shape of the rudder; this saves you from painting the rudder white
(which is what I did).
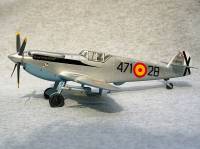
Final Touch-ups
  The
rockets and rocket racks were assembled as per instructions and attached
to the lower wings. Ditto with the landing gear finally, the antenna mast,
aileron balances, the propeller and, after a dip in Future, so were the
canopy pieces but with white glue. As I wrote earlier, a piece of one
of the cannon housings was missing and because its replacement still has
not yet arrived from MPC, which distributed the Academy kits, I have chosen
to leave off the cannon for the time being. Nevertheless, I dry-fitted
the one cannon assembly I had on hand and can say that you can expect
some work to set this properly. The
rockets and rocket racks were assembled as per instructions and attached
to the lower wings. Ditto with the landing gear finally, the antenna mast,
aileron balances, the propeller and, after a dip in Future, so were the
canopy pieces but with white glue. As I wrote earlier, a piece of one
of the cannon housings was missing and because its replacement still has
not yet arrived from MPC, which distributed the Academy kits, I have chosen
to leave off the cannon for the time being. Nevertheless, I dry-fitted
the one cannon assembly I had on hand and can say that you can expect
some work to set this properly.
Final Assessment
  Overall,
Academy's HA-1112 is a good kit. It's no shake-and-bake and that's fine;
if you take time to think things through (such as not drilling certain
holes in the wings and painting those black areas of the valve covers),
you can build a very nice model of the HA-1112 which will certainly provide
a nice shiny contrast to all those camouflaged Me-109s you may have on
your shelves. Overall,
Academy's HA-1112 is a good kit. It's no shake-and-bake and that's fine;
if you take time to think things through (such as not drilling certain
holes in the wings and painting those black areas of the valve covers),
you can build a very nice model of the HA-1112 which will certainly provide
a nice shiny contrast to all those camouflaged Me-109s you may have on
your shelves.
|
|